Hello everybody and welcome to this month's Tonic Studios Stamp Club Monsters release! Now this set is so fun and quirky and it has totally stolen my heart! It is available in limited quantities so if you love it, run to the store fast! You can shop at Tonic USA or Tonic UK.
This set has a bunch of fun little monsters and some fun little accessory stamps to go with them (think potion bottles, eye balls and birthday cakes)! The die set is also fantastic as it has not only coordinating dies but word dies, a stitched star background die and a great dotted coverplate as well! You can check it all out in my VIDEO HERE!
On my first card I colored in one of my favorite monsters (he's so happy with that huge smile) with copic markers. Then I cut him out with the coordinating die.
I ink blended the background panel using a stencil that I made by cutting the circle dot die plate two times, side by side. I gently inkblended soft primary colors through the stencil and I love how the background came out.
I combined a die cut "hi" with one of my favorite sentiments and popped all of my elements up using foam tape to finish off the card.
Now, I mentioned a made a video so before I get too far along here it is...
For my next card I used a monster that I've nicknamed "Grumpy." The poor little guy looks so bummed out that I just can't help but love him. I stamped him straight onto a white cardbase, added a flower to his hand, and colored him with my copic markers. I used a sharpie to add some grass so he had something to stand on.
I combined two of the sentiments on the front of my card.
And then I used an adhesive foam sheet to pop up the front of my card before adding a few sequins.
This next card is all about getting that party started! I stamped two little party monsters clinking their drink potions together on watercolor paper. I watercolored them using my Nuvo Aqua flow pens.
I heat embossed my sentiment in black. I also stamped the inside of the card with "We'll have a monster of a good time!"
The final step was using foam adhesive to pop the watercolored panel up onto a black background.
Now, if you're not one for coloring then this card is for you. I heat embossed my images in white on white cardstock. Then I used a blending brush to ink blend over them in pink, yellow and blue inks. I wanted there to be a little more contrast so I grabbed my copic markers and darkened up the background (behind the monsters only) a little bit to make the monsters look like they were in the foreground. I also used a black gel pen to add dots to their eyes.
For the next step, I used the stitched stars detail die to add some really cool detail and texture to my backgournd above the monsters. I also heat embossed my sentiments in black on white, cut out the sentiment strips and added them with foam tape.
I added some striped washi tape to the top of a white note card. Then, I added strips of black cardstock at the top and bottom of my monster panel and mounted it to the card base.
My final card is a slim-line card. I used the circle dot die from the bundle to create a white, holey background panel. I put that on top of a watercolored background from my stash.
I added the layered panels to my black, mini-slimline cardbase then set to work coloring and die cutting my monsters and the two-layer cake.
After heat embossing my sentiments I added them and the monsters to my card front using foam tape.
Ok you guys that is it for today! I absolutely love this Monsters release and I hope you will too! Before I go I want to show you what the full Monsters release looks like and of course we've got a blog hop and a giveaway too (scroll down for details).
Bye everybody and have and awesome day!
Maria
GIVEAWAY:
-One lucky winner will win a £50/$50 Giftcard to Tonic Studios and the Monsters bundle!
-To enter, comment on every blog in the hop by 11:59pm PST on September 29, 2021/ 7:59am GST on September 30, 2021
-Winner will be announced on October 1, 2021 on IG and FB so make sure you're following all of the Tonic Studios social media accounts!
Hey everybody! I hope you had an awesome weekend! I am popping in to share a bunch of cards with you and to let you know that I am up on the Hero Arts blog and YouTube channel today sharing a video on how to use your Hero Paste and how to get the most out of it. I share a bunch of techniques and I hope you'll enjoy it.
Here's a look at the cards I create in the video (well, I make the backgrounds in the video anyhow)... This first card was made by creating custom colors of Hero Paste using reactive ink re-inkers.
I paired my colorful Hero Paste with the Fall Leaves Stencil to create this beautiful fall colored background.
I finished the card off by adding a sentiment from the Autumn Messages stamp set.
This second card was put together using a scrap piece of Pitch Black cardstock and some Hero Paste that I covered with Brass Embossing Powder.
I stamped a Sand cardbase in Versamark ink with the Ocean Waves Bold Prints stamp.
I added a sentiment from the Sea You Soon stamp set, a sea star from the Sea Shells Fancy Dies and put it all together using foam tape.
For my last card I started out by spraying my DIY Liquid Watercolor Sprays onto a piece of cardstock to give it some fun color. Then, I used the Mermaid Sea Stencil to apply my paste.
Once the paste was dry I sprayed more liquid watercolor onto the background and allowed the color to pool in the spaces between the embossing paste.
To finish the card off I add a white frame using the Nesting Rectangle Infinity Dies. Then, I added a white shell from the Seashells Fancy Dies and topped that with a gold sea horse from the Paper Layering SeaHorses dies. The final touch was to add a sentiment from the Sea You Soon stamp set.
Ok, that is it for today you guys. For all the hot tips please head on over to the Hero Arts YouTube channel and watch the video!
Have an awesome day!
PRODUCT SUPPLY LIST (Affiliate links may be used at no extra cost to you):
Hello everybody! Exciting news- it's Gina K. Designs release day! I've made a one-layer card using the new Poppy Garden stamp set (it has coordinating dies!) by Hannah Drapinski. This set is stunning and made me want to sit down and watercolor it straight away. I've made a VIDEO to share some easy watercoloring techniques so be sure to scroll on down and check out that video on my YouTube Channel.
I started out by heat embossing the largest image from the set onto Strathmore watercolor cardstock. To do this I used Onyx Pigment ink from Hero Arts and clear embossing powder.
You can check out the entire watercoloring process here...
My video shares my process for layering ink colors and easy application of color using Karin Brush Markers and a paint brush. I used four colors of ink for the poppies and three colors of ink for the leaves. I started by applying my lightest color of ink (yellow for poppies, lime green for leaves) as a light layer of color over my entire image. I used very little water and allowed my paint to almost entirely dry before adding the next layer of color. I added the darker colors into the areas where I wanted to have shadows and kept the other areas light as highlights.
After I finished watercoloring I stamped a sentiment in Gina K. Design Black Onyx ink and added a few white highlights with a gel pen.
It was a huge struggle not to splatter the heck out of this card but I managed to leave it as a clean and simple card. I hope you've enjoyed learning a little bit about my process today. For all of the details you can head over to YouTube and watch my VIDEO. You can also head on over to Gina K. Designs to check out the full release!
Have an awesome day!
Maria
PRODUCT SUPPLY LIST (Affiliate links may be used at no extra cost to you):
Hi everybody and happy Hero Arts release day! The August My Monthly Hero Kit is here and it is such a magical kit!
If you aren't familiar with the My Monthly Hero kit, it's a kit that is released by Hero Arts on the first Monday of every month. It always has a fun, themed collection of stamps, dies and other goodies. The cost is just $34.99/month and the value is always much greater! This month's kit is valued at $70!
You have the option to subscribe (subscribing now means your first kit will be the September release), or, to buy your favorite kits as a one-off purchases. Be aware that once these kits sell out they are gone for good. If you see a kit you like make sure to snatch it up quickly! There are also always a ton of fantastic add-on products offered. You can choose to buy your favorites or buy them all at a discounted rate.
We also have an awesome GIVEAWAY and a BLOG HOP with tons of inspiration going on so please make sure to check the info for those at the bottom of my post! And, I have a VIDEO today sharing a really fun DIY technique for making your own watercolor sprays (see below)!
Ok, on to my first card! If you'd like to watch me put this card together you can watch the video below. I started out by making a cool watercolor background using my DIY water color sprays (see the video for how to make yours). Then I used a die from the kit to out the purple heart hands. I love these hands and keep thinking that they look like a heart fist bump.
I used the stencil from the kit to add some white glacier paste to a black cardbase. Then, I heat embossed my sentiment in white.
I added my purple hands with foam tape and then added a gold glitter heart in the center. I thought this sentiment was perfect because it looks like the light is shining through from the heart hands.
I shared this card on Friday but wanted to share it again in case you didn't see it. I used my liquid watercolor sprays to make this background and loved how easy it was to make.
The "love" dies are from the kit so I cut those in black and added them with foam tape after heat embossing the word "you."
I added a few sequins from the Winter Sequins mix and that was it!
My last card was made using a piece of the background that I made in my video. I cut a 3" x 6" piece out of it and then heat embossed the Floral Color Wheel Bold Print stamp in Brass Embossing Powder.
I heat embossed a small sentiment from the Better Together set in white embossing powder on black cardstock.
I tied some gold thread around the side of the sentiment piece and attached it with foam tape. Then I added some gems in different colors to finish my card off.
Ok you guys that's it for me today but make sure you enter the giveaway and continue on with our awesome blog hop to catch all of the amazing inspiration along the way!
Have an awesome day!
Maria
GIVEAWAY:
Hero Arts will give away one $50 gift card, drawn from the comments left across the hop. Enter by Sunday, August 8th at 11:59pm Pacific, and the winner will be announced on the Hero Arts blog the following week.
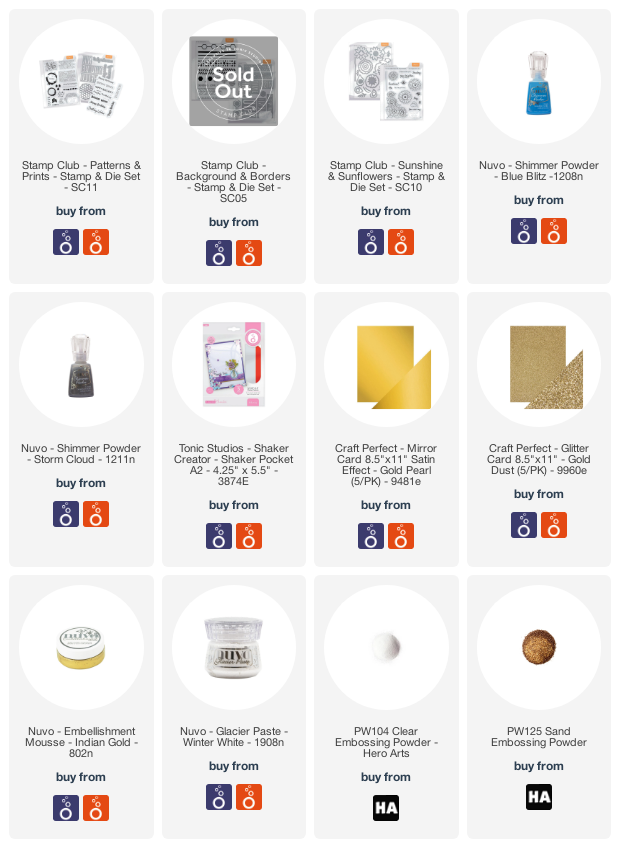
Hello everyone! I'm so happy you're here because it is release week for Tonic Studios Stamp Club and this month's set is one of my absolute favorites! This month's bundle is called Patterns & Prints and it is an amazing bundle for adding all kinds of visual texture and bold sentiments to your projects. Guess what?! I have more good news! Backgrounds & Borders (sold out in less than 24 hours) is back for a second round and it coordinates so well with the new Patterns & Prints set. So, two awesome bundles that work well together-it doesn't get much better than that!
Today's post is part of a blog hop with tons of inspiration so make sure to click to the next blogger when you hit the bottom of my post. We've also got two great giveaways for you today! First, we are giving away this Patterns & Prints bundle and a $50 gift card to Tonic so make sure to enter below. Second, everyone who orders the Patterns & Prints bundle will receive a FREE stamp in their order (check out the free stamp at the bottom of my post). On top of all that I also have a VIDEO for you today so make sure to check that out too (below).
Now, I just couldn't put this bundle down so I ended up making nine cards to share with you today. You can see all of them in the video or cruise through this blog post for more details.
Before I get to my first card here is that video I promised you!
For my first card I started out with a background that I had made using Dina Wakley Gloss Sprays. Then I used three of the stamps from the Patterns & Prints set to stamp the background. I used a combination of gray ink, blue pigment ink and white puff embossing powder.
Then, I layered my word dies on top of the crosshatch die so that my sentiment was anchored in as a focal point.
For my next card I started out with a watercolored background and then I used multiple stamps to stamp on top of that adding a lot of texture.
I heat embossed almost every layer of this card in clear embossing powder and the texture when you run your fingers over the background is amazing! The magic maker for this background is Sand embossing powder from Hero Arts.
I finished this card off by adding a custom sentiment that I created from the dies.
This next card was so easy to make but it sure is eye candy!
I started out by using my Nuvo Shimmer Powders in Blue Blitz and Storm Cloud. I sprinkled them lightly onto water color paper and then spritzed with water. The pigment exploded into this gorgeous mess of color and I let it air dry.
Once it air dried added my sentiments in black and white to keep with a fairly monochromatic look.
This next card began with a purple and pink watercolored background.
Then I added a lot of stamping in different colors and different heat embossed finishes. I stamped the circles in gray and then heat embossed in clear. When I heat embossed the little scratches in bronze some of that embossing powder stuck to the clear EP and melted into it creating a swirly gold mess. I love when unplanned things like this happen!
After that I added the die cut sentiments but this time I added the detailed die in gold so that it matched the heat embossing on the background.
My next card started out with an alcohol ink background. I used the script stamp with some alcohol lift ink to create some texture on the background. It is hard to see but it is there.
Then I cut the hexagon die multiple time out of gold foil (leaving it attached between cuts) and added that to my background.
I added a gold glitter sentiment with foam tape to easily finish off this card.
The hexagon pieces that come out of the honeycomb die cut are so fun and are perfect to use in your shaker cards. So I stamped the background of this card and used a little bit of gold nuvo mousse on some of the edges.
Next, I used an A2 sized shaker pocket to create a shaker card. The guts were a combination of the hexagon die cuts from the honey comb die (leftover from the sunflower card), some champagne sequins and some gold chunky glitter.
I glued my sentiment right on top of the shaker pouch with my Nuvo Deluxe adhesive.
This card is so simple but so eye catching. The dies from this bundle make it so easy to make a card from those beautiful backgrounds you have lying around but haven't yet figured out what to do with. For this card I used an alcohol ink background that's full of gorgeous purples, blues and gold.
I added the sentiment straight to the card with glue, no foam tape or dimension on this one. I love that it will be easy to mail.
I also love pretty and delicate these script word dies are when used without the shadow background.
My last card is another simple one but it's an eye catching one too. I started out with a watercolored background piece. Then I used the "Hello" die cut three times on a piece of white cardstock.
It was easy to line the die up since it is shaped in a rectangle.
I added strips of foam tape to the back of the die cut panel and adhered it to my card base... that was it! I did think about making this a shaker card but I like the clean simplicity of it the way it is.