Showing posts with label #creative. Show all posts

Saturday, September 5, 2020

Hero Arts My Monthly Hero Sneak Peek

Hey Everybody! This month's My Monthly Hero kit from Hero Arts is almost here and that means the countdown is on! This month the kit is going live on Tuesday, September 8 so mark your calendars (Monday is Labor Day so it's going live a day later than normal)! The kit goes live at 10am Pacific and once it's sold out it's gone for good. If you want to make sure you never miss a kit you can subscribe here-subscribers are guaranteed a kit!

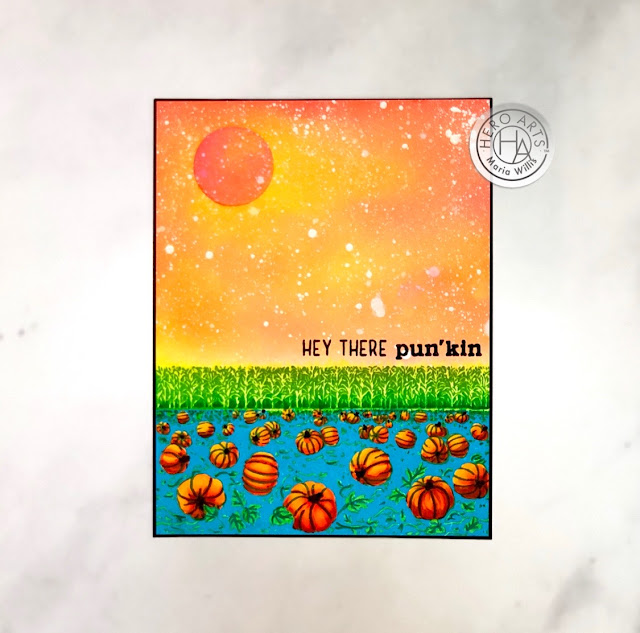
Today I've got a sneak peek of the kit for you. I've used the main image from the kit to create a fun pumpkin patch. I also had fun ink blending the happy sky with what I'm calling a harvest moon (or harvest sun?).
Cardbomb, Maria Willis, Hero Arts, cards, stamps, ink, paper, paper craft, crafty, create, cardmaker, cardmaking, handmade, diy, color, art

The sentiment is also from the main kit and was the perfect finishing touch for this pumpkin card.
Cardbomb, Maria Willis, Hero Arts, cards, stamps, ink, paper, paper craft, crafty, create, cardmaker, cardmaking, handmade, diy, color, art

Alright you guys-that's all you get for today! I promise to share more details on how this card was made on Tuesday when the hop goes live! Plus, I have a totally different take on this kit to share with you for the launch as well. I can't wait to share it all with you soon!

Oh! I almost forgot... Hero Arts is doing a giveaway and one lucky winner will be winning the September My Monthly Hero kit. All you have to do to enter is go HERE and leave a comment to win. Good Luck!

Bye guys! Have the best day!
Maria


PRODUCT SUPPLY LIST:
Thursday, August 20, 2020

Crafty Friends: Gina K. Designs and a Discount!

Hey everybody! It's the 20th and if you follow my blog you know that means it's time for another My Crafty Friends Hop! Today we are featuring products from the fabulous Gina K. Designs and she has offered to give our readers a 20% discount at the Gina K. Designs shop when they shop with a Crafty Friend! All you have to do is click this link to shop and use the code CRAFTYFRIENDS20 to receive your discount (more info below).

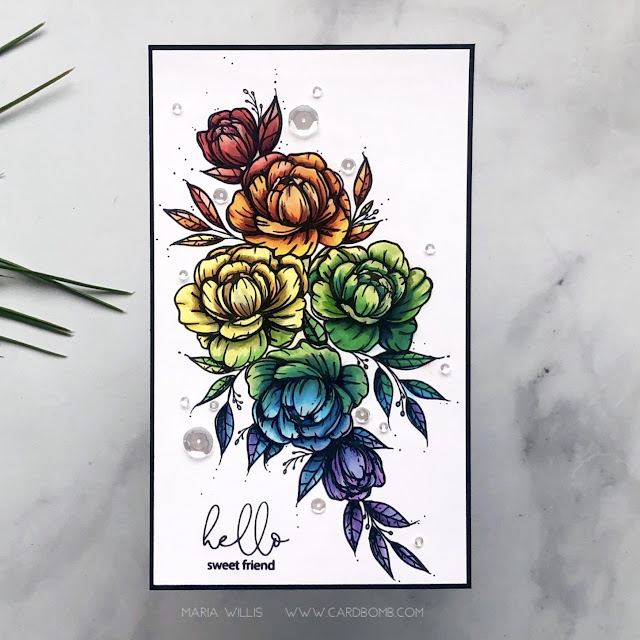
Now onto my card! Today I decided to use this gorgeous collaboration set from Gina K Designs and Hero Arts. I love that the crafty community comes together to support each other and work together. This stamp, Friendship Blooms, is the result of one of these beautiful efforts. I stamped my image in copic safe black ink on to Hammermill cardstock.
Cardbomb, Maria Willis, Gina K Designs, Hero Arts, Floral stamp, hand-stamped, rainbow, cards, handmade, art, color, diy, copic markers
Add caption

I used my copic markers in a variety of colors to create a floral rainbow. I have been wanting to do this for some time now I really enjoyed the process.
Cardbomb, Maria Willis, Gina K Designs, Hero Arts, Floral stamp, hand-stamped, rainbow, cards, handmade, art, color, diy, copic markers

After I added all of my color I went back in with my cool gray markers and added shading to the flowers. Then, I grabbed a fine tipped copic marker and had some fun adding shadow, lines and dots.
Cardbomb, Maria Willis, Gina K Designs, Hero Arts, Floral stamp, hand-stamped, rainbow, cards, handmade, art, color, diy, copic markers

The sentiment on this card is one of my favorites after stamping that some clear sequins were the perfect touch to finish off my card.

That's is all for today folks! You know my Crafty Friends have a ton more Gina K. inspiration for you so I hope you'll continue on with our hop by heading over to Becky's blog. If you prefer to follow the blog list I'm adding that below for you too.

Before you go here's a reminder that if you shop today or tomorrow you will receive a 20% discount if you shop with me at Gina K. Designs and use the code CRAFTYFRIENDS20 at check out. Enjoy!


Bye for now and I hope you all have an amazing day! 

Maria


BLOG ROLL:

Jenny Hall

Tanya Boser

Ilina Crouse

Maria Willis: YOU ARE HERE.

Becky Roberts

Sandi MacIver

Sue Plote

Sara Sherlock

Lydia Fiedler

Jill Hilliard


Saturday, June 20, 2020

Light-up Cards Made Easy with HAI supply and Pear Blossom Press

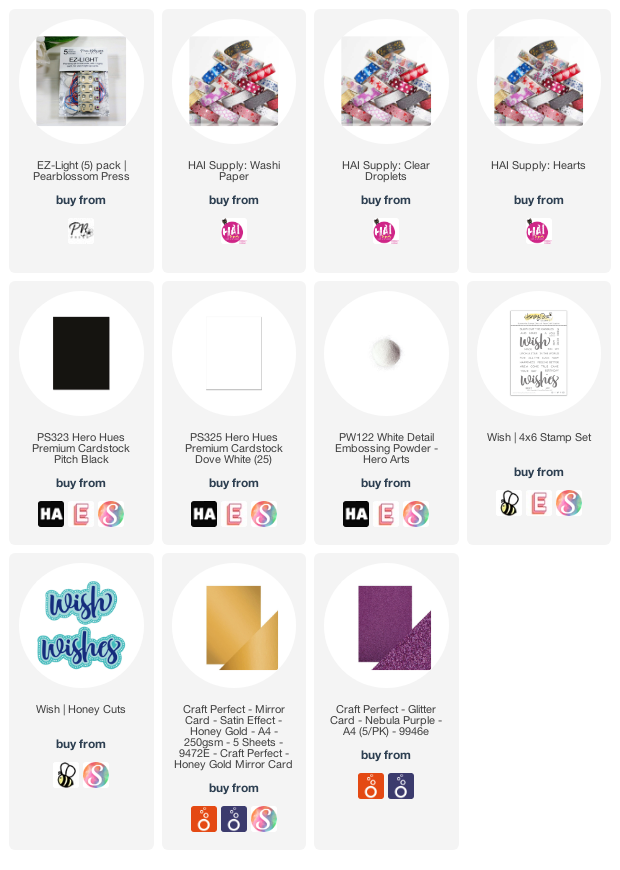
Hello everybody! That's right, I'm back for my second post of the day and all before 7am. Lol. I'm glad to have you back here because now I'm taking part in a collaboration hop between two super fun companies: HAI Supply and Pear Blossom Press. HAI Supply has everything you need for embellishing your cards from sequins and jewels, to clay embellishments (check out the rainbows!), and even washi tape and paper! Pear Blossom Press has the most amazing and easy to use light up units (EZ-LIGHTS) to use with your interactive cards! All you have to do is pop the battery in and the lights work. I've got video showing how easy they are below so make sure to check that out below.

Before I get too far along I want to make sure you know that both of these amazing companies have offered all of you a Discount code for their shops! To get $4.00 off of your order of $25 or more (before tax and shipping) just enter the code EZSHIP4 at checkout at HAI Supply and/or Pear Blossom Press before June 27th, 2020.

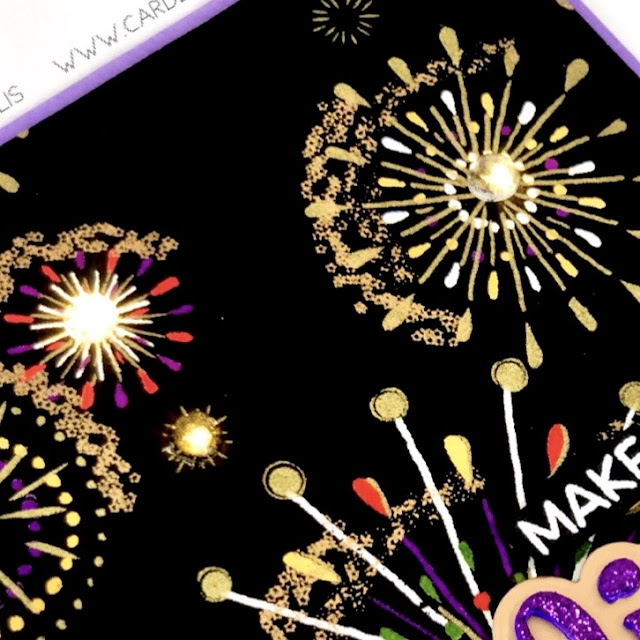
On to my first card... HAI Supply and Pear Blossom Press issued us the challenge of using washi paper, embellishments and a light up unit all on one card- Challenge accepted! I used a sheet of washi paper from THIS washi paper pack because it looks like fireworks. I thought it would be really cool to make the fireworks light up. 

Maria Willis, Cardbomb, HAI Supply, Pear Blossom Press, light-up card, #video, #videotutorial, #cards, #stamp, #ink, #paper, #craft, #papercraft, #creative, #handmade, #handmadecards, #art, #diy, #copicmarkers, #copics, #honeybeestamps, Erin Lee Creative, interactive cards,
The EZ-LIGHTS have three different light bulbs so I picked three fireworks to have light up. I used a craft pick to poke holes in the centers so that the light would shine through more brightly. I glued clear, round embellishments on top of the holes I poked. When the lights shine these embellishments will glow brightly and diffuse the light for a bright glow. 
Maria Willis, Cardbomb, HAI Supply, Pear Blossom Press, light-up card, #video, #videotutorial, #cards, #stamp, #ink, #paper, #craft, #papercraft, #creative, #handmade, #handmadecards, #art, #diy, #copicmarkers, #copics, #honeybeestamps, Erin Lee Creative, interactive cards,

Next I turned the washi paper over and used tape to adhere the lights right behind the holes I had poked. This will keep the lights where I want them so that the fireworks will glow from the centers.
Maria Willis, Cardbomb, HAI Supply, Pear Blossom Press, light-up card, #video, #videotutorial, #cards, #stamp, #ink, #paper, #craft, #papercraft, #creative, #handmade, #handmadecards, #art, #diy, #copicmarkers, #copics, #honeybeestamps, Erin Lee Creative, interactive cards,

Here's a pic of what the fireworks look like when they are lit up. In real life its very striking against the black background of the card.
Maria Willis, Cardbomb, HAI Supply, Pear Blossom Press, light-up card, #video, #videotutorial, #cards, #stamp, #ink, #paper, #craft, #papercraft, #creative, #handmade, #handmadecards, #art, #diy, #copicmarkers, #copics, #honeybeestamps, Erin Lee Creative, interactive cards,

After I had my lights in place and had fixed the battery pack where I wanted it I used a double layer of foam tape to pop up my card face. I used dies from Honeybee Stamps and gorgeous papers from Tonic Studios to add a sentiment. Down at the bottom left of my card I used a Lawn Fawn set to add "push me" so that the recipient will know how to activate the lights. 
Maria Willis, Cardbomb, HAI Supply, Pear Blossom Press, light-up card,#video, #videotutorial,  #cards, #stamp, #ink, #paper, #craft, #papercraft, #creative, #handmade, #handmadecards, #art, #diy, #copicmarkers, #copics, #honeybeestamps, Erin Lee Creative, interactive cards,

Check out this video to see how I made this card and to see the lights in action...


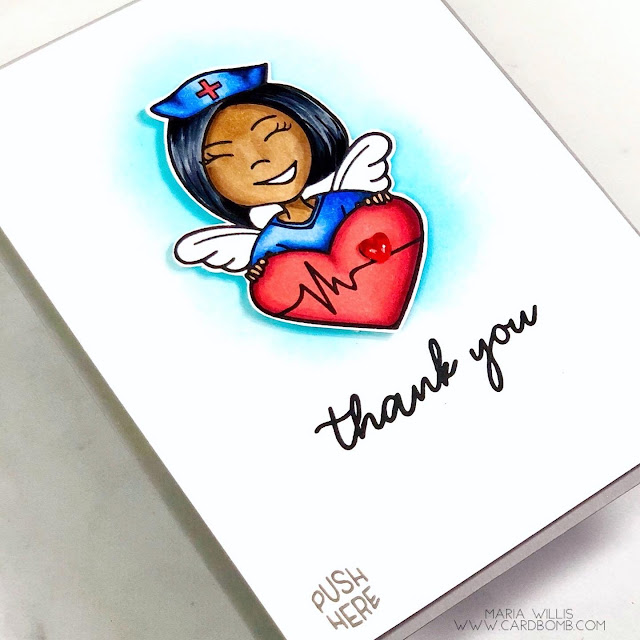
The combination of the Pear Blossom Press EZ-LIGHTS and HAI Supply embellishments is so awesome that I had to make a second card. This time around I used the Super Hero Scrubs stamp from Erin Lee Creative. I've been wanting to send a nurse friend a card and this stamp works perfectly with the HAI supply Heart Drops
Maria Willis, Cardbomb, HAI Supply, Pear Blossom Press, light-up card, #video, #videotutorial, #cards, #stamp, #ink, #paper, #craft, #papercraft, #creative, #handmade, #handmadecards, #art, #diy, #copicmarkers, #copics, #honeybeestamps, Erin Lee Creative, interactive cards,

I stamped and colored my image with copic markers and then cut it out. I used my craft pick to poke a hole in the center of the tiny heart. Then I glued a small, red heart embellishment on top of the hole. I added my lights behind the hole and taped them in place. The wires and battery pack are hidden behind the ink blended panel which is popped up with a double layer of foam tape. 
Maria Willis, Cardbomb, HAI Supply, Pear Blossom Press, light-up card, #video, #videotutorial, #cards, #stamp, #ink, #paper, #craft, #papercraft, #creative, #handmade, #handmadecards, #art, #diy, #copicmarkers, #copics, #honeybeestamps, Erin Lee Creative, interactive cards,

Here's a look at what it looks like when it's lit up. In real life there's a warm, red glow. 
Maria Willis, Cardbomb, HAI Supply, Pear Blossom Press, light-up card, #video, #videotutorial, #cards, #stamp, #ink, #paper, #craft, #papercraft, #creative, #handmade, #handmadecards, #art, #diy, #copicmarkers, #copics, #honeybeestamps, Erin Lee Creative, interactive cards,

I used the same Lawn Fawn set to add the "Push Here" at the bottom of the card.
Maria Willis, Cardbomb, HAI Supply, Pear Blossom Press, light-up card, #video, #videotutorial, #cards, #stamp, #ink, #paper, #craft, #papercraft, #creative, #handmade, #handmadecards, #art, #diy, #copicmarkers, #copics, #honeybeestamps, Erin Lee Creative, interactive cards,

Ok you guys that is it for now. These EZ-LIGHTS are so darn easy to use and I hope my cards have inspired you to check them out for yourselves. They come in 2, 3, 5 and 20 packs so there's really something for everybody. If you go shopping don't forget to use the discount code: EZSHIP4 at both HAI Supply and/or Pear Blossom Press!

In addition to the discount code we have an awesome giveaway today too! Details are below (hint: all you have to do to enter is comment here and on youtube). 

Thanks so much for joining the hop today. To continue on being inspired head on over to Rachel's blog!

Bye and have an awesome day you guys!
Maria


GIVEAWAY!
- Four random commenters are going to get lucky and be awarded a fabulous prize ($25 gift codes to HAI Supply or Pear Blossom Press)!
-No purchase necessary. Just comment here or on YouTube by June 27, 2020 PST to enter. One comment per platform but you will get extra entries for commenting on multiple stops in the hop.
-Contest is open internationally to participants who are over 18 years of age.
-Winners will be announced on Pear Blossom Press on July 6, 2020. Prizes must be claimed within 30 days of announcement.


BLOG ROLL:
Thank you for hopping along on the HAI Supply & Pear Blossom Press Collab Hop! For more inspiration, check out all of the stops in the hop...

PRODUCT SUPPLY LIST:

Thursday, April 30, 2020

Pinkfresh Studios April Release and a Giveaway!

Hi Everybody! How are you all doing? I am hanging in there (so much going on)... luckily I have the happy distraction of joining Pinkfresh Studio for their April Stamp and Die Release! This is such a great release and I'm excited to share four cards with you today.

For my first card I used a stamp set called Take Pride (main floral image),  another called, Simply Sentiments Hello (sentiement), and the Believe in Yourself die (Believe). I started out by stamping the floral image in black ink and watercoloring it with my Daniel Smith watercolor paints. Then I cut the image out with the coordinating die. 
#art, #cardbomb, #cards, #copicmarkers, #copics, #craft, #create, #creative, #danielsmith, #danielsmithwatercolors, #diy, #ink, #maria willis, #paper, #papercraft, #pinkfreshstudios, #stamp, #watercolor,

Next, I grabbed a piece of watercolor paper and taped off the background. I ink blended the background with Distress Oxide ink. Then, I splattered the background with water, a shimmer pen  from Tonic Studios, and white metallic ink from Hero Arts. I heat embossed the sentiment onto the bottom of this sheet.
#art, #cardbomb, #cards, #copicmarkers, #copics, #craft, #create, #creative, #danielsmith, #danielsmithwatercolors, #diy, #ink, #maria willis, #paper, #papercraft, #pinkfreshstudios, #stamp, #watercolor,

I die cut the word, "Believe," four times out of black cardstock. I glued each layer together to create dimension. I wanted the sentiment to really pop so I used a white gel pen to write, "Believe," on the die cut. 
#art, #cardbomb, #cards, #copicmarkers, #copics, #craft, #create, #creative, #danielsmith, #danielsmithwatercolors, #diy, #ink, #maria willis, #paper, #papercraft, #pinkfreshstudios, #stamp, #watercolor,

I glued my floral piece to my card front and added, "Believe" on top of that. The final touch was to add some white rhinestones (Hai Supply).
#art, #cardbomb, #cards, #copicmarkers, #copics, #craft, #create, #creative, #danielsmith, #danielsmithwatercolors, #diy, #ink, #maria willis, #paper, #papercraft, #pinkfreshstudios, #stamp, #watercolor,

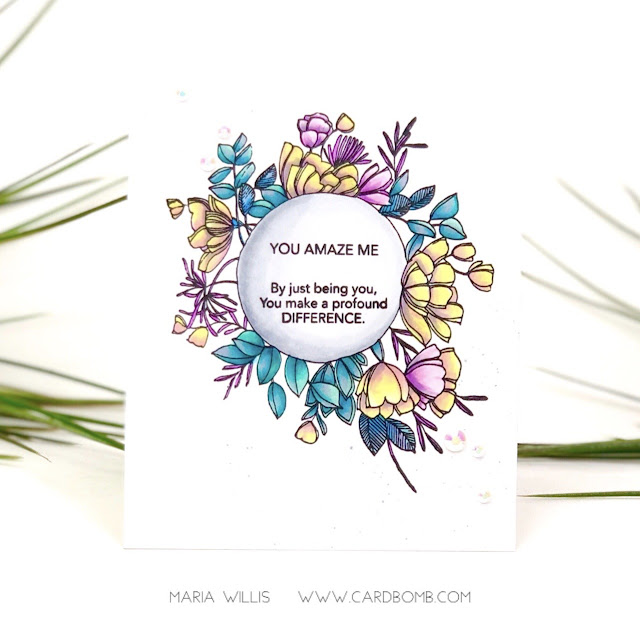
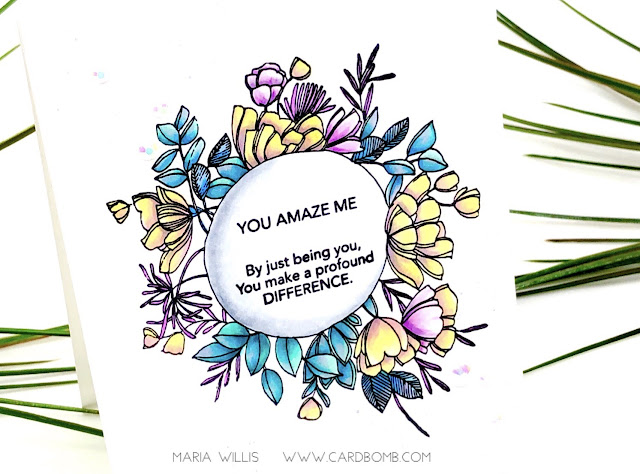
For my second card I used the same stamp set but went for a one layer card and used my Copic Markers. This card has a much softer look than the first one does. 
#art, #cardbomb, #cards, #copicmarkers, #copics, #craft, #create, #creative, #danielsmith, #danielsmithwatercolors, #diy, #ink, #maria willis, #paper, #papercraft, #pinkfreshstudios, #stamp, #watercolor,

After coloring the main image I used my Cool Gray markers to color the inside of the circle to make it pop. I used two different stamps to create the sentiment which I absolutely love (yes, I did stamp surgery and cut one of the stamps in half).
#art, #cardbomb, #cards, #copicmarkers, #copics, #craft, #create, #creative, #danielsmith, #danielsmithwatercolors, #diy, #ink, #maria willis, #paper, #papercraft, #pinkfreshstudios, #stamp, #watercolor,

It's pretty rare that I create a one layer card but I was determined to keep this one simple. I finished it off by splattering a little bit of gray ink onto the background and adding some subtle rhinestones.
#art, #cardbomb, #cards, #copicmarkers, #copics, #craft, #create, #creative, #danielsmith, #danielsmithwatercolors, #diy, #ink, #maria willis, #paper, #papercraft, #pinkfreshstudios, #stamp, #watercolor,

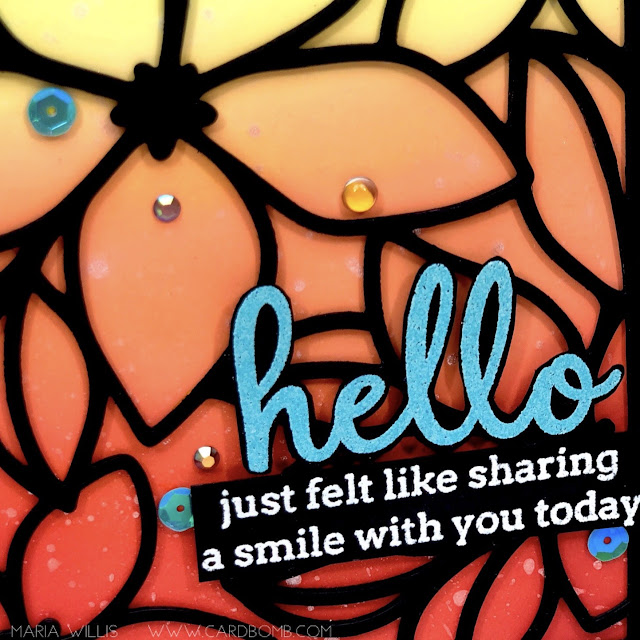
For my third card I used the new Ornate Floral Die. I cut it out three times in black cardstock, glued the layers together and set it aside. While that dried, I ink blended the background with Distress Oxides. I also splattered the background with Glitter Gloss from Tonic Studios.
#art, #cardbomb, #cards, #copicmarkers, #copics, #craft, #create, #creative, #danielsmith, #danielsmithwatercolors, #diy, #ink, #maria willis, #paper, #papercraft, #pinkfreshstudios, #stamp, #watercolor,

I heat embossed the "hello" from Simply Sentiments Hello in turquoise. I heat embossed the rest of the sentiment in white. I adhered the die cut onto the background and added my sentiment to the top. A variety of sequins and embellishments added a little texture and shine to this card.
#art, #cardbomb, #cards, #copicmarkers, #copics, #craft, #create, #creative, #danielsmith, #danielsmithwatercolors, #diy, #ink, #maria willis, #paper, #papercraft, #pinkfreshstudios, #stamp, #watercolor,

For my last card I used a sentiment from the Simply Sentiments Hello set (this set is seriously so good). I ink blended the background to create a cloud scene. Then I added a rainbow embellishment from Hai supply and the heat embossed sentiment. they go perfectly together and this card came together in minutes.
#art, #cardbomb, #cards, #copicmarkers, #copics, #craft, #create, #creative, #danielsmith, #danielsmithwatercolors, #diy, #ink, #maria willis, #paper, #papercraft, #pinkfreshstudios, #stamp, #watercolor,
Here's a closer look at the rainbow. It's so fun and that little heart on the cloud is such a sweet touch. 
#art, #cardbomb, #cards, #copicmarkers, #copics, #craft, #create, #creative, #danielsmith, #danielsmithwatercolors, #diy, #ink, #maria willis, #paper, #papercraft, #pinkfreshstudios, #stamp, #watercolor,

Ok, you guys, that is it for me today but before I go I wanted to let you know that Pinkfresh Studio has some giveaways! First, you can enter to win a $25 gift certificate just by leaving a comment here on my blog. Pinkfresh will also be giving away this entire release on their blog, IG and YouTube channel. Good luck to all of you! The winners will be announced on May 8th over on the Pinkfresh Studio Giveaway Page. Winners must claim their prize within two weeks so be sure to check to see if you've won.
#art, #cardbomb, #cards, #copicmarkers, #copics, #craft, #create, #creative, #danielsmith, #danielsmithwatercolors, #diy, #ink, #maria willis, #paper, #papercraft, #pinkfreshstudios, #stamp, #watercolor,
Pinkfresh Studio is also offering FREE SHIPPING  to US addresses when your order is $35 or more. International shipping is also discounted for orders over $35. Happy shopping!
#art, #cardbomb, #cards, #copicmarkers, #copics, #craft, #create, #creative, #danielsmith, #danielsmithwatercolors, #diy, #ink, #maria willis, #paper, #papercraft, #pinkfreshstudios, #stamp, #watercolor,

I hope you all have an amazing day today! Keep on hopping along with all of the amazing Pinkfresh Studio inspiration by following the blog roll below.

Bye for now!
Maria Willis


BLOG ROLL:

You are invited to the Inlinkz link party!
Click here to enter


PRODUCT SUPPLY LIST:


Monday, September 16, 2019

Watercoloring with Nuvo Aquaflow Pens and a Gatefold Card

Maria Willis, Cardbomb, #tonicstudios, #tonicstudiosusa, #cards, #cardmaking, #handmade, #handmadecards, #create, #creative, #art, #diy, #craft, #tonicstudiosgardenparty, #botanicalburst, #nuvo, #nuvoaquaflowpens, #watercolor, #flowers, #gatefold,

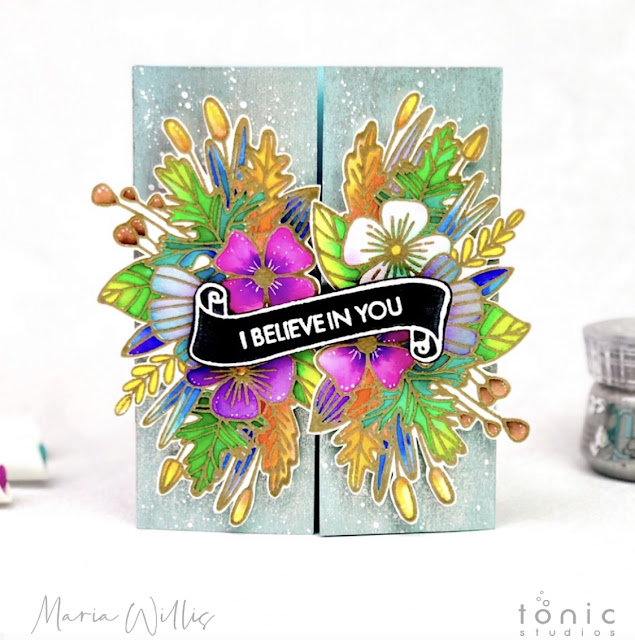
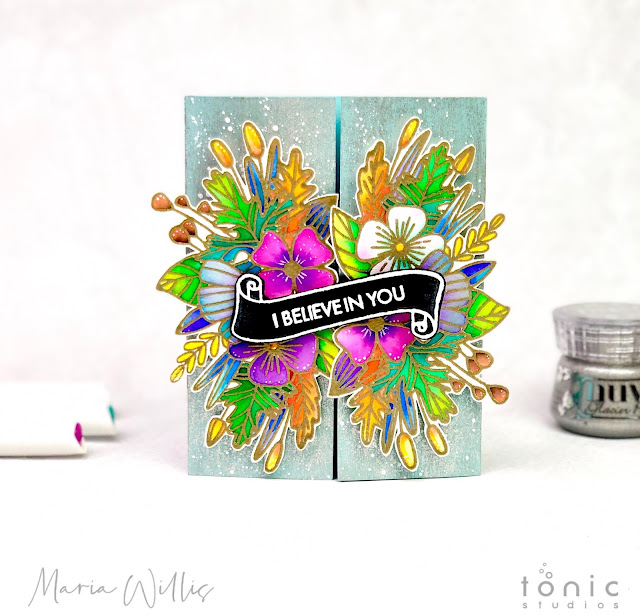
Hi everybody! Thanks for joining me here today. I'm excited to share something with you that's a little bit outside of what I normally make. It's a Gate Fold Card! Gate Fold cards have two front flaps that open forwards like two doors of a gate. This card is the same size as a normal A2 sized card but it's fun twist to have it open differently than a standard card. Guess what? I've got a video tutorial for you today-here it is...


I started out by heat embossing this gorgeous floral stamp from the Botanical Blooms set two times in gold onto watercolor paper. I needed two because I wanted to place one on each side of the card front.

Maria Willis, Cardbomb, #tonicstudios, #tonicstudiosusa, #cards, #cardmaking, #handmade, #handmadecards, #create, #creative, #art, #diy, #craft, #tonicstudiosgardenparty, #botanicalburst, #nuvo, #nuvoaquaflowpens, #watercolor, #flowers, #gatefold,

Then, I used Nuvo Aqua Flow Pens in a variety of colors to watercolor both of my images. I did this by squeezing a little bit of ink from my pens onto my Tim Holtz Glass Media Mat. Then I used a water brush to pick up the color and add it to my images.
Maria Willis, Cardbomb, #tonicstudios, #tonicstudiosusa, #cards, #cardmaking, #handmade, #handmadecards, #create, #creative, #art, #diy, #craft, #tonicstudiosgardenparty, #botanicalburst, #nuvo, #nuvoaquaflowpens, #watercolor, #flowers, #gatefold,

HERE'S A LIST OF THE NUVO AQUA FLOW COLORS THAT I USED:

  • Leaves: Sliced Kiwi, Empress Teal, Tomato Juice, True Turquoise and Azure Blue
  • Bulbs & Cattails: Mango Mimosa, Tomato Juice, Rustic Oak, Caramel Pecan
  • Flowers: Hawaiian Orchid, Indigo Dawn and Aqua Splash
Maria Willis, Cardbomb, #tonicstudios, #tonicstudiosusa, #cards, #cardmaking, #handmade, #handmadecards, #create, #creative, #art, #diy, #craft, #tonicstudiosgardenparty, #botanicalburst, #nuvo, #nuvoaquaflowpens, #watercolor, #flowers, #gatefold,

I decided that I wanted the front of my card to be super sparkly so I painted the front panels with Glacier Paste in Quiksilver. This paste is so cool! It goes on really smooth and doesn't have texture like the Embellishment and Expanding Pastes do. It dries quickly with a silky, smooth, sparkly finish. I added some splatters of white acrylic paint for a little more detail on the background.

Maria Willis, Cardbomb, #tonicstudios, #tonicstudiosusa, #cards, #cardmaking, #handmade, #handmadecards, #create, #creative, #art, #diy, #craft, #tonicstudiosgardenparty, #botanicalburst, #nuvo, #nuvoaquaflowpens, #watercolor, #flowers, #gatefold,

I heat embossed a banner with my sentiment inside and cut it out (I also cut out the floral images). 
Maria Willis, Cardbomb, #tonicstudios, #tonicstudiosusa, #cards, #cardmaking, #handmade, #handmadecards, #create, #creative, #art, #diy, #craft, #tonicstudiosgardenparty, #botanicalburst, #nuvo, #nuvoaquaflowpens, #watercolor, #flowers, #gatefold,

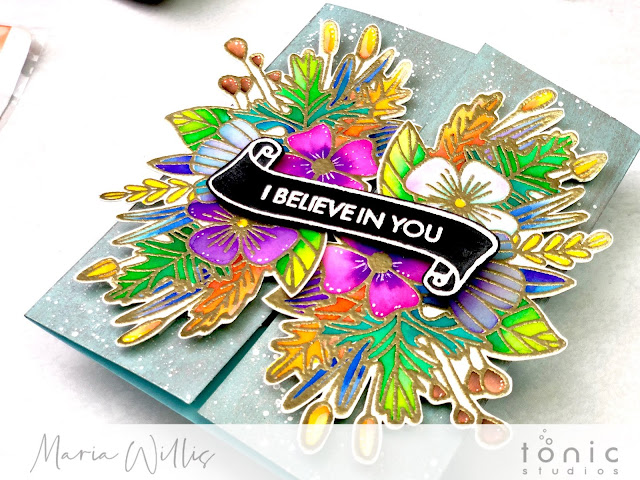
Using foam adhesive I adhered the floral images to each panel on my card front. The flowers interlock perfectly helping to keep the card closed. 

Maria Willis, Cardbomb, #tonicstudios, #tonicstudiosusa, #cards, #cardmaking, #handmade, #handmadecards, #create, #creative, #art, #diy, #craft, #tonicstudiosgardenparty, #botanicalburst, #nuvo, #nuvoaquaflowpens, #watercolor, #flowers, #gatefold,

Last of all I used foam tape to add the banner to the left side of the front of my card. When you do this it's really important to make sure that you only use adhesive on one side of the banner. If you adhere the banner to both sides of the card you will seal your card shut.
Maria Willis, Cardbomb, #tonicstudios, #tonicstudiosusa, #cards, #cardmaking, #handmade, #handmadecards, #create, #creative, #art, #diy, #craft, #tonicstudiosgardenparty, #botanicalburst, #nuvo, #nuvoaquaflowpens, #watercolor, #flowers, #gatefold,


The last helpful bit of information that I have for you is the size of the card base. It measures 5.5" tall, 8.5" wide and it is scored 2 1/8" from either side to create the front flaps. If this sounds confusing please do watch the video as I share the blank card base there.

That is all for today you guys. Thanks so much for stopping by and have a wonderful day!
Maria


PRODUCT SUPPLY LIST:

Thursday, August 1, 2019

Encouragement Card Blog Hop

Hey you guys! How are you? I hope you're having a fantastic day and enjoying your summer (if you're in my hemisphere anyway). Today I'm taking part in a special blog hop that is showcasing cardmakers in a variety of different ways. Some cardmakers mailed their cards in, some are participating via blog (like me) and others are participating via youtube video. So, I hope you will  join us for this fun and unique hop! You will find yourself jumping back and forth between blogs and youtube videos which should provide for some great entertainment and inspiring ideas.

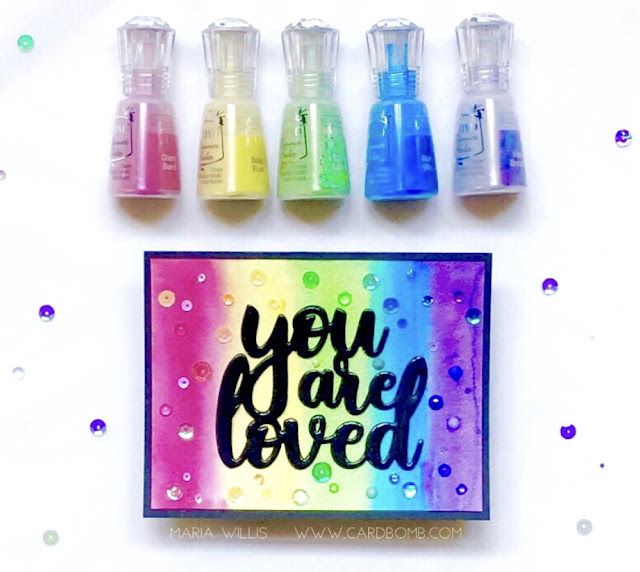
I decided to make a card for a friend who could use a little pick me up. She's a really lovely person and life has been a bit tough on her. I want her to know that she is loved... 
#mariawillis, #cardbomb, #card, #cards, #handmade, #handmadecards, #papercraft, #stamps, #ink, #paper, #art, #create, #creative, #watercolor, #diecutting, #tonicstudios, #tonicstudiosusa, #nuvo, #nuvoshimmerpowder,


I decided to use bright, happy colors for this card so I busted out my Tonic Nuvo Shimmer Powders and watercolored a rainbow background. 
#mariawillis, #cardbomb, #card, #cards, #handmade, #handmadecards, #papercraft, #stamps, #ink, #paper, #art, #create, #creative, #watercolor, #diecutting, #tonicstudios, #tonicstudiosusa, #nuvo, #nuvoshimmerpowder,


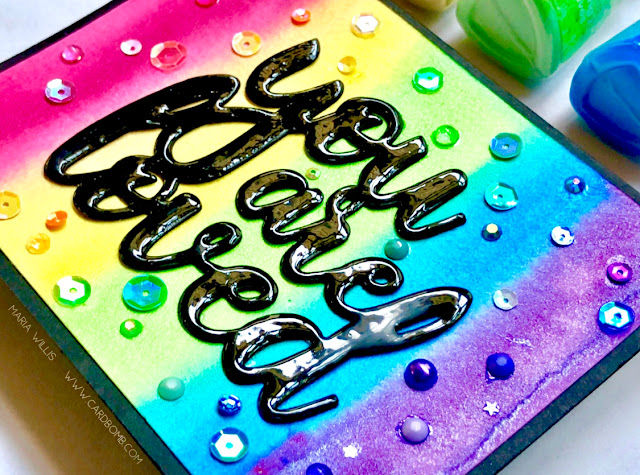
This big You Are Loved Die sentiment from Altenew was just perfect for this card. I die cut it three times then glued the layers together. After that I used my Nuvo Crystal Glaze to cover the whole die cut sentiment in a thick, glossy sheen. 
#mariawillis, #cardbomb, #card, #cards, #handmade, #handmadecards, #papercraft, #stamps, #ink, #paper, #art, #create, #creative, #watercolor, #diecutting, #tonicstudios, #tonicstudiosusa, #nuvo, #nuvoshimmerpowder,

After I adhered the sentiment I decided this card needed a rainbow of sequins, rhinestones and other fun embellishments. I dug out shiny things from lots of different companies. Then, glued them down until I had what looked like a rainbow jewel encrusted card. It might be hard to see in the picture but this card catches the light like something else and flashes all kinds of shimmery, glittery goodness back at you. I hope it will bring a smile to my friend's face.

If you're curious about the Nuvo Shimmer Powders here's a video I made a while back showcasing ten different ways to use them. I hope you might find it helpful. 


If you are interested in checking out any of the products that I've used today I've linked them all at the bottom of this post. 

Thanks so much for joining me today! I hope you have an amazing day and enjoy the rest of the hop!


Next, you are off to visit Jessica Shier on Youtube! 


Have an awesome day you all!
Maria

PS: For some added fun I'm entering this card into this week's Simon Says Stamp Monday Challenge:  Bright and Cheerful! 


PRODUCT SUPPLY LIST


Monday, September 17, 2018

Going Monochromatic with Distress Oxides and a Rad Background Stamp!

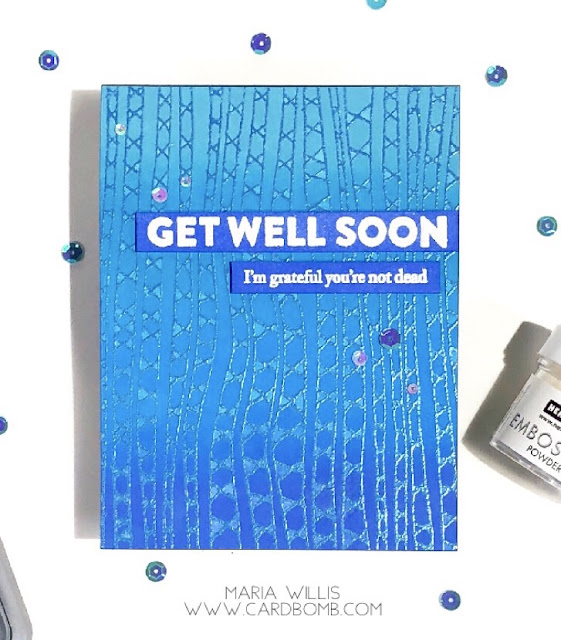
Hello! Today I've got a fun monochromatic card to share with you. The inspiration to make something monochromatic came from this month's challenge over at A Blog Named Hero. I bought this background stamp (Cross-Hatch Bold Prints) quite a while ago and I've been itching to use it. It's got such a fun, crazy pattern that I thought it would provide enough interest for  what is otherwise a simple card. 
#cardbomb, #mariawillis, #card, #cardmaking, #handmade, #heroarts, #distressoxides, #tonicstudiosusa, #monochromatic, #heatemboss, #technique, #create, #creative, #color, #art, #diy, #ink, #stamp, #paper, #papercraft,

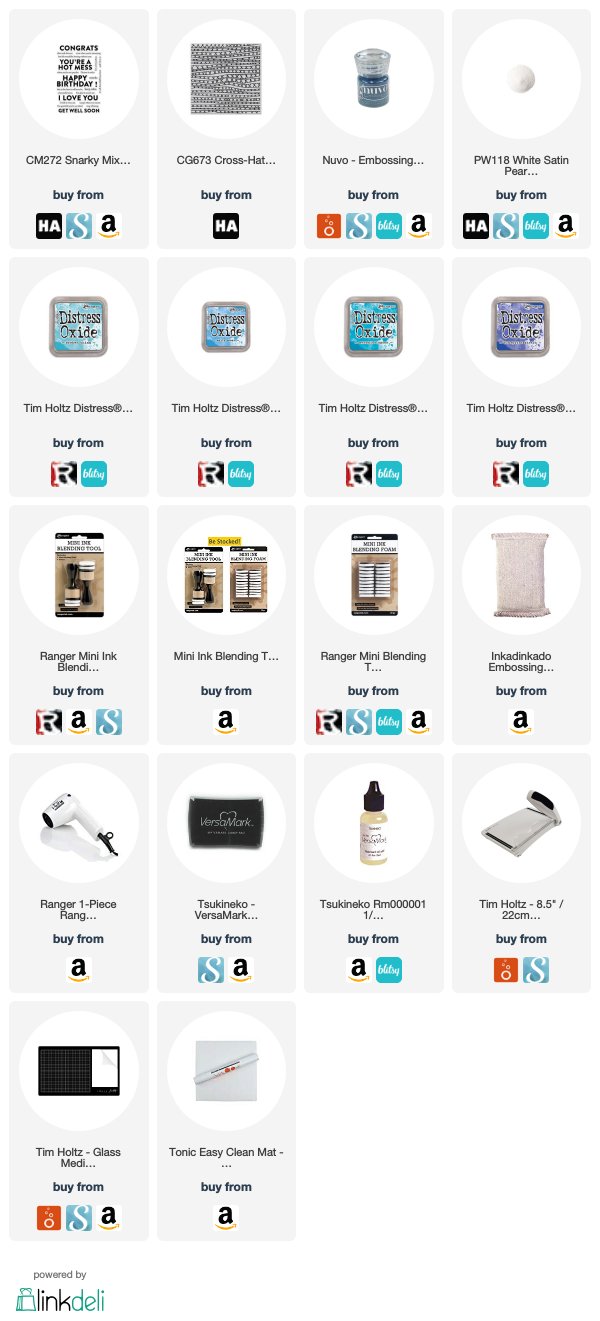
I started out by heat embossing the background stamp with Tonic Nuvo Embossing Powder in Blue Odyssey (it's a sparkly, darker blue). Then I sponged the background with Distress Oxide Inks with the lightest color at the top (Broken China), then Salty Ocean, followed by Mermaid Lagoon and finally the darkest color, Blueprint Sketch. After that I used a wet paint brush (wet with water) to fill in the little triangles on each vertical "stripe." As I went along I used a clean, dry paper towel to dry the water and lift some of the Distress Oxide ink off of the card. The ink that was left on the card in the triangles oxidized when it came into contact with the water and turned a lighter shade of blue. 
#cardbomb, #mariawillis, #card, #cardmaking, #handmade, #heroarts, #distressoxides, #tonicstudiosusa, #monochromatic, #heatemboss, #technique, #create, #creative, #color, #art, #diy, #ink, #stamp, #paper, #papercraft,

I used Hero Arts White Satin Pearl Embossing Powder to heat emboss the sentiment. Then I sponged over it with Blueprint Sketch. I wiped the embossed sentiment clean of excess ink and cut my sentiment into strips. Then I mounted it onto the card using foam adhesive.
#cardbomb, #mariawillis, #card, #cardmaking, #handmade, #heroarts, #distressoxides, #tonicstudiosusa, #monochromatic, #heatemboss, #technique, #create, #creative, #color, #art, #diy, #ink, #stamp, #paper, #papercraft,

The last thing I did was to add some blue/iridescent sequins (they look pink with the light hitting them but they really are blue).
#cardbomb, #mariawillis, #card, #cardmaking, #handmade, #heroarts, #distressoxides, #tonicstudiosusa, #monochromatic, #heatemboss, #technique, #create, #creative, #color, #art, #diy, #ink, #stamp, #paper, #papercraft,

I mentioned at the beginning of this post that I am entering this card into the the A Blog Named Hero: Monochromatic themed challenge. If you'd like to check out the design team and the other challengers to see some beautiful projects just click HERE to head over there. 

Thanks for stopping by my blog today! I'm adding links to the products I've used below in case your curious about the products or you'd like to do a little shopping. 

That's it for today. Have an amazing day you all!

Maria


Product List: 

Thursday, May 24, 2018

Bow Chicka-huahua!

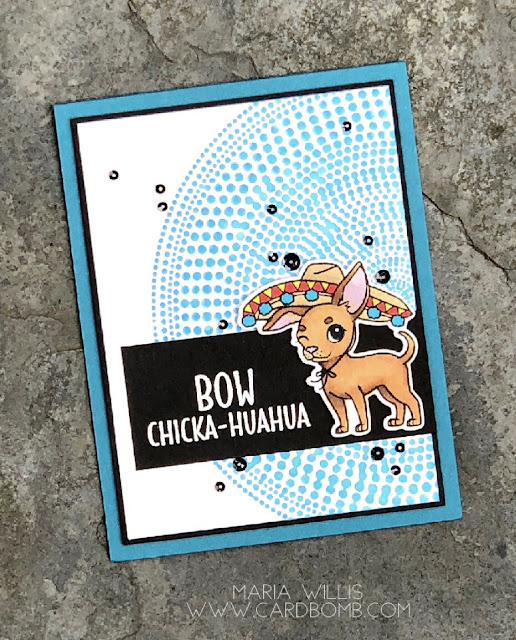
Hey you guys! I feel like I haven't posted in for-ev-er! It's been just over a week since I've posted and although I made this card quite some time ago I haven't gotten my act together to write this post. I am still loving this Chihuahua set from Hero Arts. The sentiments absolutely kill me! Bow Chicka-huahua! And, get a load of this guys eye wink-it cracks me up every time I look at it!
#cardbomb, #mariawillis, #simonsaysstamps, #ssswchallenge, #rangerink, #timholtz, #heroarts, #copics, #color, #distressoxideinks, #distressinks, #chihuahua, #cards, #stamps, #ink, #paper, #cards, #papercrafting, #creative, #handmade, #diy, #texture,

For this card I started out with a Hero Arts background stamp called Sunburst Bold Prints (CG732). I inked it up with some Distress Oxide ink. Before stamping it onto my paper I gave it a quick spritz of water to activate the ink. 
#cardbomb, #mariawillis, #simonsaysstamps, #ssswchallenge, #rangerink, #timholtz, #heroarts, #copics, #color, #distressoxideinks, #distressinks, #chihuahua, #cards, #stamps, #ink, #paper, #cards, #papercrafting, #creative, #handmade, #diy, #texture,

The charming little chihuahua is from Hero Art's It's Fiesta Time (CG252) stamp set. I stamped him with black Memento ink and colored him with Copic Markers. I cut him out with the coordinating dies (DI494) and used foam adhesive to pop him up over the sentiment piece. 
#cardbomb, #mariawillis, #simonsaysstamps, #ssswchallenge, #rangerink, #timholtz, #heroarts, #copics, #color, #distressoxideinks, #distressinks, #chihuahua, #cards, #stamps, #ink, #paper, #cards, #papercrafting, #creative, #handmade, #diy, #texture,

I finished the card off by adding a black mat and putting that on a card base of Island Indigo cardstock. The final touch was adding some black sequins in multiple sizes.
#cardbomb, #mariawillis, #simonsaysstamps, #ssswchallenge, #rangerink, #timholtz, #heroarts, #copics, #color, #distressoxideinks, #distressinks, #chihuahua, #cards, #stamps, #ink, #paper, #cards, #papercrafting, #creative, #handmade, #diy, #texture,

I'm entering this card into this week's Simon Says Stamp Wednesday challenge (Click HERE to check out the challenge blog). This week's challenge is to use more than one stamp set and I've used two on this card. 

I'll be back soon! I've been playing around with Nuvo Shimmer Powder and that stuff is so amazing! I can't wait to share what I've made with you. 

Have an awesome day and I'll see you back here soon!

Maria
mariawillis@hotmail.com


01 09 10