Showing posts with label #diecutting. Show all posts

Friday, March 26, 2021

VIDEO: Tonic Studios Stamp Club Release and Giveaway! I Love You Fairy Much!

Hi everybody! I'm so glad you're here because today is launch day for the newest Tonic Studios Stamp Club release called I Love You Fairy Much. I had so much fun with this release that I've got eight cards and a video to share with you today. Before I get to the cards I want to let you know that this release is available exclusively from Tonic Studios. There is a limited quantity of bundles and when they are sold out they'll be gone for good so make sure to grab yours before they sell out. If you want to grab an I Love You Fairy Much bundle for yourself here are the links:
       -Tonic Studios USA
       -Tonic Studios UK

There is also a GIVEAWAY over on my Instagram account @Cardbomb. If you'd like a chance to win this whole stamp and die bundle plus some Nuvo Hybrid inks and one of my favorite blending brushes, please head over to my Instagram account to enter the giveaway.

Ok, let's get on to the cards! For my first card I ink-blended a background, splattered it with Glitter Gloss and gouache, and stamped it with dragonflies.
#cardbomb,#maria willis,#tonicstudios,#nuvo,#cards,#handmade,#cardmaker,#fairy,#art,#ink,#color,#diy,#papercraft,#diecutting,#tonicstudiosstampclub,

Then I adhered the fairyland frame die cut to frame out my scene. I used it together with the outer frame so that it perfectly framed on an A2 sized card.

#cardbomb,#maria willis,#tonicstudios,#nuvo,#cards,#handmade,#cardmaker,#fairy,#art,#ink,#color,#diy,#papercraft,#diecutting,#tonicstudiosstampclub,

I added a fairy sitting on a mushroom to the left and added a sentiment to the right to finish my card off.
#cardbomb,#maria willis,#tonicstudios,#nuvo,#cards,#handmade,#cardmaker,#fairy,#art,#ink,#color,#diy,#papercraft,#diecutting,#tonicstudiosstampclub,


Here's a link to the video I made if you'd like to see this release in action...
 
If you're having trouble watching this video CLICK HERE to view it now.


My next card features a watercolored background in light pastels. It's splattered with Glitter Gloss for some extra shimmer and I used my Tim Holtz Deckle Trimmer to cut it down.
#cardbomb,#maria willis,#tonicstudios,#nuvo,#cards,#handmade,#cardmaker,#fairy,#art,#ink,#color,#diy,#papercraft,#diecutting,#tonicstudiosstampclub,

I added a die cut frame from Pinkfresh Studios. I layered a flagged sentiment on to the bottom and added some clear sequins to the background.
#cardbomb,#maria willis,#tonicstudios,#nuvo,#cards,#handmade,#cardmaker,#fairy,#art,#ink,#color,#diy,#papercraft,#diecutting,#tonicstudiosstampclub,

To finish the card off I added a copic colored fairy using foam adhesive to make it look like she is floating over the sentiment.
#cardbomb,#maria willis,#tonicstudios,#nuvo,#cards,#handmade,#cardmaker,#fairy,#art,#ink,#color,#diy,#papercraft,#diecutting,#tonicstudiosstampclub,

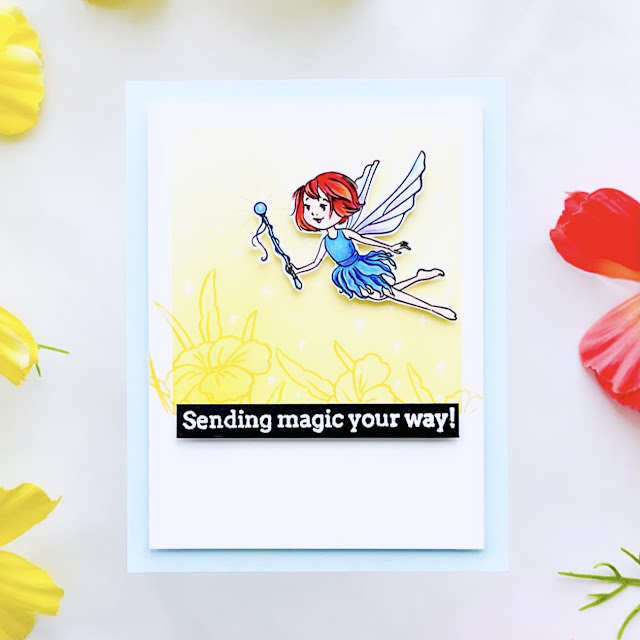
This next card is one of my favorites because I just love this little fairy! She's super spunky and I love her wand. I decided to mask off the background and ink blend a square in yellow. I used that same color of yellow ink to stamp some flowers on to the bottom of the square. I also stamped the wand glow onto the background right behind where I would place the fairy and her wand.
#cardbomb,#maria willis,#tonicstudios,#nuvo,#cards,#handmade,#cardmaker,#fairy,#art,#ink,#color,#diy,#papercraft,#diecutting,#tonicstudiosstampclub,


I mounted that card panel onto some light blue cardstock using foam adhesive. Then I heat embossed my sentiment in white embossing powder onto black cardstock and adhered that to my card as well.
#cardbomb,#maria willis,#tonicstudios,#nuvo,#cards,#handmade,#cardmaker,#fairy,#art,#ink,#color,#diy,#papercraft,#diecutting,#tonicstudiosstampclub,

Finally, I used foam adhesive to glue my fairy down. I love how it looks like she's hovering over a field of flowers.
#cardbomb,#maria willis,#tonicstudios,#nuvo,#cards,#handmade,#cardmaker,#fairy,#art,#ink,#color,#diy,#papercraft,#diecutting,#tonicstudiosstampclub,

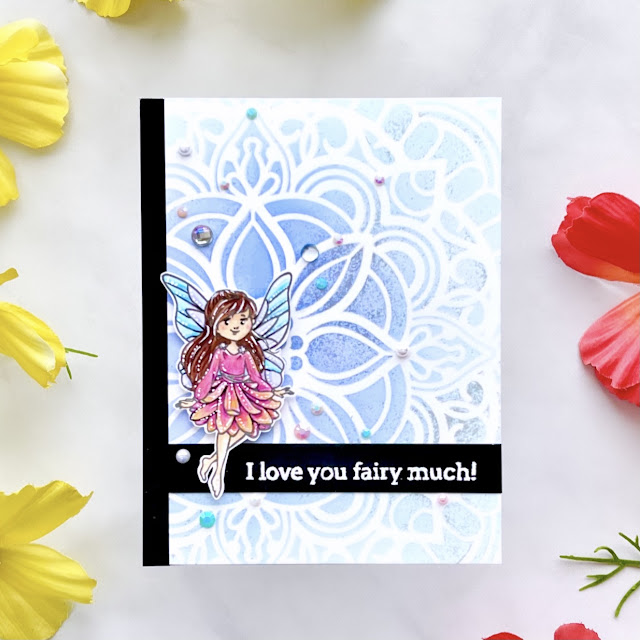
This card was fun to put together... I started out ink-blending the background with Nuvo hybrid ink. I especially like using this ink when I am going to apply a product on top of the ink bc this hybrid ink is permanent and will not react with water (or wet products). After ink-blending I added a thin layer of glacier paste on top. I cut the background down to four inches by five and a half inches. I glued this to the right side of a card base. I glued a one quarter inch strip of black cardstock to the left side of the card to fill in the remaining space.
#cardbomb,#maria willis,#tonicstudios,#nuvo,#cards,#handmade,#cardmaker,#fairy,#art,#ink,#color,#diy,#papercraft,#diecutting,#tonicstudiosstampclub,


I heat embossed my sentiment in white on black and added the strip to my card.
#cardbomb,#maria willis,#tonicstudios,#nuvo,#cards,#handmade,#cardmaker,#fairy,#art,#ink,#color,#diy,#papercraft,#diecutting,#tonicstudiosstampclub,


After that all I had to do was add my fairy and some rhinestones and jewels to my card front.
#cardbomb,#maria willis,#tonicstudios,#nuvo,#cards,#handmade,#cardmaker,#fairy,#art,#ink,#color,#diy,#papercraft,#diecutting,#tonicstudiosstampclub,


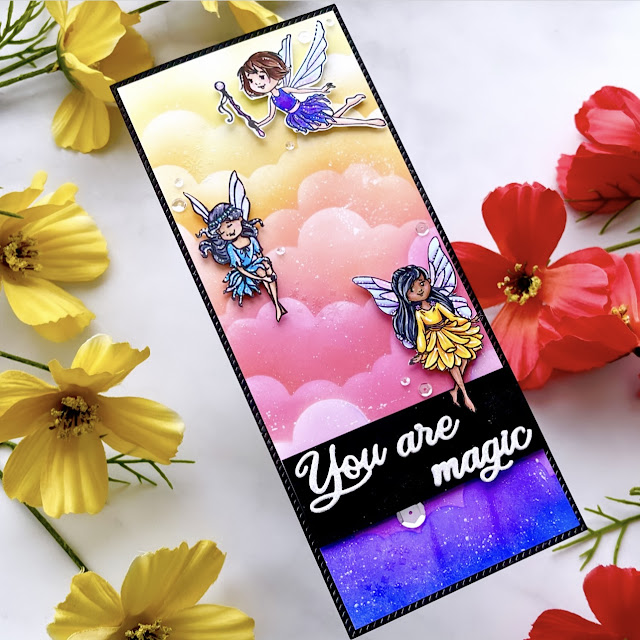
The I Love You Fairy Much bundle makes creating slimline cards a snap. With so many coordinating elements it's really easy to quickly fill up your card with images that go well together. I started this card by inkblending the background with card stencils that I made using the cloud dies from the second stamp club release. I used a rainbow of colors and then splattered it with Glitter Gloss and white paint. I also heat embossed the fairy dust stamp multiple times onto the background in the spaces between where the fairies would be placed.
#cardbomb,#maria willis,#tonicstudios,#nuvo,#cards,#handmade,#cardmaker,#fairy,#art,#ink,#color,#diy,#papercraft,#diecutting,#tonicstudiosstampclub,


Next, I die cut my sentiment multiple times in white cardstock. I also cut it out one time form glittery white cardstock. I glued the multiple layers together with the glittery cardstock on top. This gave me a fun, dimensional, die-cut sentiment that popped off of a piece of black cardstock.
#cardbomb,#maria willis,#tonicstudios,#nuvo,#cards,#handmade,#cardmaker,#fairy,#art,#ink,#color,#diy,#papercraft,#diecutting,#tonicstudiosstampclub,

To finish my card off I adhered all of my fairies using foam adhesive and then added a few subtle sequins.

#cardbomb,#maria willis,#tonicstudios,#nuvo,#cards,#handmade,#cardmaker,#fairy,#art,#ink,#color,#diy,#papercraft,#diecutting,#tonicstudiosstampclub,


If you look closely at the fairies you will be able to see that I used a white gel pen to add little highlights to their hair, wings and outfits. I think this gives them a sparkly, magical look.
#cardbomb,#maria willis,#tonicstudios,#nuvo,#cards,#handmade,#cardmaker,#fairy,#art,#ink,#color,#diy,#papercraft,#diecutting,#tonicstudiosstampclub,


I just love it when a stamp set is versatile and this bundle has got a lot going on. This mushroom stamp pairs perfectly with its punny sentiment to make for a great guy card! I started out by stamping the mushroom in Antique Linen Distress Oxide ink on black cardstock. Then, I colored the image in with colored pencils. This was my first time trying this and I had fun with it but it was hard for me. 

#cardbomb,#maria willis,#tonicstudios,#nuvo,#cards,#handmade,#cardmaker,#fairy,#art,#ink,#color,#diy,#papercraft,#diecutting,#tonicstudiosstampclub,


After I finished coloring I heat embossed a sentiment directly below the image. I also splattered the background lightly with white paint before cutting it out with my Deckle Edge trimmer.
#cardbomb,#maria willis,#tonicstudios,#nuvo,#cards,#handmade,#cardmaker,#fairy,#art,#ink,#color,#diy,#papercraft,#diecutting,#tonicstudiosstampclub,


I splattered my green cardbase with black ink and adhered my image panel down using foam tape.
#cardbomb,#maria willis,#tonicstudios,#nuvo,#cards,#handmade,#cardmaker,#fairy,#art,#ink,#color,#diy,#papercraft,#diecutting,#tonicstudiosstampclub,


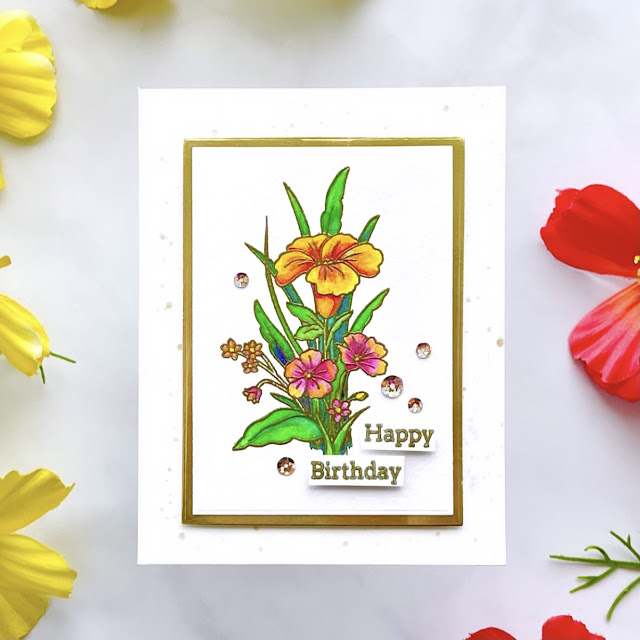
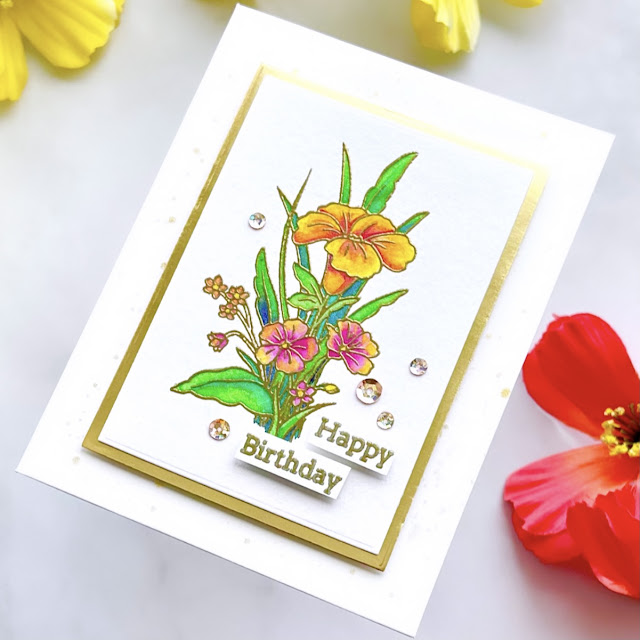
Here is another way that you can use this set to create beautiful (non-fairy) cards. I heat embossed the floral image in gold and then watercolored it using Nuvo Shimmer powders.
#cardbomb,#maria willis,#tonicstudios,#nuvo,#cards,#handmade,#cardmaker,#fairy,#art,#ink,#color,#diy,#papercraft,#diecutting,#tonicstudiosstampclub,


I used the dies from Stamp Club 6 to cut out my layers and added those onto an ivory cream card base that I splattered with Midas Touch.
#cardbomb,#maria willis,#tonicstudios,#nuvo,#cards,#handmade,#cardmaker,#fairy,#art,#ink,#color,#diy,#papercraft,#diecutting,#tonicstudiosstampclub,


I added some Nuvo sequins in Champagne to finish this card off.
#cardbomb,#maria willis,#tonicstudios,#nuvo,#cards,#handmade,#cardmaker,#fairy,#art,#ink,#color,#diy,#papercraft,#diecutting,#tonicstudiosstampclub,


For my last card I wanted to share how easy it is make a fabulous shaker card using the fairyland frame die from this set. I cut the die from the inside of an A2 sized piece of black cardstock. 
#cardbomb,#maria willis,#tonicstudios,#nuvo,#cards,#handmade,#cardmaker,#fairy,#art,#ink,#color,#diy,#papercraft,#diecutting,#tonicstudiosstampclub,


I inkblended a background panel in red, orange and yellow. Then I poured chunky gold glitter and yellow butterfly confetti on top of it. I added a double layer of quarter inch foam tape to the back of the die cut frame and attached to the background, trapping all of the glitter and confetti inside.
#cardbomb,#maria willis,#tonicstudios,#nuvo,#cards,#handmade,#cardmaker,#fairy,#art,#ink,#color,#diy,#papercraft,#diecutting,#tonicstudiosstampclub,


The final steps were to add a gold, heat embossed sentiment and a copic colored flower to the card front.
#cardbomb,#maria willis,#tonicstudios,#nuvo,#cards,#handmade,#cardmaker,#fairy,#art,#ink,#color,#diy,#papercraft,#diecutting,#tonicstudiosstampclub,


Ok, that's it for me today you guys! I hope you'll like this I Love You Fairy Much bundle as much as I have. If you do like it, remember that once it sells out it is gone for good so pick yours up while they are still in stock. It's only available at Tonic Studios so here are the links to those shops for you:

        -Tonic Studios USA

        -Tonic Studios UK


Have an amazing day you guys!

Maria


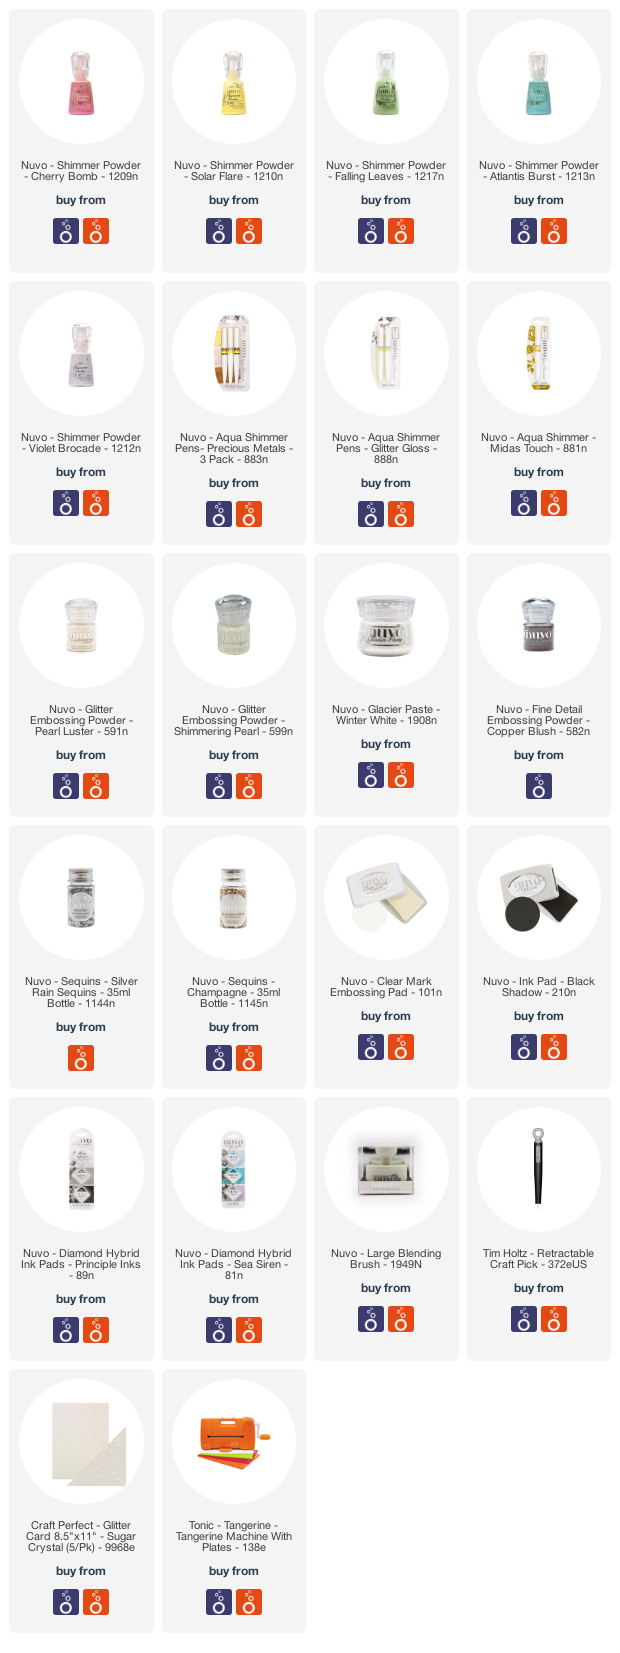
PRODUCT SUPPLY LIST:


Friday, March 20, 2020

Crafty Friends: Pinkfresh and a Discount!

Hey you guys! How are you all doing out there in this crazy world? I'm in California, USA and my family is healthy, safe and on lockdown at home. I'd love to hear how you are all doing so please let me know in the comments below! Since I'm sure many of you are stir crazy I'm happy to say that today is the 20th of the month when I hop my Crafty Friends and we bring you a 20% discount to our featured company! Woohoo! There is no better time for a discount than when you are on lockdown and actually have time to spend getting crafty. I am happy to let you know that this month we are featuring Pinkfresh Studios and they are generously offering all of you a 20% discount to their shop! Details are at the bottom of my post.

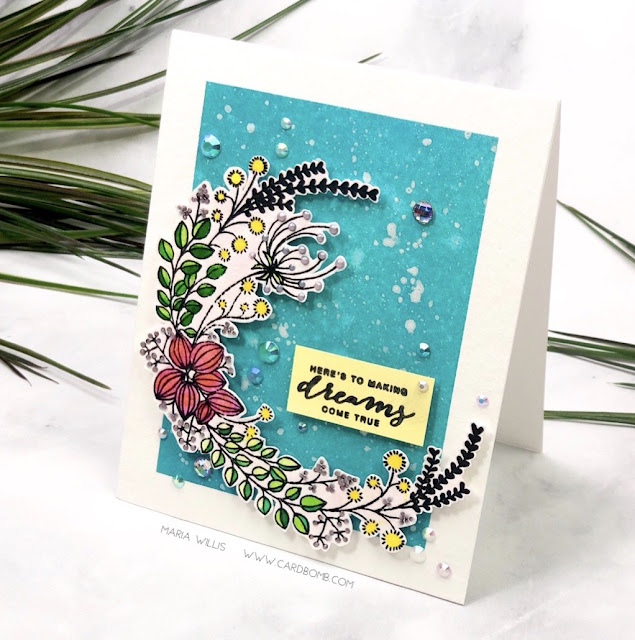
For my first card I used the Heart and Soul stamp set and it is such a stunner. It's got one large floral image shaped like a half wreath and quite a few wonderful sentiments.
#mariawillis, #cardbomb, #card, #cardmaking, #cardmaker, #cards, #handmade, #pinkfreshstudios, #stamp, #ink, #paper, #papercraft, #art, #diy, #color, #happybirthday, #heartandsoul, #diecut, #diecutting,

I started off by watercoloring my image with Pinkfresh liquid watercolors. Then I added some Nuvo drops to give it some dimension and shine. When it was dry I fussy cut it out.
#mariawillis, #cardbomb, #card, #cardmaking, #cardmaker, #cards, #handmade, #pinkfreshstudios, #stamp, #ink, #paper, #papercraft, #art, #diy, #color, #happybirthday, #heartandsoul, #diecut, #diecutting,

I taped off the edges of a piece of watercolor paper with some purple tape. Then I ink blended the background using Distress Oxide ink Peacock Feathers. To finish the background I spritzed it with shimmer spray and splattered it with silver metallic paint from Hero Arts.
#mariawillis, #cardbomb, #card, #cardmaking, #cardmaker, #cards, #handmade, #pinkfreshstudios, #stamp, #ink, #paper, #papercraft, #art, #diy, #color, #happybirthday, #heartandsoul, #diecut, #diecutting,

Finally I added a sentiment on yellow cardstock and then some chunky rhinestones to finish it off.
#mariawillis, #cardbomb, #card, #cardmaking, #cardmaker, #cards, #handmade, #pinkfreshstudios, #stamp, #ink, #paper, #papercraft, #art, #diy, #color, #happybirthday, #heartandsoul, #diecut, #diecutting,


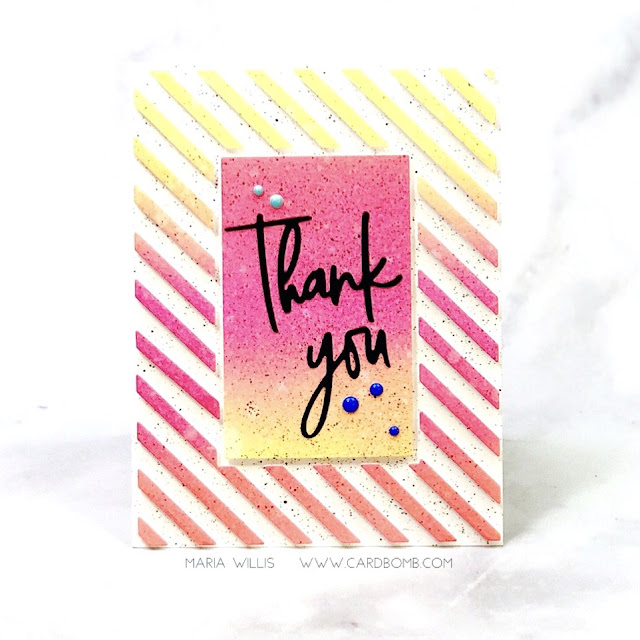
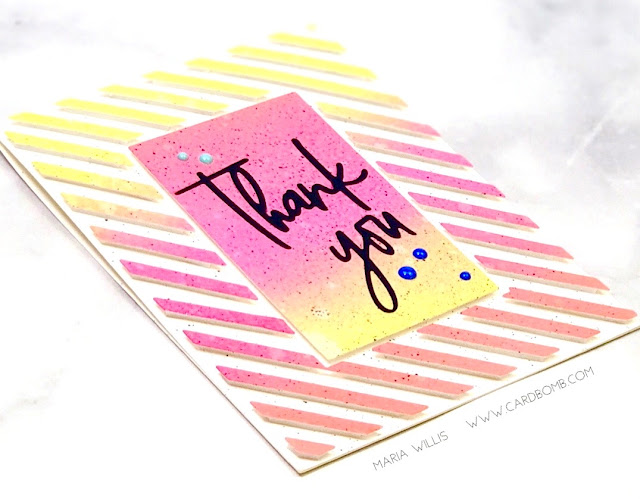
For my next projects I made two cards from one background that I cut from the Diagonal Stripes with Window die. I ink blended my background with Distress Oxide inks in Squeezed Lemon, Picked Raspberry and Abandoned Coral. Then, I cut it out with the die. I used the positive part of the die cut for my first card.
#mariawillis, #cardbomb, #card, #cardmaking, #cardmaker, #cards, #handmade, #pinkfreshstudios, #stamp, #ink, #paper, #papercraft, #art, #diy, #color, #happybirthday, #heartandsoul, #diecut, #diecutting,

These colors really pop when paired with some black cardstock so I used foam adhesive to pop the die up. Then I splattered the whole thing with Sparkle from a Tonic Studios Nuvo Shimmer Pen in Glitter Gloss. 
#mariawillis, #cardbomb, #card, #cardmaking, #cardmaker, #cards, #handmade, #pinkfreshstudios, #stamp, #ink, #paper, #papercraft, #art, #diy, #color, #happybirthday, #heartandsoul, #diecut, #diecutting,

The super fun sentiment is cut using Pinkfresh's Classic Word Dies Set. I love that this set provides both the thinner sentiment as well as the "halo" background piece. The final touch for this card was to add enamel dots from Hero Arts and a bunch of random sequins, pearls, rhinestones and confetti stars. I really love how this card came out (it's super sparkly).
#mariawillis, #cardbomb, #card, #cardmaking, #cardmaker, #cards, #handmade, #pinkfreshstudios, #stamp, #ink, #paper, #papercraft, #art, #diy, #color, #happybirthday, #heartandsoul, #diecut, #diecutting,

For my second card  with this die I used the negative pieces. I used positive piece of the die to help me line up all of the thin stripes and popped them up on foam adhesive. 
#mariawillis, #cardbomb, #card, #cardmaking, #cardmaker, #cards, #handmade, #pinkfreshstudios, #stamp, #ink, #paper, #papercraft, #art, #diy, #color, #happybirthday, #heartandsoul, #diecut, #diecutting,

I decided to flip the center piece over before adhering it because I liked the way the contrast looked. I added my sentiment and this time I only used the thin letters so that my colored background would pop.
#mariawillis, #cardbomb, #card, #cardmaking, #cardmaker, #cards, #handmade, #pinkfreshstudios, #stamp, #ink, #paper, #papercraft, #art, #diy, #color, #happybirthday, #heartandsoul, #diecut, #diecutting,

To finish the card off I some black ink splatter and a few enamel dots from Hero Arts. 
#mariawillis, #cardbomb, #card, #cardmaking, #cardmaker, #cards, #handmade, #pinkfreshstudios, #stamp, #ink, #paper, #papercraft, #art, #diy, #color, #happybirthday, #heartandsoul, #diecut, #diecutting,

These cards are bright and happy and totally remind me of the 80's!
#mariawillis, #cardbomb, #card, #cardmaking, #cardmaker, #cards, #handmade, #pinkfreshstudios, #stamp, #ink, #paper, #papercraft, #art, #diy, #color, #happybirthday, #heartandsoul, #diecut, #diecutting,

Ok, that's it for today you guys so let me tell you about this discount before I go. Pinkfresh is offering you a discount of 20% of everything in the store except for new release, sale, and marked down items (ex: bundles). All you have to do to get this discount is use the code CRAFTYFRIENDS20 when you check out from the Pinkfresh Studios site. Happy Shopping! 

#mariawillis, #cardbomb, #card, #cardmaking, #cardmaker, #cards, #handmade, #pinkfreshstudios, #stamp, #ink, #paper, #papercraft, #art, #diy, #color, #happybirthday, #heartandsoul, #diecut, #diecutting,

Have an awesome day you guys! Stay healthy and craft hard!
Maria


CRAFTY FRIENDS BLOG ROLL:
Maria Willis: You are Here.

PRODUCT SUPPLY LIST:


Thursday, August 1, 2019

Encouragement Card Blog Hop

Hey you guys! How are you? I hope you're having a fantastic day and enjoying your summer (if you're in my hemisphere anyway). Today I'm taking part in a special blog hop that is showcasing cardmakers in a variety of different ways. Some cardmakers mailed their cards in, some are participating via blog (like me) and others are participating via youtube video. So, I hope you will  join us for this fun and unique hop! You will find yourself jumping back and forth between blogs and youtube videos which should provide for some great entertainment and inspiring ideas.

I decided to make a card for a friend who could use a little pick me up. She's a really lovely person and life has been a bit tough on her. I want her to know that she is loved... 
#mariawillis, #cardbomb, #card, #cards, #handmade, #handmadecards, #papercraft, #stamps, #ink, #paper, #art, #create, #creative, #watercolor, #diecutting, #tonicstudios, #tonicstudiosusa, #nuvo, #nuvoshimmerpowder,


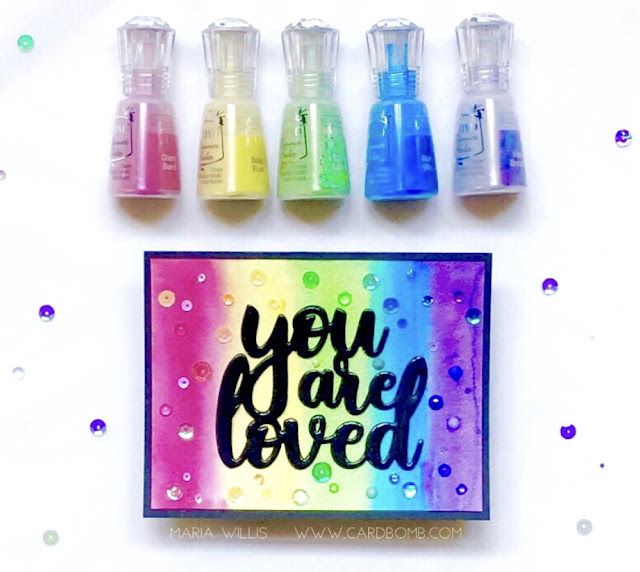
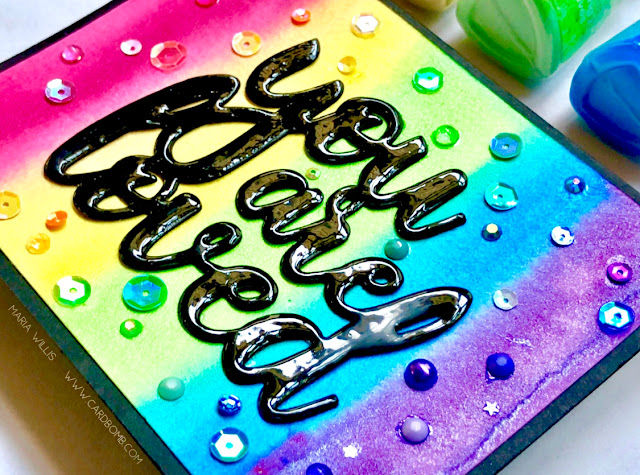
I decided to use bright, happy colors for this card so I busted out my Tonic Nuvo Shimmer Powders and watercolored a rainbow background. 
#mariawillis, #cardbomb, #card, #cards, #handmade, #handmadecards, #papercraft, #stamps, #ink, #paper, #art, #create, #creative, #watercolor, #diecutting, #tonicstudios, #tonicstudiosusa, #nuvo, #nuvoshimmerpowder,


This big You Are Loved Die sentiment from Altenew was just perfect for this card. I die cut it three times then glued the layers together. After that I used my Nuvo Crystal Glaze to cover the whole die cut sentiment in a thick, glossy sheen. 
#mariawillis, #cardbomb, #card, #cards, #handmade, #handmadecards, #papercraft, #stamps, #ink, #paper, #art, #create, #creative, #watercolor, #diecutting, #tonicstudios, #tonicstudiosusa, #nuvo, #nuvoshimmerpowder,

After I adhered the sentiment I decided this card needed a rainbow of sequins, rhinestones and other fun embellishments. I dug out shiny things from lots of different companies. Then, glued them down until I had what looked like a rainbow jewel encrusted card. It might be hard to see in the picture but this card catches the light like something else and flashes all kinds of shimmery, glittery goodness back at you. I hope it will bring a smile to my friend's face.

If you're curious about the Nuvo Shimmer Powders here's a video I made a while back showcasing ten different ways to use them. I hope you might find it helpful. 


If you are interested in checking out any of the products that I've used today I've linked them all at the bottom of this post. 

Thanks so much for joining me today! I hope you have an amazing day and enjoy the rest of the hop!


Next, you are off to visit Jessica Shier on Youtube! 


Have an awesome day you all!
Maria

PS: For some added fun I'm entering this card into this week's Simon Says Stamp Monday Challenge:  Bright and Cheerful! 


PRODUCT SUPPLY LIST


Wednesday, July 24, 2019

Shaker Card vs. Mixed Media Card for Tonic Studios

maria willis, #cardbomb, #card, #cards, #handmade, #handmadecards, #stamp, #ink, #paper, #papercraft, #art, #diy, #tonicstudios, #tonicstudiosusa, #mermaid, #diecutting, #shaker card, #mixedmedia,
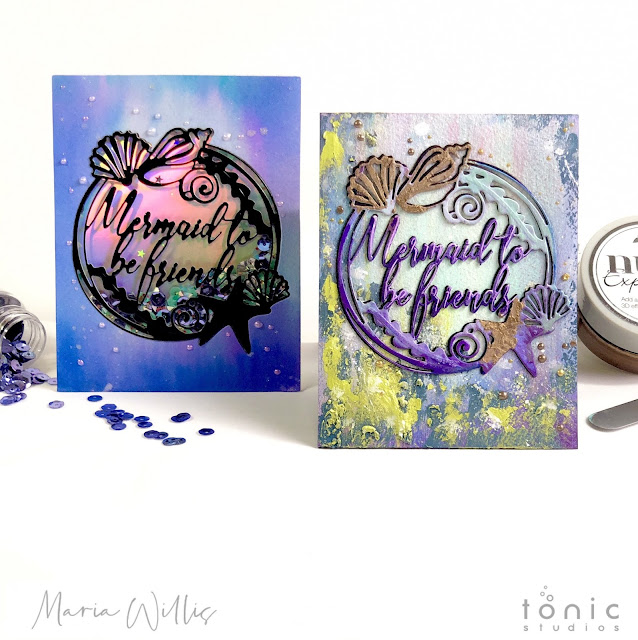
Hey, everyone! It's Maria from Cardbomb here to share two totally different cards made from the same layout. In fact, not only did I use the same layout but I even used the same die. One of my favorite things about Tonic Studios is the diverse range of products they carry. Whether you want gorgeous paper, pens, pencils, watercolors, alcohol markers, mousses, drops, embellishments, etc. Tonic Studios has it! Today I've decided to share how you can make your cards dramatically different just by switching out your papers and art mediums.

CARD #1: MERMAID SHAKER CARD

For my first card I decided to do a clean and simple shaker card...

maria willis, #cardbomb, #card, #cards, #handmade, #handmadecards, #stamp, #ink, #paper, #papercraft, #art, #diy, #tonicstudios, #tonicstudiosusa, #mermaid, #diecutting, #shaker card, #mixedmedia,

SHAKER CARD HOW TO:
  • Start with a piece of watercolor paper cut to 4.25" x 5.5"
  • Use Nuvo Aqua Flow Pens and a wet paint brush to watercolor the background
  • Cut the "Mermaid to Be Friends" die out of the watercolored background. You will use the background for this card. Save the die cut for card #2.
  • Then, put double sided adhesive sheet onto the back of a piece of glossy black cardstock. Cut the "Mermaid to Be Friends" die out of this piece too.
  • Cut a piece of Holo Waves Mirror Cardstock to fill the front of a white card base and adhere it. Set this aside.
  • Adhere a piece of clear acetate to the backside of your watercolored background.
  • Peel the backing off of your black, glossy die cut and fit it into the watercolored background and adhering it to the acetate.
  • Flip the watercolor background over and add foam adhesive. Make sure that it is not visible through the acetate window. Also make sure that you create a foam barrier around the die cut sentiment so that your sequins cannot fall out of the shaker.
  • Add as many sequins and embellishments as you want to in a pile in the center of the Holo Waves cardstock. Make sure to use thin embellishments like glitter and sequins so that they will slide easily in your shaker card.
  • Stick the watercolored piece onto the card base trapping the embellishments behind the acetate window and within the foam adhesive barrier you created earlier.
  • Splatter the front of the card with Glitter Gloss sparkle!
  • Embellish with Dream Drops in Cloud 9
  • Shake the card and smile!

CARD #2: MIXED MEDIA MERMAID CARD

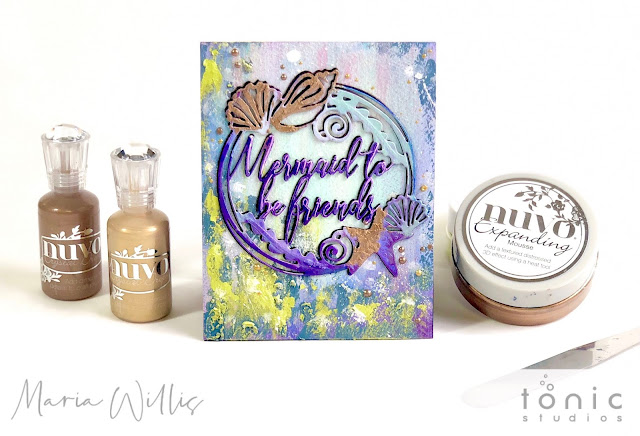
For my second card I decided to go for a completely different look. I used Nuvo Aqua Flow Pens, Embellishment Mousse, Expanding Mousse and Nuvo Drops to get a tarnished, under the sea, mixed media look...

maria willis, #cardbomb, #card, #cards, #handmade, #handmadecards, #stamp, #ink, #paper, #papercraft, #art, #diy, #tonicstudios, #tonicstudiosusa, #mermaid, #diecutting, #shaker card, #mixedmedia,

MIXED MEDIA CARD HOW TO:

  • Cut a piece of watercolor paper to 4.25" x 5.5"
  • Watercolor wash the background using Nuvo Aqua Flow Pens and a wet paintbrush.
  • Using a dry paint brush, brush some Nuvo Embellishment Mousse over the watercolor background. This will add color, texture and a sparkly sheen.
  • Grab a palette knife and use it to smear some Nuvo Expanding Mousse onto the background. Heat the mousse with a heat tool until it expands.
  • After you've gone crazy with your mousses on top of the watercolor background grab the leftover sentiment die from the first card. Add mousse and texture as you like.
  • It's important that the die will stand out on the background so add extra color using the Aqua Flow Pens if needed.
  • Cut two more "Mermaid to Be Friends" pieces out of black cardstock. Adhere these pieces together adding the colorful one on top.
  • Glue the tripled up die cut to the front of the card.
  • Splatter the card with Midas Touch Aqua Flow Pen.
  • Embellish the card with Nuvo Drops in Dirty Bronze and Mustard Gold.

HOT TIPS FOR USING NUVO MOUSSES:

  • HOT TIP #1: The more Expanding Mousse that you add (I am referring to thickness), the more the product will expand and give you incredible texture as you heat it. Thinly applied Expanding Mousse will not give you the same result.
  • HOT TIP #2: As the Expanding Mousse reacts to heat it will lose its sheen and have a more matte finish. This provides a wonderful contrast between the Expanding Mousse and the shinier Embellishment Mousse.
  • HOT TIP #3: You can brush either Embellishment or Expanding Mousse over the top of the heated Embellishment Mousse. This will not just add color but will add sheen as well.


maria willis, #cardbomb, #card, #cards, #handmade, #handmadecards, #stamp, #ink, #paper, #papercraft, #art, #diy, #tonicstudios, #tonicstudiosusa, #mermaid, #diecutting, #shaker card, #mixedmedia,

That is it for today you guys. I hope you're feeling inspired to break out all of your Tonic products and have a good play. There will be a video sharing how I made both of these cards. So, if you're interested please be on the lookout for that. Thank you for your patience with this as I've just moved and am not properly set up yet so everything is taking just a bit longer than normal. In the meantime I would love to hear which card you like better? Are you more of a clean and simple cardmaker? Or, do you like get messy and slap down layers of product onto your projects? Please leave a comment below and let me know!

Have an amazing day you all! Thanks so much for checking out today's projects and we will see you back here soon!

Maria


PS: These Mermaid dies are not available in the Tonic USA shop but you can still have them! No matter where you might be in the world you can order from the Tonic UK shop. Tonic UK offers affordable, fast shipping for international customers making it easy for you to purchase whatever you want from the UK shop!

TONIC UK SUPPLY LIST:


TONIC USA SUPPLY LIST:


Wednesday, July 10, 2019

Cardmaking with Hexagon Dies and Tonic Nuvo Shimmer Powders


#cardbomb, #mariawillis, #card, #handmade, #handmadecards, #cards, #art, #watercolor, #tonicstudios, #tonicstudiosusa, #color, #diecutting, #stamp, #ink, #paper, #papercraft, #hexagon,


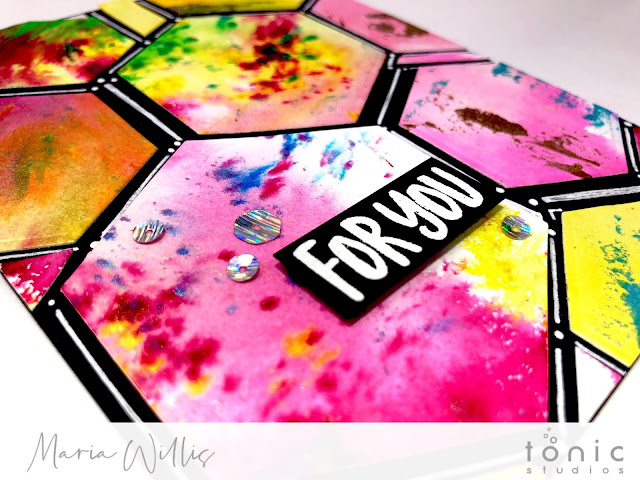
Hey everybody! I'm so happy to be here today sharing a fun way to use your dies and art supplies as the focal point of your cards. Although, I chose to use hexagons for my cards, you can use any shape that you like. I started out with a large piece of watercolor paper. Then, I used my Nuvo Shimmer Powders and Nuvo Aqua Flow Pens to watercolor the entire paper. After that, I used a stencil and Nuvo Expanding Mousse to add texture on top of the color.

 Card #1: Blues & Purples

#cardbomb, #mariawillis, #card, #handmade, #handmadecards, #cards, #art, #watercolor, #tonicstudios, #tonicstudiosusa, #color, #diecutting, #stamp, #ink, #paper, #papercraft, #hexagon,
In the picture below you can see the embossing mousse and how much texture it adds. You can use it both with, and without, a stencil for different looks.


#cardbomb, #mariawillis, #card, #handmade, #handmadecards, #cards, #art, #watercolor, #tonicstudios, #tonicstudiosusa, #color, #diecutting, #stamp, #ink, #paper, #papercraft, #hexagon,
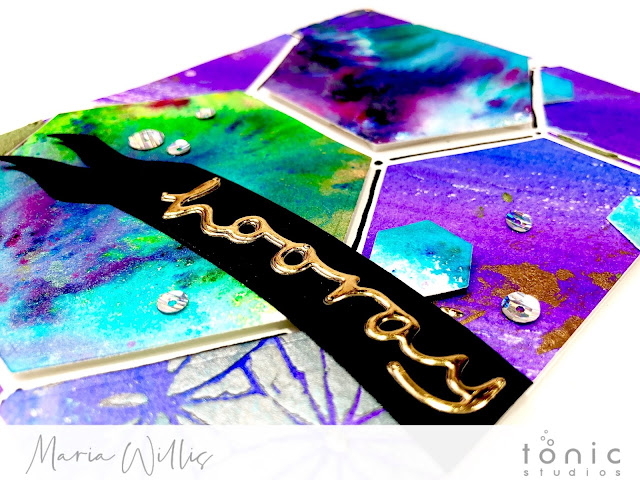
Next, I used my Hexagon dies to cut out as many hexagons as I could. Each hexagon was beautiful in a unique way. This shimmery one below was one of my favorites. Because of that, I popped it up on foam adhesive and made it the focal point of my first card.

#cardbomb, #mariawillis, #card, #handmade, #handmadecards, #cards, #art, #watercolor, #tonicstudios, #tonicstudiosusa, #color, #diecutting, #stamp, #ink, #paper, #papercraft, #hexagon,
After filling my card with hexagons I cut off any over hanging edges. Next, I added a die cut, "hooray," sentiment. That gold foil really pops off of the black cardstock.


#cardbomb, #mariawillis, #card, #handmade, #handmadecards, #cards, #art, #watercolor, #tonicstudios, #tonicstudiosusa, #color, #diecutting, #stamp, #ink, #paper, #papercraft, #hexagon,

Card #2: Pinks & Yellows

For my first card I paired blues, purples and even some greens together. However, for the second card I wanted a different color scheme. So, I went with pinks and yellows. The black background provides a great contrast for the brightly colored hexagons. After adhering the hexagons I decided to fill in some of the black space by drawing with a gel pen. I liked the way it looked. Therefore, I decided to do the same thing on my first card.


#cardbomb, #mariawillis, #card, #handmade, #handmadecards, #cards, #art, #watercolor, #tonicstudios, #tonicstudiosusa, #color, #diecutting, #stamp, #ink, #paper, #papercraft, #hexagon,
It was difficult to capture how shimmery these cards are in my pictures. Here's a close up that shows the sparkle from the Shimmer Powders.


#cardbomb, #mariawillis, #card, #handmade, #handmadecards, #cards, #art, #watercolor, #tonicstudios, #tonicstudiosusa, #color, #diecutting, #stamp, #ink, #paper, #papercraft, #hexagon,
This picture (below) shows smooth watercoloring (Aqua Flow Pens). On top of that you can see both Embellishment and Expanding Mousses.


#cardbomb, #mariawillis, #card, #handmade, #handmadecards, #cards, #art, #watercolor, #tonicstudios, #tonicstudiosusa, #color, #diecutting, #stamp, #ink, #paper, #papercraft, #hexagon,
The sentiment was heat embossed in white on black cardstock. Then, it was popped up on foam adhesive for dimension.

#cardbomb, #mariawillis, #card, #handmade, #handmadecards, #cards, #art, #watercolor, #tonicstudios, #tonicstudiosusa, #color, #diecutting, #stamp, #ink, #paper, #papercraft, #hexagon,
Overall, I'm really happy with the way these cards came out. I had fun making a mess with my watercolor supplies. Then, I got to puzzle piece it all together to make the finished card. I enjoyed the whole process.

#cardbomb, #mariawillis, #card, #handmade, #handmadecards, #cards, #art, #watercolor, #tonicstudios, #tonicstudiosusa, #color, #diecutting, #stamp, #ink, #paper, #papercraft, #hexagon,

How to make these cards:

  • Watercolor a big sheet of paper with both Shimmer Powders and Aqua Flow Pens.
  • Add texture with Embellishment and Expanding Mousse. Stencils are optional.
  • Use Hexagon dies to cut out shapes from the decorated paper.
  • Adhere the hexagons to your card using liquid and foam adhesive.
  • Add details with a gel pen.
  • Die cut or heat emboss a sentiment.
  • Embellish your card with sequins or Nuvo Drops.


#cardbomb, #mariawillis, #card, #handmade, #handmadecards, #cards, #art, #watercolor, #tonicstudios, #tonicstudiosusa, #color, #diecutting, #stamp, #ink, #paper, #papercraft, #hexagon,


That's all for today folks! I hope my projects have inspired you to go have some crafty fun! I am adding links to the products I've used today in case you'd like to check any of them out.

Have an amazing day!
Maria


SUPPLY LIST: TONIC STUDIOS UK


SUPPLY LIST: TONIC STUDIOS USA


01 09 10