Showing posts with label copic markers. Show all posts

Monday, April 4, 2022

gina k and brutus monroe

Hello everyone! I hope you all had an amazing weekend and are excited to get going with a new week. One of my favorite things is when two companies get together and decide to do a collaboration release of super fun products. That's what's going on today and we have an awesome collaboration release from Gina K. Designs and Brutus Monroe to share with you.

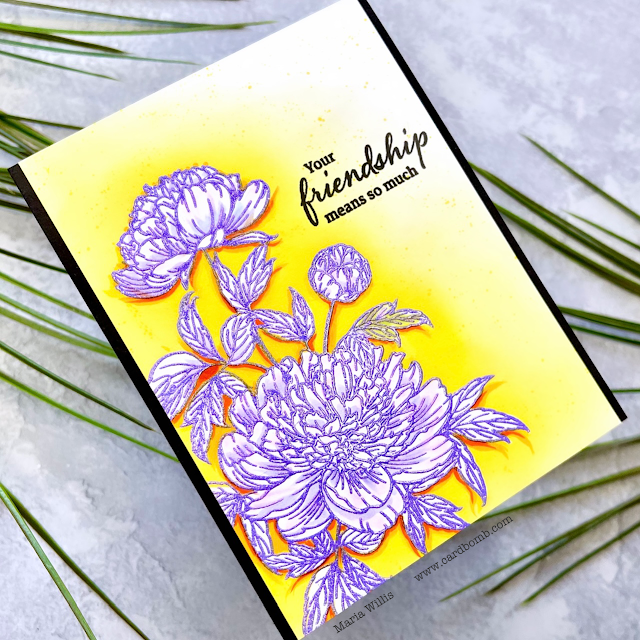
For my card I've used the gorgeous new floral design called, Seeds of Joy Stamp Set. Now, I chose to use the main floral image but it's also got a really fun seed packet image that I can't wait to use as well. I heat embossed the flowers using the new Wisteria Land Embossing Powder (hello, gorgeous purple!). Then I masked the image off using Masking Magic Sheets. I inkblended over the top of the masking paper in tones of yellow using a darker tone closer to the flowers. Then, I peeled off the masking paper revealing a crisp, clean floral image.

Cardbomb, Maria Willis,Gina K Designs,Gina K. Designs,Brutus Monroe, Cards, cardmaking, stamps, stamping, color, coloring,copics,copic markers,art, diy,handmade cards,flowers,heat embossing,

Next, I pulled out my copic markers I added some drop shadows in yellows and oranges before adding a little shading to the flowers (Purples and pinks). After I was done with my markers I stamped the sentiment in Onyx Black ink. I added a black mat behind my image piece and I think the black really helps the colors pop.
Cardbomb, Maria Willis,Gina K Designs,Gina K. Designs,Brutus Monroe, Cards, cardmaking, stamps, stamping, color, coloring,copics,copic markers,art, diy,handmade cards,flowers,heat embossing,

Ok, that's it for today you guys! Have an amazing day. Normally I say I'll see you back here soon but I probably won't be back on the blog this week as I'll be at Creativation in Florida! Take care!

Maria


PRODUCT SUPPLY LIST:


Monday, September 27, 2021

Gina K Designs Release

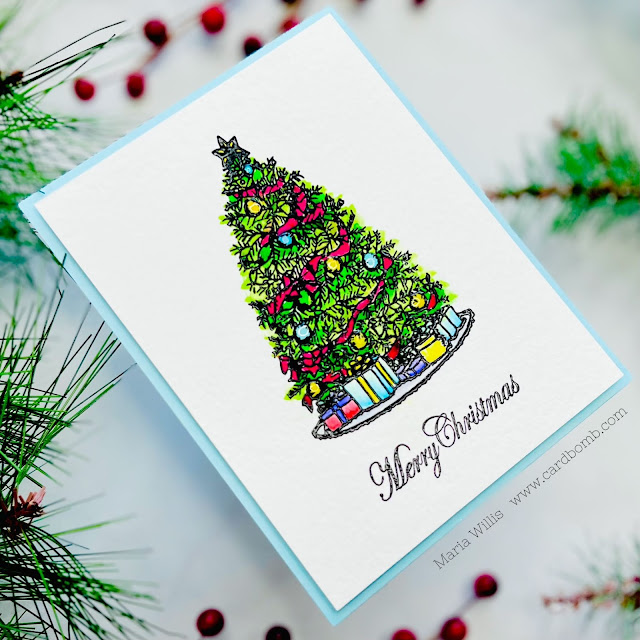
Hello everybody! Thanks for stopping by today because I have a clean and simple card to share with you today. I'm using the brand new Winter Window stamp set from Gina K Designs. Now, this set has some really beautiful elements that can be used to build a window scene complete with a window treatment,  trees in the distance and beautiful birds. There are also coordinating dies! There is so much you can do with this set but for today I decided to keep it simple.

I stamped the tree in black onto watercolor paper. Then I watercolored with my Karin markers.

Cardbomb, Maria Willis,Gina K Designs,Gina K. Designs,cats,cards, cardmaking, stamps, stamping, ink,christmas,trees,copic coloring,copic markers,CAS,handmade, color, art, diy

I started out by watercoloring the ribbon and ornaments before moving on to coloring the tree. After that I watercolored the presents. It was so hard for me to do but I managed to leave the background white.
Cardbomb, Maria Willis,Gina K Designs,Gina K. Designs,cats,cards, cardmaking, stamps, stamping, ink,christmas,trees,copic coloring,copic markers,CAS,handmade, color, art, diy

I heat embossed my sentiment in black and then I popped my panel up on a light blue card base.
Cardbomb, Maria Willis,Gina K Designs,Gina K. Designs,cats,cards, cardmaking, stamps, stamping, ink,christmas,trees,copic coloring,copic markers,CAS,handmade, color, art, diy


Ok you guys! That's it for today. Thanks for stopping by and I'll see you back here soon!

Maria

Sunday, May 2, 2021

Hero Arts Countdown to Creativity: Stay Salty!

Hey everybody! It's almost time for the May Hero Arts My Monthly Hero release and this month's kit is going to knock your socks off! 

But first, if you aren't familiar with the My Monthly Hero kit, it's a kit that is released by Hero Arts on the first Monday of every month. It always has a fun, themed collection of stamps, dies and other goodies. The cost is just $34.99/month and the value is always much greater! 

You have the option to subscribe (subscribing now means your first kit will be the June release), or, to buy your favorite kits as one-off purchases. Be aware that once these kits sell out they are gone for good. If you see a kit you like make sure to snatch it up quickly!

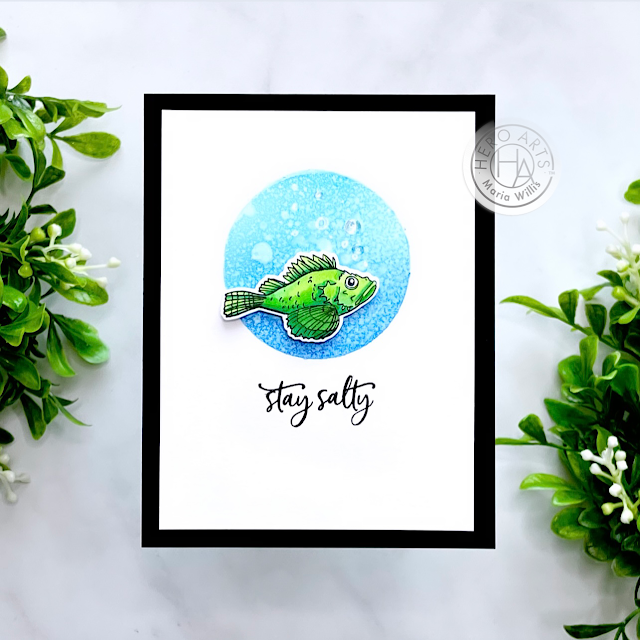
Ok, on to my card! I absolutely love this sentiment and knew I had to use it! So, I paired it up with this salty little fish to make a simple and funny card. I colored my fish with copic markers and cut him out with the coordinating dies that come with the kit.

Cardbomb,maria willis,Hero Arts, My Monthly Hero May 2021, cards, cardmaking, cardmaker, stamps, stamping, ink, paper, papercraft, art, color,copics,copic markers, fish

I ink blended a circle in Splash and Blue Hawaii inks and then sprayed it with White Irridescent Spray to give it a watery, sparkly finish. I stamped my sentiment in Onyx Pigment ink and then heat embossed it with clear embossing powder. I adhered my fish using foam tape and attached the card front to a black cardbase. I finished my card off by adding a few clear enamel dots as bubbles.

Cardbomb,maria willis,Hero Arts, My Monthly Hero May 2021, cards, cardmaking, cardmaker, stamps, stamping, ink, paper, papercraft, art, color,copics,copic markers, fish

I love when I can quickly and easily make a card that is striking even if it is simple. This kit was perfect for that! Ok, you guys, that's it for today but before you go I wanted to make sure you knew that you can enter to WIN A KIT before you can buy it. To enter just head over to the Hero Arts Blog and leave a comment for your chance to win!

Have an amazing day!
Maria


PRODUCT SUPPLY LIST:

Monday, April 26, 2021

Copic Coloring with Gina K! New Release!

Hi Everybody! I hope you're having a great day and an even better start to your week. I'm excited to be here today to share a card using a stamp from Gina K Design's newest release. The stamp set I've used is called Best of Luck

I stamped the single daffodil image in black ink onto Hammermill cardstock. I colored the image using copic markers.

Cardbomb, Maria Willis, cards, cardmaking, stamps, stamping, ink, paper, papercraft,#flowers, happy birthday, art, color, copics,copic markers

After coloring with copics I wanted to achieve a greater level of shading. I used my cool gray copic markers to add an extra layer of shading. After that I used a sharpie and a gel pen to add more shading and some highlights as well. Of course I couldn't help but add some extra details with my sharpie.
Cardbomb, Maria Willis, cards, cardmaking, stamps, stamping, ink, paper, papercraft,#flowers, happy birthday, art, color, copics,copic markers


After my front panel was done I added it to a layer of gray cardstock. Using foam tape I adhered that to a panel that I had watercolored with yellow Distress Oxide ink.
Cardbomb, Maria Willis, cards, cardmaking, stamps, stamping, ink, paper, papercraft,#flowers, happy birthday, art, color, copics,copic markers


That's it for today you guys! Thanks so much for stopping by and I will see you back here soon!

Have a great one!
Maria

Friday, January 22, 2021

Raise the Woof for Light Up Birthday Cards!

Hi everybody! I hope you're all having a great day today. I'm so glad you stopped by because you are in for a real treat today! Today Hero Arts is teaming up with Pear Blossom Press for a collaboration blog hop. We will be showing off how to use the Pear Blossom Press EZ-Lights with a variety of Hero Arts products. We've got a great blog hop full of really fun light-up cards and some GIVEAWAYS so make sure to hop along with us today. As you hop make sure to leave comments on each of the blogs to enter to win either a $50 gift card to Hero Arts, or, a $50 gift card to Pear Blossom Press

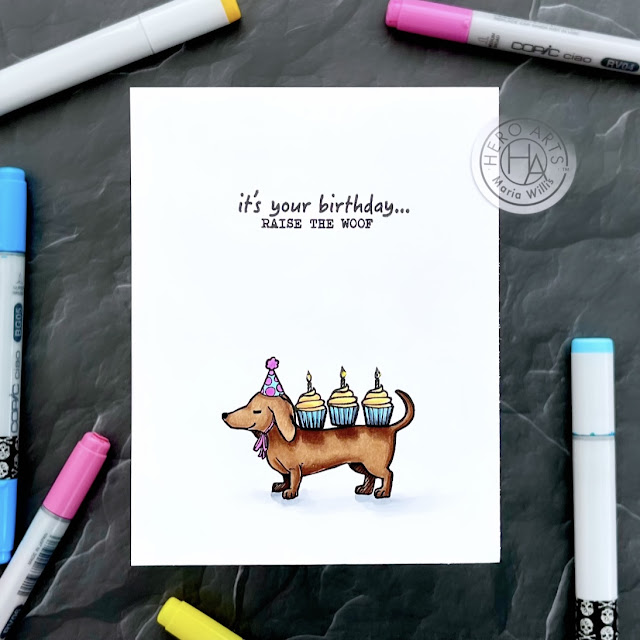
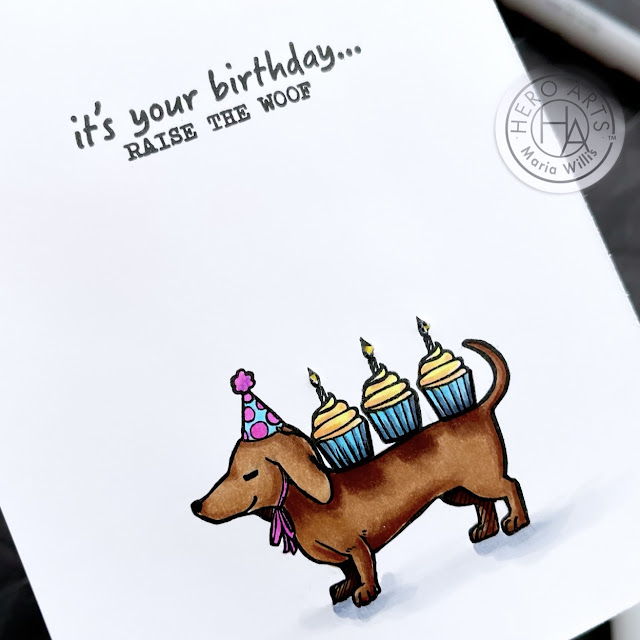
For today's card I was inspired by this set from the Stamping Village. The Hero Arts contribution is so cute (small stamp of weiner dog with three cupcakes on his back) so I decided to recreate the small stamp but much larger. I used the Birthday Paw-ty stamp set to make make my card and it's perfect bc it had all the same elements as my inspiration stamp, but, on a larger scale. I started out by stamping my sentiment and image in Hero Arts INTENS-ified Black ink. I love this ink because it plays nice with both alcohol inks and watercolor. Then, I colored in my image with copic markers.
Cardbomb, Maria Willis, Hero Arts,Pear Blossom Press, cards, cardmaking, handmade, stamps, stamping, ink, paper, paper craft, happy birthday, dogs, cupcakes,light-up card, art, color, diy,copic markers,

Next, I used my craft pick to poke holes in all three of the candle flames. I turned my card over and a grabbed a set of EZ-Lights. Each EZ-Light unit consists of a battery unit that has a button on it and three wires that extend from the battery unit and have tiny light bulbs on their tips. I taped one light bulb behind each hole that I had poked. Then, I secured the battery pack at the bottom left corner of my card front using tape adhesive. This placement will allow for the button to easily be pushed to light up the candles. I gently looped the excess length of wires and taped them to the back of the card. Last, I added a double layer of foam tape and adhered my card face to a top folding card base. To see pictures of what the guts of these cards look like make sure you stop by the Hero Arts blog. I shared a card over there as well and took quite a few pictures of the process of putting the card together. 
Cardbomb, Maria Willis, Hero Arts,Pear Blossom Press, cards, cardmaking, handmade, stamps, stamping, ink, paper, paper craft, happy birthday, dogs, cupcakes,light-up card, art, color, diy,copic markers,

When you press and hold the bottom left corner of my card the candles light up like this...
Cardbomb, Maria Willis, Hero Arts,Pear Blossom Press, cards, cardmaking, handmade, stamps, stamping, ink, paper, paper craft, happy birthday, dogs, cupcakes,light-up card, art, color, diy,copic markers,

I had so much fun making this card today. My idea to recreate the stamp from the Stamping Village set came together so easily. It's simple but the lights really take it up a notch and add a fun-factor! 

Cardbomb, Maria Willis, Hero Arts,Pear Blossom Press, cards, cardmaking, handmade, stamps, stamping, ink, paper, paper craft, happy birthday, dogs, cupcakes,light-up card, art, color, diy,copic markers,

Ok, you guys! That's all I've got for today. I hope you'll keep hopping along with us and check out all of the other fun light-up cards on this blog hop. Remember to comment below for your chance to win the GIVEAWAY! Two lucky winners will be randomly selected from comments along the hop. There are two $50 gift cards up for grabs: one each to Hero Arts and Pear Blossom Press!

I hope you all have a great day!
Maria


BLOG HOP LIST:

Pear Blossom Press/ Amanda Stevens

Kelly Latevola Taylor

Carissa Wiley

Lynnea Hollendonner

Niccole Kulig

Daniel West

Lydia Fiedler

Ilina Crouse

Maria Willis: You are here.

Mindy Eggen

Dana Joy

Seeka 

Libby Hickson

Pocono Pam

Hero Arts

Monday, January 4, 2021

Hero Arts My Monthly Hero Kit January 2021 and a Giveaway!

Hi everybody and happy Monday! I'm glad you are here because today the first My Monthly Hero Kit of the year is releasing and it is amazing! 

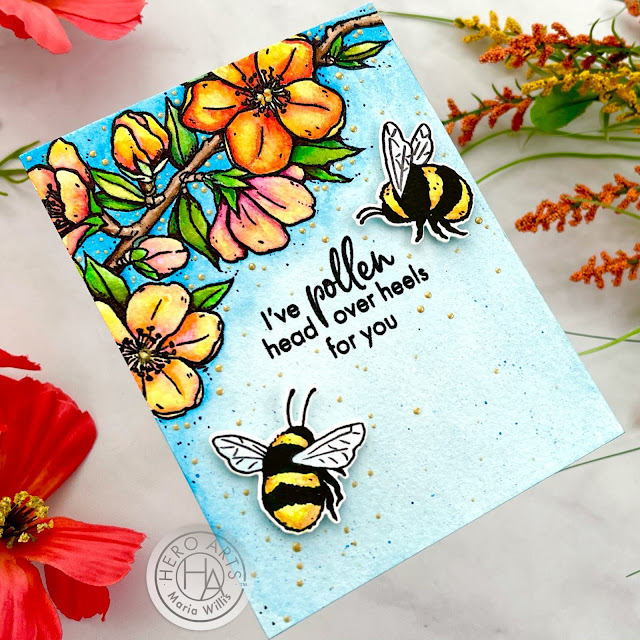
This kit is possibly my favorite MMH kit of all time! I could not stop making cards with it so I've got five cards to share with you today and I'll have more in the coming days. I have used some of the add-ons in my cards today but I'll have more of those in separate posts as well. Make sure to check back in here if you'd like to see those. For my first card I decided to watercolor the large floral image. I stamped it in INTENS-ified black ink (good for both watercoloring and copic coloring) onto Arches cold press watercolor paper. I also stamped a bunch of the chubby bees (three or four of each) too.
Cardbomb, Maria Willis,Hero Arts, My Monthly Hero Kit January 2021,flowers,bees,stamps,stamping, mixed media, art, die cutting,#hexagon, color,watercolor,ink blending,grunge,

I watercolored with my Daniel Smith watercolors and cut the bees out with the coordinating die cuts. I stamped the sentiment using my Misti.
Cardbomb, Maria Willis,Hero Arts, My Monthly Hero Kit January 2021,flowers,bees,stamps,stamping, mixed media, art, die cutting,#hexagon, color,watercolor,ink blending,grunge,

I don't have the honey lacquer that comes with the kit but I wanted to add some "pollen" to my card. I used some gold Nuvo drops to add little dots everywhere. I think that you will get a similar affect using the lacquer that comes with the kit.
Cardbomb, Maria Willis,Hero Arts, My Monthly Hero Kit January 2021,flowers,bees,stamps,stamping, mixed media, art, die cutting,#hexagon, color,watercolor,ink blending,grunge,

I used foam adhesive to adhere my bees to the card and that was it!
Cardbomb, Maria Willis,Hero Arts, My Monthly Hero Kit January 2021,flowers,bees,stamps,stamping, mixed media, art, die cutting,#hexagon, color,watercolor,ink blending,grunge,

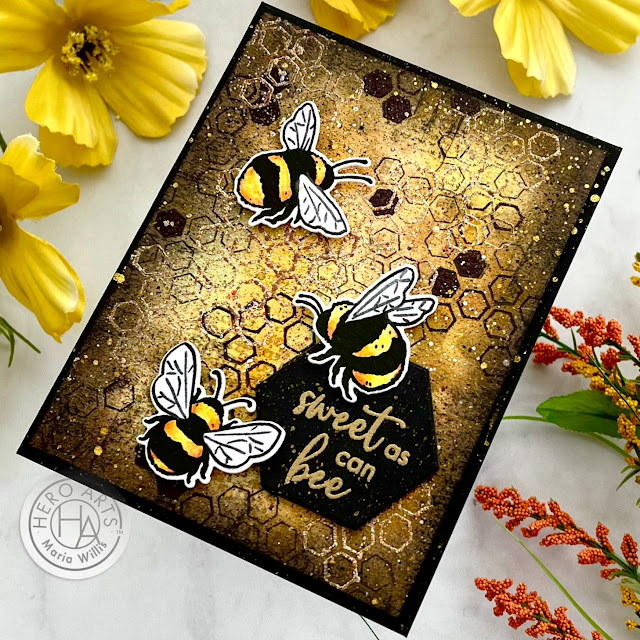
Now, if you visited my blog yesterday for the countdown then you've already seen this next card. I did promise that in today's post I'd let you know how I made this grungy card. I started out with a piece of watercolor paper that had a light watercolor wash of yellow and orange. Once it was dry I inkblended some Butterbar and Tangerine ink over the top in random splotches. Don't worry about doing perfect ink blending because we're going for grunge! Next, I grabbed the new Peek-A-Boo Honeycomb Fancy Die and use it as a stencil (yep, think outside the box and get the most you can out of all of your products) to ink blend some brown hexagons randomly onto your background.
Cardbomb, Maria Willis,Hero Arts, My Monthly Hero Kit January 2021,flowers,bees,stamps,stamping, mixed media, art, die cutting,#hexagon, color,watercolor,ink blending,grunge,

Next I stamped the hexagon outline stamp from the kit in black ink. I stamped it randomly all over the place using an acrylic block. My stamping was not perfect. I used a black sharpie to color in some of the hexagons. Next, I stamped the same hexagon outline stamp using Versamark ink so that I could heat emboss. Note that I didn't bother using an anti-static tool as it doesn't matter if you get embossing powder all over the place with this technique. It actually looks cool with random specks of embossing powder. I used Sand embossing powder. This is probably my favorite embossing powder for grungy backgrounds because it has multiple colors of metallic powder in it (this results in a variety of metallic colors being embossed and it looks amazing). The embossing powder also has different sized powder granules which really adds to the texture on the card.
Cardbomb, Maria Willis,Hero Arts, My Monthly Hero Kit January 2021,flowers,bees,stamps,stamping, mixed media, art, die cutting,#hexagon, color,watercolor,ink blending,grunge,

To finish off the background I ink blended the edges in Cup O' Joe ink and a darker brown ink. Then I dragged my black ink pad around the edges to really darken it up. This might sound scary but don't worry about messing it up. The whole thing with grungy backgrounds is that you are making a beautiful mess. Just try to make sure that you have areas of light and dark so that you have contrast. the last thing that I did was to splatter the backgroud with gold ink from my Midas Touch pen.
Cardbomb, Maria Willis,Hero Arts, My Monthly Hero Kit January 2021,flowers,bees,stamps,stamping, mixed media, art, die cutting,#hexagon, color,watercolor,ink blending,grunge,

To finish the card off I added a gold embossed sentiment on black cardstock cut with the new Hexagon Infinity dies. Then I added some chubby bees (leftover from my first card) with foam tape and, that was, that!
Cardbomb, Maria Willis,Hero Arts, My Monthly Hero Kit January 2021,flowers,bees,stamps,stamping, mixed media, art, die cutting,#hexagon, color,watercolor,ink blending,grunge,


For my third card I again watercolored the floral stamp. I didn't like the way the bottom of my painting came out so I cut it off. 
Cardbomb, Maria Willis,Hero Arts, My Monthly Hero Kit January 2021,flowers,bees,stamps,stamping, mixed media, art, die cutting,#hexagon, color,watercolor,ink blending,grunge,

I splattered some blue cardstock with Metallic white ink and added a frame that I created with the rectangle infinity dies. My flowers were adhered to the top of the card using foam adhesive.
Cardbomb, Maria Willis,Hero Arts, My Monthly Hero Kit January 2021,flowers,bees,stamps,stamping, mixed media, art, die cutting,#hexagon, color,watercolor,ink blending,grunge,

I cut the "thinking of you" sentiment out three times from white cardstock and once from the yellow glitter cardstock that came from the kit. I glued the layers together and then glued those to my card front. I added some sequins to finish the card off.
Cardbomb, Maria Willis,Hero Arts, My Monthly Hero Kit January 2021,flowers,bees,stamps,stamping, mixed media, art, die cutting,#hexagon, color,watercolor,ink blending,grunge,


My next card is a much more simple card. I splattered an A2 sized, black card base with gold. Then I cut a rectangle out three times in yellow cardstock and once from black. I glued the layers together and adhered them to the card base. This gave a subtle but fun look because you can see the yellow layers from the sides.
Cardbomb, Maria Willis,Hero Arts, My Monthly Hero Kit January 2021,flowers,bees,stamps,stamping, mixed media, art, die cutting,#hexagon, color,watercolor,ink blending,grunge,

I heat embossed my sentiment and added the bee with foam tape.
Cardbomb, Maria Willis,Hero Arts, My Monthly Hero Kit January 2021,flowers,bees,stamps,stamping, mixed media, art, die cutting,#hexagon, color,watercolor,ink blending,grunge,

I finished the card off with some black enamel dots. Here's a closer look at the yellow layers of cardstock that you can see from the sides of this card.
Cardbomb, Maria Willis,Hero Arts, My Monthly Hero Kit January 2021,flowers,bees,stamps,stamping, mixed media, art, die cutting,#hexagon, color,watercolor,ink blending,grunge,

I almost forgot to mention that I added some of the honeycomb die cut from the kit to the bottom of the centerpiece to trim it out.
Cardbomb, Maria Willis,Hero Arts, My Monthly Hero Kit January 2021,flowers,bees,stamps,stamping, mixed media, art, die cutting,#hexagon, color,watercolor,ink blending,grunge,

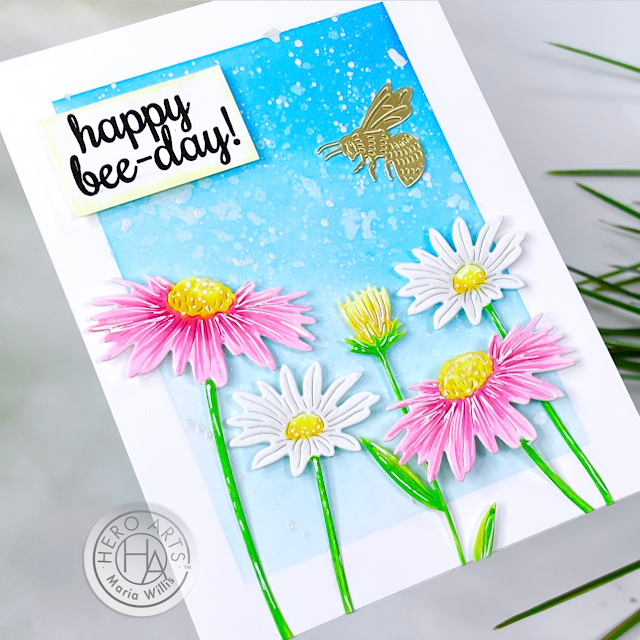
For this next card I started out by ink blending the background in Splash and Blue Hawaii inks. Then I sprayed it with White Iridescent Shimmer spray and splattered it with White Metallic Ink.
Cardbomb, Maria Willis,Hero Arts, My Monthly Hero Kit January 2021,flowers,bees,stamps,stamping, mixed media, art, die cutting,#hexagon, color,watercolor,ink blending,grunge,

While that dried I cut some flowers out of white cardstock using the new Bees and Flowers Fancy Dies. I also cut some out of gold mirror cardstock that had adhesive paper on the back (meaning that my little gold bee is a sticker). These flowers are so beautiful! I colored the flowers in with my copic markers but they have so much detail that they are beautiful even just cut out of white. 
Cardbomb, Maria Willis,Hero Arts, My Monthly Hero Kit January 2021,flowers,bees,stamps,stamping, mixed media, art, die cutting,#hexagon, color,watercolor,ink blending,grunge,

After stamping my sentiment (Bee and Flowers Wreath stamp set), cutting it out, and coloring yellow around the edges... I glued all of my pieces onto my card.
Cardbomb, Maria Willis,Hero Arts, My Monthly Hero Kit January 2021,flowers,bees,stamps,stamping, mixed media, art, die cutting,#hexagon, color,watercolor,ink blending,grunge,

Here's a look at what comes in this mont's kit. It comes with the main stamp set and coordinating dies, the hexagon window die, three sheets of glitter paper and a honey lacquer pen. Such a fun kit!


Ok, that is it for me today but before we go I want to make sure you know about the giveaway...

GIVEAWAY: Hero Arts will give away one $50 gift card, drawn from the comments left across the hop. Enter by Sunday, January 10th at 11:59pm pacific, and the winner will be announced on the Hero Arts blog the following week. All you need to do to enter is leave me a comment below.

To continue on the hop you can head over to Michelle's blog to see what beautiful things she's made with this kit. If you prefer to see the whole list of blog hoppers I've got that listed for you below.

Have an awesome day!
Maria


BLOG HOP LIST: 

PRODUCT SUPPLY LIST:


Friday, December 11, 2020

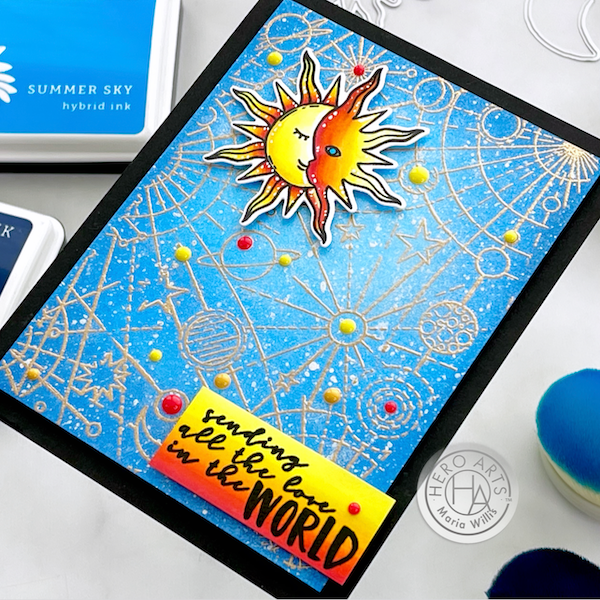
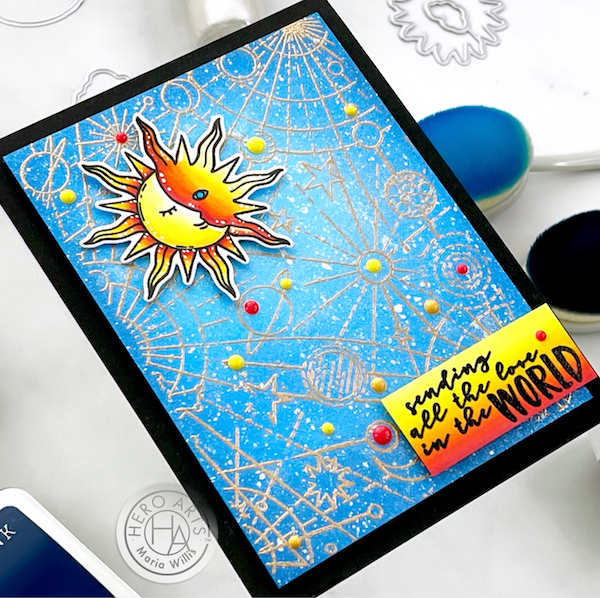
Sending All the Love in the World and a Grungy Background!

Hey everybody! I am just popping in today to let you all know that I am up on the Hero Arts blog today with this fun card. For all of the details on how I made it please head over to Hero Arts
Cardbomb, Maria Willis,Hero Arts,ink blending, stamping, stamps, ink, paper, papercraft, art, color, diy, handmade, cards, cardmaking, love,copic markers,

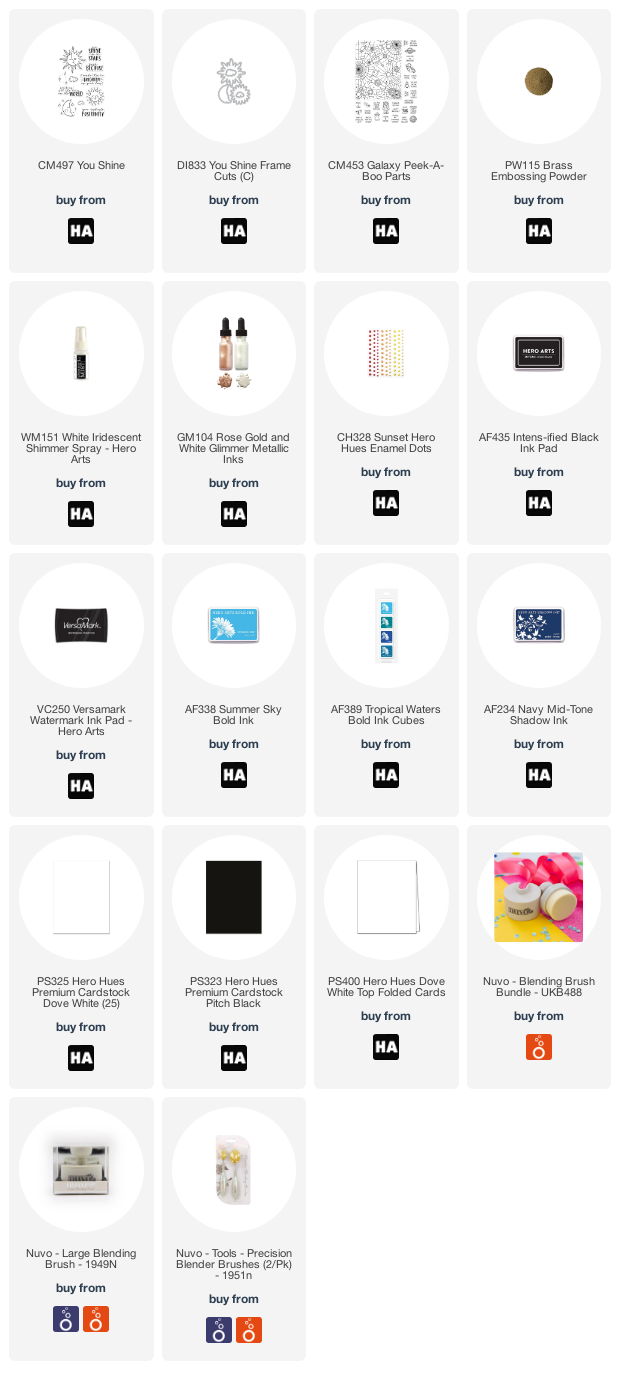
I used the You Shine and Galaxy Peek-a-Boo Parts stamp sets for this card.

Cardbomb, Maria Willis,Hero Arts,ink blending, stamping, stamps, ink, paper, papercraft, art, color, diy, handmade, cards, cardmaking, love,copic markers,

I created a fun, grungy background and used an image and sentiment from the You Shine stamp set as my focal points.
Cardbomb, Maria Willis,Hero Arts,ink blending, stamping, stamps, ink, paper, papercraft, art, color, diy, handmade, cards, cardmaking, love,copic markers,

All of the details for this card are available now over at Hero Arts!

Have an awesome day you guys!
Maria


PRODUCT SUPPLY LIST:


Monday, November 16, 2020

Reverse Confetti: Stock Your Stash- Holiday and Winter Cards!

Hi everybody! I hope you are having a great day today and thanks so much for stopping by. Today I am here to let you know it is time to Stock Your Stash with Reverse Confetti! Stock Your Stash is Reverse Confetti's monthly card making challenge and this month's theme is "Holiday & Winter" themed cards. For my card I've decided to use the adorable Yuletide Mice stamp set and coordinating dies.  I started out by stamping my mouse in copic friendly black ink and coloring the image in with copic markers. The most fun part of coloring in this image was adding the glow from the star to the little mouse's face. 
Reverse Confetti,cards,greeting cards,cardmaking,cardmaker,christmas,holiday,stamp,stamping,art,ink,create,handmade,diy,color,copic markers,#distressoxideinks,


Next, I ink blended a panel using distress oxide inks. Then I splattered the panel with water and dried it to oxidize and lift some of the ink. Next, I sprayed the background with iridescent shimmer spray and then splattered it with white metallic paint. This left me with a shimmery, textured, cosmic looking background. I used the Star Struck Cover Panel Confetti Cuts to cut some stars out of white cardstock. I adhered these with a mix of foam adhesive, glue dots and liquid adhesive to make the stars sit at different depths.
Reverse Confetti,cards,greeting cards,cardmaking,cardmaker,christmas,holiday,stamp,stamping,art,ink,create,handmade,diy,color,copic markers,#distressoxideinks,


After gluing my ink blended panel to a white card base I heat embossed my sentiment in white embossing powder onto black cardstock. Then, I cut the sentiment down into a small strip. I adhered both the sentiment and mouse image onto the front of the card using foam adhesive and that finished off my card.
Reverse Confetti,cards,greeting cards,cardmaking,cardmaker,christmas,holiday,stamp,stamping,art,ink,create,handmade,diy,color,copic markers,#distressoxideinks,


To play along with the Reverse Confetti Stock Your Stash challenge this month just make a holiday or winter themed card using Reverse Confetti products. Then, head over to their challenge blog and enter your card to win! Good luck!


Thanks so much for stopping by today you guys! I hope you have an amazing day and I will see you back here soon!

Maria


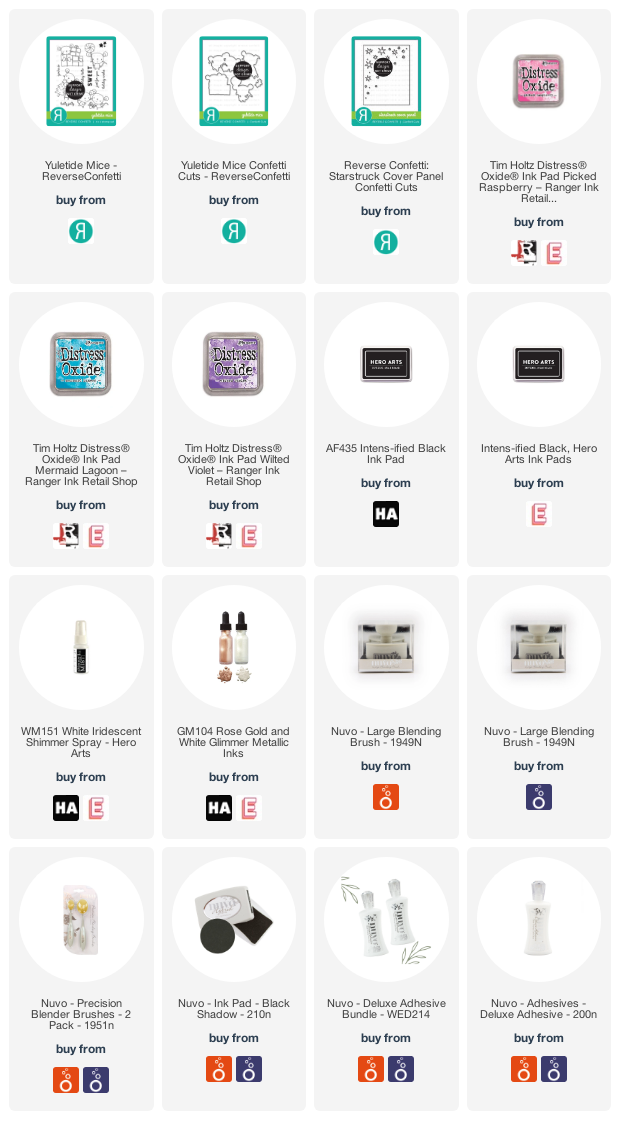
PRODUCT SUPPLY LIST: 
01 09 10