Hey everybody! I hope you're having an awesome day! Today I'm excited to be back with another creation using goodies from yesterday's Hero Arts release. Yesterday the new Premium My Monthly Hero kit came out and I absolutely died when I saw the rub-ons (image transfer sheets) that are included in the kit. These are so cool because you can rub them onto a background if you want, or, you can rub the butterflies onto paper, vellum, etc and use the coordinating butterfly dies (also in the Premium kit) to cut them out. On this project I've done both.
I started out by using my Rounded Rectangle Infinity Dies to cut out a piece of watercolor paper. I sprayed that with DIY Reactive Sprays in Root Beer and Blue Raspberry and ink blended around the edges with Indigo Core ink. Next, I added some of the floral and star rub-ons to the background then stamped the Background Texture Strips in Sand ink. I added White and Gold Glimmer Metallic ink splatters too.
To add more texture to the background I stamped the Background Texture Strips again using Onyx Pigment in and then heat embossed that in clear. I rubbed the edges into some Versamark embossing ink and added Sand Embossing Powder. This added some amazing, gritty texture to the edges. Next, I grabbed my Star Cluster Stencil and added some Gold Hero Wax. I wanted a little more of that gold so I rubbed some Hero Wax around the edges with my finger.
Once my background was done I used the gorgeous butterfly rub-on and transferred it a piece of white cardstock. I die cut it with the coordinating dies from the Premium kit. Then I added a coiled up piece of black metallic thread to the back with some foam tape and added that to my project to finish it off.
That's it for today you guys but please come back tomorrow as I'll be sharing three cards that I made with the gorgeous new Papillons Digital Card kit!
Have an awesome day and I'll see you back here soon!
Maria
PRODUCT SUPPLY LIST (Affiliate links may be used at no extra cost to you):
Hey everybody! It's Maria here and I am really happy to be here to share a mixed media card that I had so much fun making. I started out wanting to focus on the beautiful new Leaf Circle Stencil (so great for Autumn cards, right?) and when I saw how magical it looked in gold I decided to go with more of a nature/woodland theme. I know this card looks like a lot but it's actually easy to make so let me walk you through it step-by-step.
BACKGROUND:
Cut a piece of Luxe Watercolor Cardstock to 4.25" x 5.5"
Spray the background with liquid watercolor sprays of your choice (I added liquid watercolor and water to a spray bottle to create my own sprays). I used Leaf, Jungle Mist, Indigo and Art Print Brown. Allow to dry.
Spray the same watercolor colors onto your work surface and smoosh your dried background into the color. This will add unpredictable visual texture and some extra color to your background. Allow to dry.
Place your Leaf Circle Stencil over your background piece. I secured mine from the back with washi tape so that it would stay in place. Use your palette knife to spread Gold Hero Wax through the stencil. Don't worry about perfection- partial stenciling will add character to your background.
Remove the stencil (put it in water so it will be easy to wash later) and immediately sprinkle some Sand Embossing Powder over the wet wax (a couple of pinches should do the trick). Make sure not to completely cover the wax so that you can still see the gold.
Heat the embossing powder and wax to set them. This will melt the Sand Embossing Powder and it will also bubble the wax for extra texture.
Splatter the background with White Glimmer Metallic Ink for extra magic.
FOCAL POINT:
Stamp the text stamp from the Sending Love Mail stamp in Granite ink onto vellum. Cut this piece to 2.5" x 3.5" and set it aside.
Use the Mushrooms and Ferns Fancy Dies to die cut mushrooms and ferns from Luxe Watercolor Cardstock. I left the ferns white.
Using Liquid Watercolor sprays, spray the tops of the mushrooms Orange and the stems Art Print Brown.
I used Tomato ink (ink-blending) and Copic markers to add a little bit of extra color and shading to my my mushrooms.
Stamp the sentiment from Zen Messages in Aquamarine Pigment ink, heat emboss it in clear and cut it into a strip.
ASSEMBLE:
Add your background to a cardbase. I used Precision Glue to do this.
Adhere your sentiment strip to the vellum piece then layer the ferns and mushrooms on top using either foam adhesive or glue dots to create dimension.
Add foam adhesive to the vellum making sure to hide it behind the sentiment, ferns and mushrooms. Attach the focal point to the background.
The final step is to splatter the focal point with White Glimmer Metallic ink. I covered my sentiment with a piece of washi tape to protect it.
Now you've got a finished card with tons of color and eye-catching texture! I hope some of you might have fun recreating this card or using some of the techniques I've shared today.
I hope you all have an awesome day today, but if your day is feeling hard, try to just let that shitake go!
Hey everybody! The wait is over! It's time for theHero ArtsAugust 2022My Monthly Hero release and this month's kit is a stencil lovers dream! It's got a set of four layering stencils to create a beautiful desert scene. There are also a sentiment stamp set, some coordinating dies, four ink cubes, five sheets of Luxe watercolor paper and bronze PearlEx (affiliate links may be used at no extra cost to you)!
Before I get to my cards, if you aren't familiar with the My Monthly Hero kit, it's a kit that is released by Hero Arts on the first Monday of every month. It always has a fun, themed, collection of stamps, dies and other goodies. The cost is just $34.99/month and the value is always much greater! This month's kit is valued at $70!
You have the option to subscribe (subscribing now means your first kit will be the September release), or, to buy your favorite kits as one-off purchases. Be aware that once these kits sell out they are gone for good. If you see a kit you like make sure to snatch it up quickly! There are also a ton of amazing add-on products! You can buy the add-ons as a bundle at a discounted rate or just pick up your favorite products.
HOT TIP: Ok, so here's something I quickly figured out with this kit... I am someone who struggles with leaving white space on a card (especially in a landscape scene like this where white space within the design would really break it up). If you are like me then I suggest the easy solution of starting either with colored card stock and ink blending on that, inkblending a background in the colors of your choice before using the stencils, or, grab a background from your stash and have fun with that!
For my first project I decided to grab a watercolored background from my stash and be inspired by the vibrant colors. This panel was created with DIY Liquid Watercolor sprays and I believe I used Pink and Dandelion but it looks like I could've sprayed a little Creamsicle Reactive spray in there too. I decided to put the pink up top for a magically hazy sky and the yellow/orange tones worked well for a desert floor. I used the stencils from the kit and inkblended in Taffy reactive ink to add the gorgeous skyline and some sandy pits. For the next layer I used a sponge dauber to gently add in highlights with Gold Glimmer Metallic Ink. If you decide to do this make sure to go easy so that the gold doesn't run under your stencil and you can get some crisp highlights. I wanted more gold so after the first layer dried I went back with a paintbrush and thickened it up.
I wanted to give the mountains a little bit more definition since doing pink mountains against a pink sky didn't provide a lot of contrast. I grabbed a pink colored pencil and traced around the edges of the mountains and added a little shading where I thought it would look good. That was an easy way to make the mountains pop. I wanted to add to the sky as well so I masked off the bottom part of the card (coordinating dies make this easy) and splattered it with White Glimmer Metallic Ink. Before moving on, I heat embossed my sentiment onto the panel using Onyx Pigment ink and clear embossing powder.
Next, I used a separate piece of white paper to stencil my cacti in Key Lime Fizz and Green Apple Reactive Inks. I used the coordinating dies to cut them out and adhered them with foam tape. I finished my card off by adding it to a black mat and a card base.
I made this next card using a new stencil called Desert Road Stencil. I used some Pixie Spray to lightly adhere it to my cardstock before working with it so that I could get clean lines. I inkblended everything above the dark brown section using Dandelion, Pale Tomato, Sand, Caramel, Cup O' Joe, and Espresso inks. It was too hard to keep the colors separated by section as I had originally planned so I blended over the tops of the stencil lines and ended being happy with the look
By the time I was halfway down the card I was tired of inkblending and started wondering if it would work well to use my copic markers with the stencil. I decided to try it out and this technique allowed me to get some nice shading in my gray road and to move quickly down the rest of the card. I do think the ink blending at the top looks smoother though.
Here's another card I made using the kit. This one has a watercolor look that was easy to achieve. If you'd like the details for this card you can find them by clicking here.
Ok, that's it for today you guys! I hope you have an amazing week and that you'll keep hopping along with us for more inspiration. Remember to comment below to enter yourself in the giveaway!
Maria
GIVEAWAY:
We will give away a $50 gift card, drawn from the comments left across the hop. Enter by Sunday, August 7th at 11:59pm Pacific, and the winner will be announced on the Hero Arts blog the following week.
Hey everybody! It's almost time for the August 2022Hero ArtsMy Monthly Hero release and this month's kit is a fun one especially for all of you stencil lovers out there!
If you aren't familiar with the My Monthly Hero kit, it's a kit that is released by Hero Arts on the first Monday of every month. It always has a fun, themed, collection of stamps, dies and other goodies. The cost is just $34.99/month and the value is always much greater!
You have the option to subscribe (subscribing now means your first kit will be the September 2022 release), or, to buy your favorite kits as one-off purchases. Be aware that once these kits sell out they are gone for good. If you see a kit you like make sure to snatch it up quickly!
Today is Day Oneof the Countdown to Creativity and I've got a card with an faux-ish watercolor technique to share with you. This month's kit comes with a set of four stencils that allow you to create a gorgeous desert scene. The kit also comes with Luxe Watercolor cardstock so I took that as my que to create a watercolor scene using my stencils as the guide.
I used my DIY liquid watercolor sprays with the stencil to create layers of color. All I did was place my stencil down and then spray my color over the top. Once that layer had dried I added the next layer of color. The colors that I used were Cocoa, Mulled Wine, Leaf, Jungle Mist and Teal. Once I had the full desert scene I added color to the sky by masking off the scene (there's a die that makes this easy) and spraying it with White Iridescent Shimmer Spray followed by a splatter of White Glimmer Metallic Ink.
The final steps were to stamp my sentiment in Onyx Pigment ink and heat emboss it in clear, then add my scene to a Nautical mat.
Well, that is it for today folks! I hope you've enjoyed this little sneak peek. If you'd like a chance to win this kit before you can buy then head on over to the Hero Arts blog and enter for your chance to win!
Have an awesome day and I will see you back here on Monday for the full (super amazing) release!
Maria
PRODUCT SUPPLY LIST (affiliate links may be used at no extra cost to you):
Hey everybody! It's almost time for the April 2022Hero ArtsMy Monthly Hero release and this month's kit is an eclectic kit filled with love!
If you aren't familiar with the My Monthly Hero kit, it's a kit that is released by Hero Arts on the first Monday of every month (later this month because of the holidays). It always has a fun, themed, collection of stamps, dies and other goodies. The cost is just $34.99/month and the value is always much greater!
You have the option to subscribe (subscribing now means your first kit will be the May 2022 release), or, to buy your favorite kits as one-off purchases. Be aware that once these kits sell out they are gone for good. If you see a kit you like make sure to snatch it up quickly!
Today is Day Oneof the Countdown to Creativity and I've got a sneak peek of this month's kit to share with you... and this month's kit is absolutely gorgeous! I can't spill all of the beans yet because this is just a sneak peek so stay tuned because the full release is on Monday!
For today's card I stamped the large background stamp from the kit in Soft Granite ink onto white cardstock.
Then I used the layering stencils and Reactive Inks in Lemon Drop, Taffy, Key Lime Fizz and Green Apple to color in the image using blending brushes. I used copic markers to color in the sweet little bees.
To finish my card off I added a black sentiment on gray cardstock and added a matching cardbase. I also tied some silver thread around the sentiment piece for a little something extra.
Ok you guys, that is it for today but I am telling you that this release is phenomenal so please come back on Monday to check out the full reveal!
Have an awesome day!
Maria
PRODUCT SUPPLY LIST (Affiliate links may be used at now extra cost to you):
Hey everybody! I'm just popping in to let you all know that I'm up on the Hero Arts blog today with this shimmery, fun card! I wanted to create an easy card that is still eye-catching and this is what I came up with. Head on over to Hero Arts to check out all of the details.
I love the look of the Glitter Paste on black cardstock and using a large word die to finish the card off made my job easy.
Hi everybody! I'm popping in with a fun card from the lates Simon Says Stamp STAMPtember release! Now it's Picket Fence Studio's turn to join the fun with an adorable cat stamp set called, Sarcastic Kitties. You can get just the stamp set, or, go big and get the stamp and die bundle.
I decided to go with a mixed media look for my mini-slimline card. I grabbed a watercolored, galaxy background from my stash and then added some gold mousse through the SSS Circle Dots Stencil to add a little texture and shine.
Then I watercolored on of the cats from the set using my Karin markers. I only used two colors ( a gray and a pink) but I was able to mix them to achieve a range of shades.
I heat embossed my sentiment in black and added some extra detail to the background with a black posca pen. Then I adhered the cat to my card with foam tape, attached the background to a black cardbase, and called it good!
Thanks for stopping by today! I hope you have an awesome day and I'll see you all back here soon!
Hey everybody! It's almost time for the AugustHero ArtsMy Monthly Hero release and this month's kit is absolutely gorgeous!
But first, if you aren't familiar with the My Monthly Hero kit, it's a kit that is released by Hero Arts on the first Monday of every month. It always has a fun, themed collection of stamps, dies and other goodies. The cost is just $34.99/month and the value is always much greater!
You have the option to subscribe (subscribing now means your first kit will be the October release), or, to buy your favorite kits as one-off purchases. Be aware that once these kits sell out they are gone for good. If you see a kit you like make sure to snatch it up quickly!
Today is Day One of the Countdown to Creativity and I've got a sneak peek of this month's kit to share with you... and this month's kit is mindblowingly amazing! This month's kit has a gorgeous, large sunflower stamp. Even more amazing than that it's got a five piece layering set of stencils that makes it so incredibly easy for you to quickly and perfectly color this image in!
For this card I stamped my image in Onyx Pigment ink and heat embossed it in clear. Then I used the stencil set to add my color using blending brushes. I cut the image out with the coordinating die and set it aside.
Next, I cut a piece of Paradise cardstock to 4.25" x 5.5 and partially inkblended it using Blue Hawaii ink. I wanted the die background to be darker behind the sunflowers. I added the flowers with foam tape and then splattered my whole cardfront with White Glimmer Metallic ink.
I layered up my "hello" sentiment in black and white and glued that to my card. The final touch was to add some clear sequins.
Ok, you guys! That's it for today but please come back on Tuesday so I can share the whole kit and a really fun foiling technique with you!
Have a great day!
Maria
PRODUCT SUPPLY LIST (Affiliate Links may be used at no extra cost to you):
Hi everybody! I am so excited because today is launch day for the new Hero Arts Summer Catalog and it is on fire! You can check out the whole catalog HERE if you'd like to but first join us for an amazing blog hop full of crafty inspiration using the new products. I've got four cards to share with you today so let's get to it!
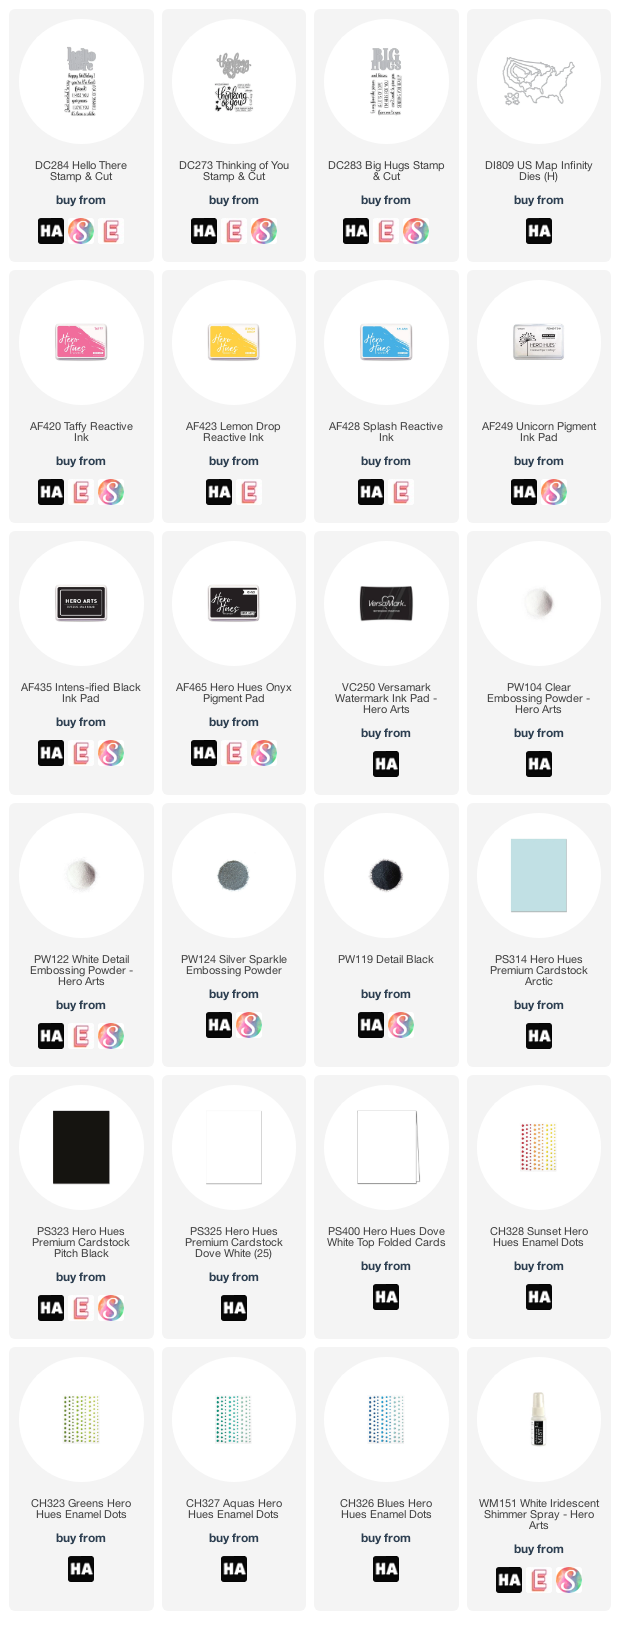
For my first card I paired the new Brick Wall Bold Prints, the new Message Strips Stamp and Cut, and the Hello There Stamp & Cut. I started by ink blending my background panel in Taffy, Lemon Drop and Splash Reactive Inks.
Next, I put my background in my Misti along with the Brick Wall Bold Prints stamp and stamped it using Unicorn White Pigment ink. This resulted in my background having a light and subtle look. Now, if you've used pigment ink before you know it can take a little time to dry... I don't always have the patience for all of that waiting so I tossed some clear embossing powder onto the wet ink and heat embossed it. This added extra texture and shine to my "bricks." When I stamped, the ink on my background reacted with the wet ink and some of it lifted off my card and the color stayed on the stamp. I used that residual ink to stamp a second background panel which you will see on my last card today.
I heat embossed the "I miss you" from the new Message Strips Stamp & Cut in Onyx Pigment ink and clear embossing powder. Then, I mounted my background onto a black card base and added "Hello There" and some enamel dots to finish my card off.
My next card is a slimline card and although it looks pretty fancy it really wasn't all that hard to make. I recently made a similar card using different products so if you'd like to watch the process you can find that video HERE. I used my slimline stencils to cut out a panel and then ink blended it using Lemon Drop, Taffy and Splash reactive inks (my three favorite reactive inks). Then I used the new Floral Tile Stencil to add Moonstone Glimmer Paste to the background. Now, this isn't a slimline stencil so I just readjusted it and added more paste where I wanted it.
I heat embossed the new Succulent Bouquet stamp in silver onto vellum. This is so easy and creates such a gorgeous look! I die cut the succulents and then adhered them to my background using foam which I had cut into small pieces to hide it from sight.
To finish my card off I added a sentiment using both the Thinking of You Stamp & Cut as well as the Message Strips Stamp & Cut. The final step was to add some jewels and pearls for a little bling.
This next card was made using the new Looking Glass Canyon Lands dies. This is just one set in an amazing collection of Looking Glass dies and I hope that you'll check them out! There are also two different sized stencils to help you with alignment so that you can always get perfect placement of your dies! I cut all three dies out of separate pieces of cardstock and then colored them with copic markers. I also prepared a background sky using splash ink and White Iridescent Shimmer Spray.
Next, I layered my die cuts together making sure that they were properly aligned (when I made this card I didn't have the alignment stencils yet and had to wing it). I adhered the layers using foam tape so that there would be depth to my scene.
Once my little die cut scene was properly put together, I used a square die to cut a black card panel. I created a gold frame using two square dies and glued that on to frame the hole. Then I heat embossed my sentiment below the frame. I adhered my little scene to the back of the black cardstock so that it was perfectly framed. I added extra foam tape to the back of the panel and attached it to a cardbase to finish off the card.
I thought the card needed a little something more so I added some tiny arrows from the US Map Infinity Die set.
Ok, you guys, that's all I've got for today! Thanks so much for stopping by and I hope you will continue on with the rest of this inspiration filled blog hop celebrating the launch of the Hero Arts Summer Catalog. Make sure to check out the Giveaway info below and leave a comment right here on my blog to be entered to win!
Have an awesome day!
Maria
GIVEAWAY:
Hero Arts will give away THREE $50 gift cards, drawn from the comments left across the hop. Enter by Sunday, May 30th at 11:59pm pacific, and the winner will be announced on the Hero Arts blog the following week.
Hi everybody! It's My Monthly Hero Monday and we finally get to share the entire release with you. This month's kit has a bit of a geometric theme. The kit is valued at $83 and includes a 6" x 8" stamp with 16 coordinating die cuts, 3 geometric rotating stencils, 3 ink cubes and a blending brush! I had a ton of fun with this kit and went the mixed media route when I made my cards. I've got a video up sharing some tips for creating mixed media cards that pop! CLICK HERE or scroll down to watch the video.
My first card uses stamps from the kit as well as one of the geometric stencils.
If you're having trouble viewing this video you can CLICK HERE to watch it now.
I started by inkblending the background in reactive inks. Then I stenciled, stamped, heat embossed, splattered and generally made a mess of my background.
I finished my card off by stamping three butterflies in two tones of ink each, die cutting them and adding them to my card with a sentiment.
With this next card I opted for a cleaner look and inkblended a rainbow background.
I used a stencil to add embossing ink and heat embossed the design using White Puffy embossing Powder.
I added a die cut from the Love You stamp & cut XL, added some enamel dots and that it was it for this card.
This card has a bit of a darker toned look. I used yellow, brown and black to create my background.
Then I grunged up my background and you can watch exactly how I did it in my video.
I used stamps from the monthly kit and stamped in contrasting colors so that the images would pop off of the background.
There are some really fun add-ons this month and my favorite is the Graphic Reef Stamp set (it's got a coordinating die set too). I created a background using reactive inks and a stencil from the kit.
Then I heat embossed some of the images from the Graphic Reef stamp set on to watercolor paper and colored them with my Karin markers. I cut them out with the coordinating dies so that I could pop them up with foam tape.
You can watch the whole process in my video (it will up soon).
My last card is a card I shared on Friday for my Countdown post but I wanted to make sure to add it here in case you missed that post.
I used acrylic paint through a stencil and then added Nuvo gilding flakes on top.
I added a heat embossed gold glitter sentiment to finish the card off.
Ok you guys, that's it for today but before I go I want to let you know about an amazing giveaway!
GIVEAWAY:
We will give away one $50 gift card, drawn from the comments left across the hop. Enter by Sunday, April 11th at 11:59pm pacific, and the winner will be announced on the Hero Arts blog the following week.