Wednesday, July 24, 2019

Shaker Card vs. Mixed Media Card for Tonic Studios

maria willis, #cardbomb, #card, #cards, #handmade, #handmadecards, #stamp, #ink, #paper, #papercraft, #art, #diy, #tonicstudios, #tonicstudiosusa, #mermaid, #diecutting, #shaker card, #mixedmedia,
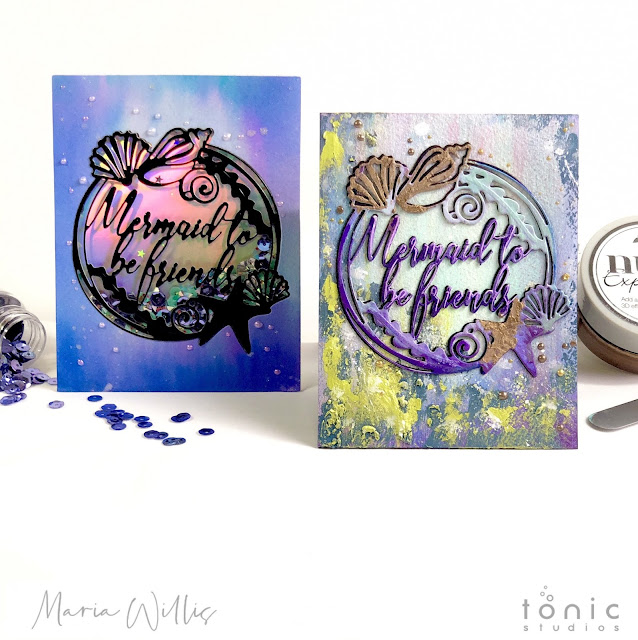
Hey, everyone! It's Maria from Cardbomb here to share two totally different cards made from the same layout. In fact, not only did I use the same layout but I even used the same die. One of my favorite things about Tonic Studios is the diverse range of products they carry. Whether you want gorgeous paper, pens, pencils, watercolors, alcohol markers, mousses, drops, embellishments, etc. Tonic Studios has it! Today I've decided to share how you can make your cards dramatically different just by switching out your papers and art mediums.

CARD #1: MERMAID SHAKER CARD

For my first card I decided to do a clean and simple shaker card...

maria willis, #cardbomb, #card, #cards, #handmade, #handmadecards, #stamp, #ink, #paper, #papercraft, #art, #diy, #tonicstudios, #tonicstudiosusa, #mermaid, #diecutting, #shaker card, #mixedmedia,

SHAKER CARD HOW TO:
  • Start with a piece of watercolor paper cut to 4.25" x 5.5"
  • Use Nuvo Aqua Flow Pens and a wet paint brush to watercolor the background
  • Cut the "Mermaid to Be Friends" die out of the watercolored background. You will use the background for this card. Save the die cut for card #2.
  • Then, put double sided adhesive sheet onto the back of a piece of glossy black cardstock. Cut the "Mermaid to Be Friends" die out of this piece too.
  • Cut a piece of Holo Waves Mirror Cardstock to fill the front of a white card base and adhere it. Set this aside.
  • Adhere a piece of clear acetate to the backside of your watercolored background.
  • Peel the backing off of your black, glossy die cut and fit it into the watercolored background and adhering it to the acetate.
  • Flip the watercolor background over and add foam adhesive. Make sure that it is not visible through the acetate window. Also make sure that you create a foam barrier around the die cut sentiment so that your sequins cannot fall out of the shaker.
  • Add as many sequins and embellishments as you want to in a pile in the center of the Holo Waves cardstock. Make sure to use thin embellishments like glitter and sequins so that they will slide easily in your shaker card.
  • Stick the watercolored piece onto the card base trapping the embellishments behind the acetate window and within the foam adhesive barrier you created earlier.
  • Splatter the front of the card with Glitter Gloss sparkle!
  • Embellish with Dream Drops in Cloud 9
  • Shake the card and smile!

CARD #2: MIXED MEDIA MERMAID CARD

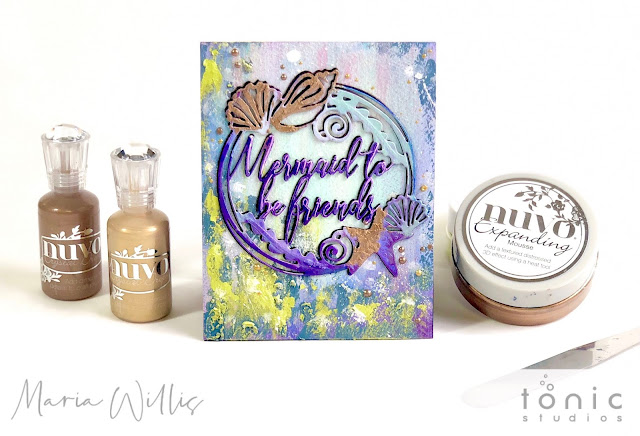
For my second card I decided to go for a completely different look. I used Nuvo Aqua Flow Pens, Embellishment Mousse, Expanding Mousse and Nuvo Drops to get a tarnished, under the sea, mixed media look...

maria willis, #cardbomb, #card, #cards, #handmade, #handmadecards, #stamp, #ink, #paper, #papercraft, #art, #diy, #tonicstudios, #tonicstudiosusa, #mermaid, #diecutting, #shaker card, #mixedmedia,

MIXED MEDIA CARD HOW TO:

  • Cut a piece of watercolor paper to 4.25" x 5.5"
  • Watercolor wash the background using Nuvo Aqua Flow Pens and a wet paintbrush.
  • Using a dry paint brush, brush some Nuvo Embellishment Mousse over the watercolor background. This will add color, texture and a sparkly sheen.
  • Grab a palette knife and use it to smear some Nuvo Expanding Mousse onto the background. Heat the mousse with a heat tool until it expands.
  • After you've gone crazy with your mousses on top of the watercolor background grab the leftover sentiment die from the first card. Add mousse and texture as you like.
  • It's important that the die will stand out on the background so add extra color using the Aqua Flow Pens if needed.
  • Cut two more "Mermaid to Be Friends" pieces out of black cardstock. Adhere these pieces together adding the colorful one on top.
  • Glue the tripled up die cut to the front of the card.
  • Splatter the card with Midas Touch Aqua Flow Pen.
  • Embellish the card with Nuvo Drops in Dirty Bronze and Mustard Gold.

HOT TIPS FOR USING NUVO MOUSSES:

  • HOT TIP #1: The more Expanding Mousse that you add (I am referring to thickness), the more the product will expand and give you incredible texture as you heat it. Thinly applied Expanding Mousse will not give you the same result.
  • HOT TIP #2: As the Expanding Mousse reacts to heat it will lose its sheen and have a more matte finish. This provides a wonderful contrast between the Expanding Mousse and the shinier Embellishment Mousse.
  • HOT TIP #3: You can brush either Embellishment or Expanding Mousse over the top of the heated Embellishment Mousse. This will not just add color but will add sheen as well.


maria willis, #cardbomb, #card, #cards, #handmade, #handmadecards, #stamp, #ink, #paper, #papercraft, #art, #diy, #tonicstudios, #tonicstudiosusa, #mermaid, #diecutting, #shaker card, #mixedmedia,

That is it for today you guys. I hope you're feeling inspired to break out all of your Tonic products and have a good play. There will be a video sharing how I made both of these cards. So, if you're interested please be on the lookout for that. Thank you for your patience with this as I've just moved and am not properly set up yet so everything is taking just a bit longer than normal. In the meantime I would love to hear which card you like better? Are you more of a clean and simple cardmaker? Or, do you like get messy and slap down layers of product onto your projects? Please leave a comment below and let me know!

Have an amazing day you all! Thanks so much for checking out today's projects and we will see you back here soon!

Maria


PS: These Mermaid dies are not available in the Tonic USA shop but you can still have them! No matter where you might be in the world you can order from the Tonic UK shop. Tonic UK offers affordable, fast shipping for international customers making it easy for you to purchase whatever you want from the UK shop!

TONIC UK SUPPLY LIST:


TONIC USA SUPPLY LIST:


Wednesday, July 10, 2019

Cardmaking with Hexagon Dies and Tonic Nuvo Shimmer Powders


#cardbomb, #mariawillis, #card, #handmade, #handmadecards, #cards, #art, #watercolor, #tonicstudios, #tonicstudiosusa, #color, #diecutting, #stamp, #ink, #paper, #papercraft, #hexagon,


Hey everybody! I'm so happy to be here today sharing a fun way to use your dies and art supplies as the focal point of your cards. Although, I chose to use hexagons for my cards, you can use any shape that you like. I started out with a large piece of watercolor paper. Then, I used my Nuvo Shimmer Powders and Nuvo Aqua Flow Pens to watercolor the entire paper. After that, I used a stencil and Nuvo Expanding Mousse to add texture on top of the color.

 Card #1: Blues & Purples

#cardbomb, #mariawillis, #card, #handmade, #handmadecards, #cards, #art, #watercolor, #tonicstudios, #tonicstudiosusa, #color, #diecutting, #stamp, #ink, #paper, #papercraft, #hexagon,
In the picture below you can see the embossing mousse and how much texture it adds. You can use it both with, and without, a stencil for different looks.


#cardbomb, #mariawillis, #card, #handmade, #handmadecards, #cards, #art, #watercolor, #tonicstudios, #tonicstudiosusa, #color, #diecutting, #stamp, #ink, #paper, #papercraft, #hexagon,
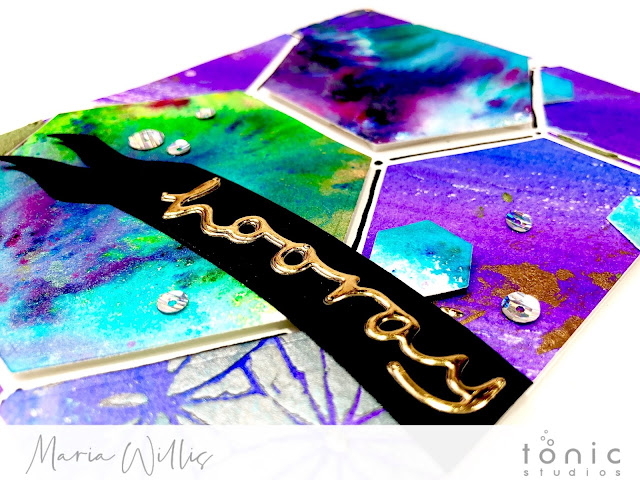
Next, I used my Hexagon dies to cut out as many hexagons as I could. Each hexagon was beautiful in a unique way. This shimmery one below was one of my favorites. Because of that, I popped it up on foam adhesive and made it the focal point of my first card.

#cardbomb, #mariawillis, #card, #handmade, #handmadecards, #cards, #art, #watercolor, #tonicstudios, #tonicstudiosusa, #color, #diecutting, #stamp, #ink, #paper, #papercraft, #hexagon,
After filling my card with hexagons I cut off any over hanging edges. Next, I added a die cut, "hooray," sentiment. That gold foil really pops off of the black cardstock.


#cardbomb, #mariawillis, #card, #handmade, #handmadecards, #cards, #art, #watercolor, #tonicstudios, #tonicstudiosusa, #color, #diecutting, #stamp, #ink, #paper, #papercraft, #hexagon,

Card #2: Pinks & Yellows

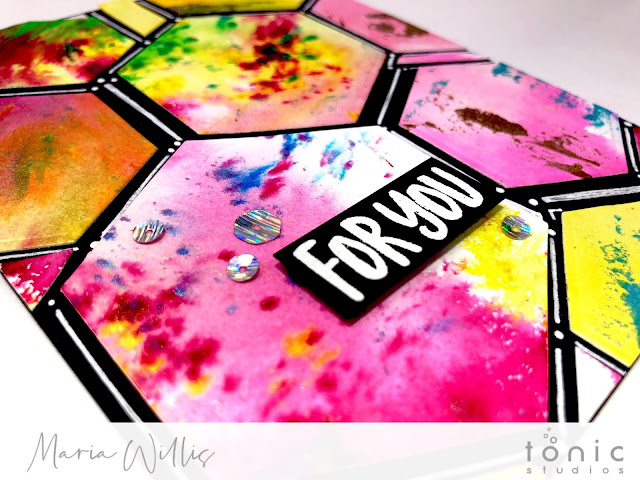
For my first card I paired blues, purples and even some greens together. However, for the second card I wanted a different color scheme. So, I went with pinks and yellows. The black background provides a great contrast for the brightly colored hexagons. After adhering the hexagons I decided to fill in some of the black space by drawing with a gel pen. I liked the way it looked. Therefore, I decided to do the same thing on my first card.


#cardbomb, #mariawillis, #card, #handmade, #handmadecards, #cards, #art, #watercolor, #tonicstudios, #tonicstudiosusa, #color, #diecutting, #stamp, #ink, #paper, #papercraft, #hexagon,
It was difficult to capture how shimmery these cards are in my pictures. Here's a close up that shows the sparkle from the Shimmer Powders.


#cardbomb, #mariawillis, #card, #handmade, #handmadecards, #cards, #art, #watercolor, #tonicstudios, #tonicstudiosusa, #color, #diecutting, #stamp, #ink, #paper, #papercraft, #hexagon,
This picture (below) shows smooth watercoloring (Aqua Flow Pens). On top of that you can see both Embellishment and Expanding Mousses.


#cardbomb, #mariawillis, #card, #handmade, #handmadecards, #cards, #art, #watercolor, #tonicstudios, #tonicstudiosusa, #color, #diecutting, #stamp, #ink, #paper, #papercraft, #hexagon,
The sentiment was heat embossed in white on black cardstock. Then, it was popped up on foam adhesive for dimension.

#cardbomb, #mariawillis, #card, #handmade, #handmadecards, #cards, #art, #watercolor, #tonicstudios, #tonicstudiosusa, #color, #diecutting, #stamp, #ink, #paper, #papercraft, #hexagon,
Overall, I'm really happy with the way these cards came out. I had fun making a mess with my watercolor supplies. Then, I got to puzzle piece it all together to make the finished card. I enjoyed the whole process.

#cardbomb, #mariawillis, #card, #handmade, #handmadecards, #cards, #art, #watercolor, #tonicstudios, #tonicstudiosusa, #color, #diecutting, #stamp, #ink, #paper, #papercraft, #hexagon,

How to make these cards:

  • Watercolor a big sheet of paper with both Shimmer Powders and Aqua Flow Pens.
  • Add texture with Embellishment and Expanding Mousse. Stencils are optional.
  • Use Hexagon dies to cut out shapes from the decorated paper.
  • Adhere the hexagons to your card using liquid and foam adhesive.
  • Add details with a gel pen.
  • Die cut or heat emboss a sentiment.
  • Embellish your card with sequins or Nuvo Drops.


#cardbomb, #mariawillis, #card, #handmade, #handmadecards, #cards, #art, #watercolor, #tonicstudios, #tonicstudiosusa, #color, #diecutting, #stamp, #ink, #paper, #papercraft, #hexagon,


That's all for today folks! I hope my projects have inspired you to go have some crafty fun! I am adding links to the products I've used today in case you'd like to check any of them out.

Have an amazing day!
Maria


SUPPLY LIST: TONIC STUDIOS UK


SUPPLY LIST: TONIC STUDIOS USA


Monday, July 1, 2019

Altenew Build-A-Flower: Camellia Japonica Release Blog Hop + Giveaway

Hey Everybody, happy Monday! I hope your week is off to a great start. Today I'm excited because Altenew is releasing the new Build-a-Flower: Camelia Japonica set and it is gorgeous! Something fun to know is that you have the option to get this BAF set alone, or, to get it bundled with ink cubes at a 5% discount (click here to check out the ink bundle). You can also subscribe to Altenew's Build-A-Flower Montly Subscription Plan for an even larger discount and receive a set every month. I love that there are so many options to meet everyone's needs. Before I get too far into my post I want to make sure you know that this post is part of a big blog hop hosted by Altenew. Not only will many talented designers be sharing their ideas for this set but there will be prizes too! So, I hope you will hop along with us, get inspired to create with this new set, and enter to win some fabulous prizes (prize info at bottom of post). 

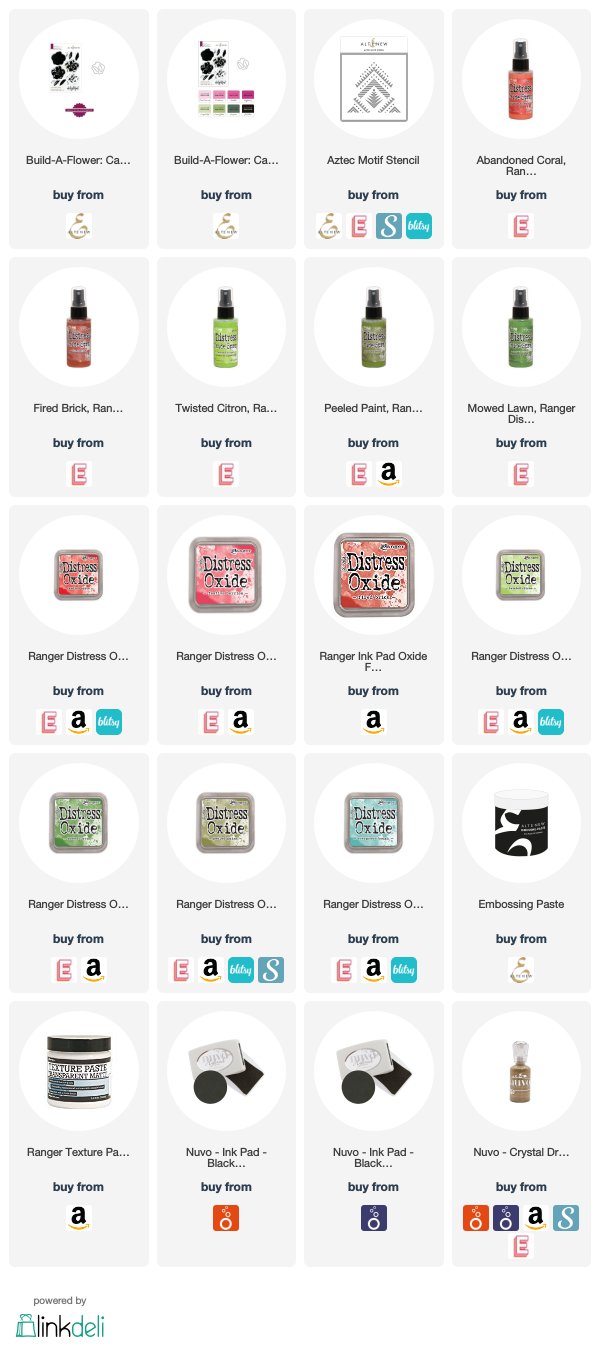
For my card I decided to go for a mixed media look and I had a ton of fun coming up with this. I started out by blending my background in shades of blue with my Distress Oxide inks. I left the center lighter so that my flower would stand out a bit more. Then I used embossing paste and the Aztec Motif stencil to add some texture to the background. I used one of the detail stamps from the leaves to stamp in black around the edges. Then I splattered the heck out of the whole background and added some bronze Nuvo drops for good measure.

The flower and leaves were colored by ink smooshing them with Distress Oxide inks in reds and greens. After the flower dried I stamped the detail in with black ink (I only used one of the detail stamps). This set doesn't have a stem so I made my own. I just used the same color greens that I did for the leaves on a piece of white cardstock. Then I cut a long strip out with scissors. After that I added details to all of the flower pieces with a black sharpie and a white gel pen. 

I heat embossed the sentiment in white onto black cardstock. Next, I cut it all out and popped it up on my card using foam adhesive for dimension. The flower and parts of the leaves are popped up as well. 


Thanks so much for stopping by today! If you'd like a chance to win a $15 gift certificate from Altenew all you need to do is leave a comment below. More info about prizes can be found below along with links to the products I've used today. 

Now you are off to visit the fabulous Maryam Perez to see what she has created to share with us today.

Have an amazing day you guys!
Maria


Prizes:
To celebrate this release, Altenew is giving away a $30 gift certificate to 6 lucky winners! Please leave a comment on the Altenew Card Blog and/or Altenew Scrapbook Blog for a chance to win.

We’ll also draw a winner to receive a $15 gift certificate from the comments left on each designer’s blog on the blog hop list below. All winners will be announced on the Altenew blogs on 7/7/2019.

Blog Hop Order:
Please add a link to the person before and after you in your post. You are encouraged to include the full list as well.


PRODUCT SUPPLY LIST:


01 09 10