Sunday, September 30, 2018

Coloring with Copics and Tim Holtz Distress Crayons

Hi you guys! It's late on a Sunday evening here in California so I am going to be short and sweet with today's post. A while back I had a lot of fun making this card. I filmed my process but hadn't had time to finish the video editing until today... so, finally I get to share this with you. I used a Tim Holtz stamp set (see list below for info) and stamped it multiple times using masking fluid to cover the images that I wanted to keep in the front. 
#cardbomb, #mariawillis, #timholtz, #stamp, #ink, #paper, #papercraft, #papercrafting, #copics, #copicmarkers, #distresscrayons, #cards, #art, #handmade, #cardmaking, #video, #videotutorial,

Then I used Copic Markers to color it. I was trying to work on using dark colors to add shadows and depth to my coloring.
#cardbomb, #mariawillis, #timholtz, #stamp, #ink, #paper, #papercraft, #papercrafting, #copics, #copicmarkers, #distresscrayons, #cards, #art, #handmade, #cardmaking, #video, #videotutorial,

I also added details with a fine tip sharpie and a white gel pen. 
#cardbomb, #mariawillis, #timholtz, #stamp, #ink, #paper, #papercraft, #papercrafting, #copics, #copicmarkers, #distresscrayons, #cards, #art, #handmade, #cardmaking, #video, #videotutorial,

The real magic maker for this project was Tim Holtz Distress Crayons blended over the top of some of my Copic Coloring. 
#cardbomb, #mariawillis, #timholtz, #stamp, #ink, #paper, #papercraft, #papercrafting, #copics, #copicmarkers, #distresscrayons, #cards, #art, #handmade, #cardmaking, #video, #videotutorial,


I could never explain exactly how I made this card so here's a video detailing my process from start to finish. I hope you like it!


Over at the Simon Says Stamp Wednesday Challenge they've got an Anything Goes theme going on this week. That of course means that I'll be adding my card to their gallery. Check out their challenge by clicking HERE.

Have an amazing week you guys! If you're interested in checking out the products that I've used please check out the product list below. If you purchase through my links I do get a small commission at no extra charge to you (so if you purchase through my blog-many thanks!).

Bye for now!
Maria


PRODUCT LIST:

Wednesday, September 19, 2018

Moon Men! Love You to the Moon & Back!

Hi! I hope you all are having an amazing day. I'm just popping in to share another shimmery, sparkly card that I made with Tonic Nuvo Shimmer Powder and the adorable Moon Men stamp set from Reverse Confetti. 

#cardbomb, #simonsaysstamps, #reverseconfetti, #tonicstudiosusa, #nuvoshimmerpowder, #moonmen, #watercolor, #art, #outerspace, #copics, #color, #paper, #stamping, #ink, #card, #cardmaking, #videotutorial, #video,

I started by making the background using the black Nuvo Shimmer Powder (the color is called Storm Cloud). Then I used the yellow/gold powder (Solar Flare) to splatter the background so that it looked like outer space. I also splattered it with clean water and then blotted it with a paper towel so that I had some lighter spots that gave the background a little bit more depth. I cut the background out with a frame from Lawn Fawn so that it would have stitched detail on the edges.
#cardbomb, #simonsaysstamps, #reverseconfetti, #tonicstudiosusa, #nuvoshimmerpowder, #moonmen, #watercolor, #art, #outerspace, #copics, #color, #paper, #stamping, #ink, #card, #cardmaking, #videotutorial, #video,

I colored my moon man with my Copic markers and then heat embossed my sentiment in white onto black cardstock. I added both of those to the card front with foam adhesive so that they would pop off of the card. 
#cardbomb, #simonsaysstamps, #reverseconfetti, #tonicstudiosusa, #nuvoshimmerpowder, #moonmen, #watercolor, #art, #outerspace, #copics, #color, #paper, #stamping, #ink, #card, #cardmaking, #videotutorial, #video,

I also colored the moon with Copics and adhered it to the card using foam tape. If you look closely at the moon you can see that the craters sparkle and shine. That's because I blinged them out by watercoloring some Solar Flare shimmer powder onto them. It looks really cool in real life. 
#cardbomb, #simonsaysstamps, #reverseconfetti, #tonicstudiosusa, #nuvoshimmerpowder, #moonmen, #watercolor, #art, #outerspace, #copics, #color, #paper, #stamping, #ink, #card, #cardmaking, #videotutorial, #video,

I also added some clear epoxy embellishments to the background. I think they added to the galaxy look without being too over the top. 
#cardbomb, #simonsaysstamps, #reverseconfetti, #tonicstudiosusa, #nuvoshimmerpowder, #moonmen, #watercolor, #art, #outerspace, #copics, #color, #paper, #stamping, #ink, #card, #cardmaking, #videotutorial, #video,


If you aren't familiar with how to use the Tonic Nuvo Shimmer Powders and want to see some fun ways to use them-check out this video below. 

Over at the Simon Says Wednesday Challenge this week they've got a Bling It On themed challenge and I'm adding this card to the mix. If you want to check out all of the cool inspiration from the Simon Says Stamp design team just click HERE to head over there. 

If you're interested in checking out the products that I've used today please feel free to check out the links below. If you decide to do any shopping through the links below I will get a small commission at no extra cost to you (so thanks for shopping with me!).

Ok! It's dinner time... so I'd better go make dinner now. Have a great one and I'll be back soon!

Maria
mariawillis@hotmail.com


PRODUCT SUPPLY LIST:

Monday, September 17, 2018

Going Monochromatic with Distress Oxides and a Rad Background Stamp!

Hello! Today I've got a fun monochromatic card to share with you. The inspiration to make something monochromatic came from this month's challenge over at A Blog Named Hero. I bought this background stamp (Cross-Hatch Bold Prints) quite a while ago and I've been itching to use it. It's got such a fun, crazy pattern that I thought it would provide enough interest for  what is otherwise a simple card. 
#cardbomb, #mariawillis, #card, #cardmaking, #handmade, #heroarts, #distressoxides, #tonicstudiosusa, #monochromatic, #heatemboss, #technique, #create, #creative, #color, #art, #diy, #ink, #stamp, #paper, #papercraft,

I started out by heat embossing the background stamp with Tonic Nuvo Embossing Powder in Blue Odyssey (it's a sparkly, darker blue). Then I sponged the background with Distress Oxide Inks with the lightest color at the top (Broken China), then Salty Ocean, followed by Mermaid Lagoon and finally the darkest color, Blueprint Sketch. After that I used a wet paint brush (wet with water) to fill in the little triangles on each vertical "stripe." As I went along I used a clean, dry paper towel to dry the water and lift some of the Distress Oxide ink off of the card. The ink that was left on the card in the triangles oxidized when it came into contact with the water and turned a lighter shade of blue. 
#cardbomb, #mariawillis, #card, #cardmaking, #handmade, #heroarts, #distressoxides, #tonicstudiosusa, #monochromatic, #heatemboss, #technique, #create, #creative, #color, #art, #diy, #ink, #stamp, #paper, #papercraft,

I used Hero Arts White Satin Pearl Embossing Powder to heat emboss the sentiment. Then I sponged over it with Blueprint Sketch. I wiped the embossed sentiment clean of excess ink and cut my sentiment into strips. Then I mounted it onto the card using foam adhesive.
#cardbomb, #mariawillis, #card, #cardmaking, #handmade, #heroarts, #distressoxides, #tonicstudiosusa, #monochromatic, #heatemboss, #technique, #create, #creative, #color, #art, #diy, #ink, #stamp, #paper, #papercraft,

The last thing I did was to add some blue/iridescent sequins (they look pink with the light hitting them but they really are blue).
#cardbomb, #mariawillis, #card, #cardmaking, #handmade, #heroarts, #distressoxides, #tonicstudiosusa, #monochromatic, #heatemboss, #technique, #create, #creative, #color, #art, #diy, #ink, #stamp, #paper, #papercraft,

I mentioned at the beginning of this post that I am entering this card into the the A Blog Named Hero: Monochromatic themed challenge. If you'd like to check out the design team and the other challengers to see some beautiful projects just click HERE to head over there. 

Thanks for stopping by my blog today! I'm adding links to the products I've used below in case your curious about the products or you'd like to do a little shopping. 

That's it for today. Have an amazing day you all!

Maria


Product List: 

Saturday, September 15, 2018

Stencils meet Gel Printing-Ooh La La!

Hello Everyone! It's Saturday and it happens to be my Mother-in-Laws birthday today. We are taking her out to Brazilian Barbecue (Churrasco) for dinner tonight and I am excited! For her birthday I've made her a stash of Thank You cards (her request) and I'm looking forward to giving them to her.

Before we head out I wanted to share this fun card I made to play along with this week's Simon Says Stamp Monday Challenge to use more than one stencil. This is such a cool challenge and even though I love stencils I sometimes forget to use them.
#cardbomb #mariawillis #papercraft #rangerink #papercrafting #color #cards #stamp #ink #paper #cardmaking #handmade #craft #create #diy #art #dinawakleymedia #rangerink  #gelpress #gelprinting #sssmondaychallenge #simonsaystamp,

For this card I used my gel plate and Dina Wakely Media paints to print multiple layers of color using different stencils onto deli paper (that paper your sandwich comes wrapped in at the deli). Then I cut the paper up and chose this piece for my card front. I used my Tim Holtz collage medium to attach it to my card base.
#cardbomb #mariawillis #papercraft #rangerink #papercrafting #color #cards #stamp #ink #paper #cardmaking #handmade #craft #create #diy #art #dinawakleymedia #rangerink  #gelpress #gelprinting #sssmondaychallenge #simonsaystamp,


I love gel printing because getting to see all of the layers of color and texture is so cool to me. My background is bright and happy so I decided that adding some drawing and the sentiment bits in black would really make it pop.
#cardbomb #mariawillis #papercraft #rangerink #papercrafting #color #cards #stamp #ink #paper #cardmaking #handmade #craft #create #diy #art #dinawakleymedia #rangerink  #gelpress #gelprinting #sssmondaychallenge #simonsaystamp,

The sentiment is heat embossed in white on black cardstock. The "YOU" was die cut three time, glued together and then coated in Tonic Nuvo Crystal Effects for a thick, glossy look. I also added star sequins but I didn't like the hole in the center of them so I took a black glaze pen and covered up the holes.
#cardbomb #mariawillis #papercraft #papercrafting #rangerink #color #cards #stamp #ink #paper #cardmaking #handmade #craft #create #diy #art #dinawakleymedia #rangerink  #gelpress #gelprinting #sssmondaychallenge #simonsaystamp,

That's all for today you guys as I've got to get some other things done before we head out to dinner this evening. I hope you'll head over to the Simon Says Stamp Monday Challenge and check out all of the amazing stenciled projects over there. 

Most of the products I've used today are from Ranger Ink. Just in case you'd like to check out the Dina Wakely paints and other products that I've used today I am going to add a link below for you to check it all out. 

I hope you all have an amazing day today! 
Hasta la vista babies!

Maria
mariawillis@hotmail.com


Click here to head over to Ranger Ink. If you shop through my link I do get a little commission at no extra cost to you (so, thank you if you use it!).


Monday, September 10, 2018

Nuvo Shimmer Powders on Glossy Cardstock

Hey! So, if you follow my blog you might have a YouTube video I posted the other day featuring Ten Different Ways to use Tonic Nuvo Shimmer Powders. If you didn't catch it, never fear, I've added it to the bottom of this post so that it's easy to find. Anyhow, let me start with explaining what the Nuvo Shimmer Powders are. They are pigment powders mixed with a good amount of mica. They come in bottles with fine tips so that you can tap out just a little bit of powder (because you really only need a little). Once your powder is on your cardstock you can activate with water or alcohol. The powder will turn into vibrant color that shimmers and is absolutely beautiful. On this card I used the Shimmer Powder on Glossy Cardstock. This is one of my favorite ways to use the powder because since the glossy surface of the paper doesn't absorb the product as easily as other types of paper do, all of the color and mica sit on the surface for a truly stunning look. 

On this card I used three different colors of shimmer powder (listed at bottom of post) on glossy cardstock and then I spritzed lightly with water to activate the powder. After it dried I used this fancy die that was an add-on from the Hero Arts My Monthly Hero Kit in June. I just couldn't throw away any of the cardstock so I decided to make two cards using both the positive and negative pieces of the die.
#cardbomb, #mariawillis, #card, #stamp, #ink, #paper, #papercraft, #papercrafting, #art, #color, #handmade, #diy, #heroarts, #mymonthyhero, #tonicstudios, #tonicstudiosusa, #rangerink, #distressoxideinks, #nuvoshimmerpowder, #nuvo, #video, #videotutorial,


On this first card I used the positive portion of the die and used my distress oxide inks and the birds from the Hero Arts My Monthly Hero Kit (June) to create an ocean scene for the background. I love the way the die cut piece frames the scene.
#cardbomb, #mariawillis, #card, #stamp, #ink, #paper, #papercraft, #papercrafting, #art, #color, #handmade, #diy, #heroarts, #mymonthyhero, #tonicstudios, #tonicstudiosusa, #rangerink, #distressoxideinks, #nuvoshimmerpowder, #nuvo, #video, #videotutorial,

It's really hard to see it in these pictures but this card is so sparkly and shiny! In addition to the front piece being glimmery, I also flicked Clear Wink of Stella all over the background.
#cardbomb, #mariawillis, #card, #stamp, #ink, #paper, #papercraft, #papercrafting, #art, #color, #handmade, #diy, #heroarts, #mymonthyhero, #tonicstudios, #tonicstudiosusa, #rangerink, #distressoxideinks, #nuvoshimmerpowder, #nuvo, #video, #videotutorial,


For the second card I made I used the negative pieces from the die cut glossy cardstock. I will tell you  that this was SO tedious! Check out all of those tiny little pieces that I had to first find and then glue into the appropriate spaces. It took me quite a while but in the end it was worth it.
#cardbomb, #mariawillis, #card, #stamp, #ink, #paper, #papercraft, #papercrafting, #art, #color, #handmade, #diy, #heroarts, #mymonthyhero, #tonicstudios, #tonicstudiosusa, #rangerink, #distressoxideinks, #nuvoshimmerpowder, #nuvo, #video, #videotutorial,

I heat embossed the sentiment in white on black and used foam tape to pop up both the background and the sentiment piece. 
#cardbomb, #mariawillis, #card, #stamp, #ink, #paper, #papercraft, #papercrafting, #art, #color, #handmade, #diy, #heroarts, #mymonthyhero, #tonicstudios, #tonicstudiosusa, #rangerink, #distressoxideinks, #nuvoshimmerpowder, #nuvo, #video, #videotutorial,

I finished the card off by adding sequins in a few different iridescent colors.
#cardbomb, #mariawillis, #card, #stamp, #ink, #paper, #papercraft, #papercrafting, #art, #color, #handmade, #diy, #heroarts, #mymonthyhero, #tonicstudios, #tonicstudiosusa, #rangerink, #distressoxideinks, #nuvoshimmerpowder, #nuvo, #video, #videotutorial,


If you'd like to check see ten ways to use these shimmer powders please check out this video. I  do demonstrate how to use them on glossy cardstock if you are curious about that. 

Thanks for stopping by today! As promised I will have a list of the Nuvo Shimmer Powders that I used on these two cards below. I will also provide a link to Tonic Studios who makes the Nuvo line of products as that is where I like to purchase my powders from. I'll also link you up to Ranger Ink and Hero Arts in case you're interested in the Distress Oxide inks or the die that I've used today.

Happy Crafting!

Maria
mariawillis@hotmail.com


Nuvo Shimmer Powders
-Blue Blitz
-Solar Flare
-Atlantis Burst


-Distress Oxide Inks


-D1524 Beach Frame Fancy Die
-June My Monthly Hero Kit (Sold Out)
-


Watercolor fun and a Fancy Envelope!

Hi guys! Today I've got a fun watercolored card to share with you. It's a long overdue hug/thank you card for a kindness that somebody paid me a couple of months ago. I've been meaning to send this out forever and I figure it's better ridiculously late than never. I started off by heat embossing this gorgeous floral image from Concord & 9th (stamp set is called Hello Lovely) in black onto watercolor paper. 
#cardbomb, #mariawillis, #card, #concord&9th, #flower, #watercolor, #distressinks, #distressoxides, #timholtz, #stamp, #ink, #paper, #papercraft, #papercrafting, #cardmaking, #handmade, #diy, #craft, #create, #art,

Then I used my Distress Inks (regular not Oxide) to watercolor the image. I love how vibrant these inks are even when you watercolor with them. Also, I don't know what you all think about blue leaves but I think they're pretty fun especially alongside the vibrant greens of the other foliage.
#cardbomb, #mariawillis, #card, #concord&9th, #flower, #watercolor, #distressinks, #distressoxides, #timholtz, #stamp, #ink, #paper, #papercraft, #papercrafting, #cardmaking, #handmade, #diy, #craft, #create, #art,

After watercoloring the main image I added some lighter watercoloring in blues and greens to the background. Then I splattered it with the same colors and added some sequins. 
#cardbomb, #mariawillis, #card, #concord&9th, #flower, #watercolor, #distressinks, #distressoxides, #timholtz, #stamp, #ink, #paper, #papercraft, #papercrafting, #cardmaking, #handmade, #diy, #craft, #create, #art,

I decided to make a crazy, fun envelope to go with the card. I used my Distress Oxide inks to lay down some color on my craft mat. Then I spritzed it with shimmer spray and pressed my envelope into it repeatedly making sure the whole thing was covered with color. 

That's all for today folks. Thanks so much for stopping by. Just in case you're interested in picking up either the original Distress Inks, or, the Distress Oxide Inks so that you can play around with them at home I am adding a link to Ranger Ink below. These inks are made by Ranger and I like purchasing directly from the source! Have fun!

Have an amazing day!
Maria


Saturday, September 8, 2018

Tonic Studios Nuvo Shimmer Powder Video Tutorial

Hey everybody! Thanks for stopping by today. I am really excited to have you here because for the first time in forever I have a YouTube video for you. I actually filmed it months ago but summer got the best of me and today I finally had a chance to finish editing it. The video showcases Tonic Studios Nuvo Shimmer Powders and multiple ways to use them. 

The Nuvo Shimmer Powders are pigment powders that are mixed with mica so they have a ton of shimmer in them. I used the powders to create the galaxy background for this card. See the video at the bottom of this post for a tutorial.
#cardbomb, #simonsaysstamps, #reverseconfetti, #tonicstudiosusa, #nuvoshimmerpowder, #moonmen, #watercolor, #art, #outerspace, #copics, #color, #paper, #stamping, #ink, #card, #cardmaking, #videotutorial, #video,

The stamp set that I used is from Reverse Confetti, is called Moon Men, and I love it!
#cardbomb, #simonsaysstamps, #reverseconfetti, #tonicstudiosusa, #nuvoshimmerpowder, #moonmen, #watercolor, #art, #outerspace, #copics, #color, #paper, #stamping, #ink, #card, #cardmaking,

I colored the rocket ship and moon with my Copic markers. Then I used my Solar Flare Shimmer Powder to color the pits on the moon so that they would shimmer.
#cardbomb, #simonsaysstamps, #reverseconfetti, #tonicstudiosusa, #nuvoshimmerpowder, #moonmen, #watercolor, #art, #outerspace, #copics, #color, #paper, #stamping, #ink, #card, #cardmaking,

I heat embossed the sentiment (also from Moon Men) in white on black cardstock and popped it up on foam tape to give it dimension. I added some clear embellishments to the background (I colored some of them blue with my Copics) and that was it for this card. 
#cardbomb, #simonsaysstamps, #reverseconfetti, #tonicstudiosusa, #nuvoshimmerpowder, #moonmen, #watercolor, #art, #outerspace, #copics, #color, #paper, #stamping, #ink, #card, #cardmaking,

Here is a link to the video tutorial I made with some tips (both do's and don'ts) for using these awesome shimmer powders. 


If you're interested in trying these out for yourself I am putting a link to the Tonic Studios Shop below (Click the pic). 

Have an amazing day!

Maria
mariawillis@hotmail.com


Tonic Nuvo Shimmer Powder:
Solar Flare
Atlantis Burst
Blue Blitz
Storm Cloud


Wednesday, September 5, 2018

Let's Get Hopping Blog Hop: Not Your Standard Card

Hi Everybody! I'm so glad to have you here today because it's been forever since I've taken part in a blog hop and today I am hopping along with the crew from Let's Get Hopping. This month the theme is "Not Your Standard Card." Many card makers stick to making the standard A2 sized card (4.25" x 5.5") and don't deviate much from that size. This challenge is great because it forces us to think a little bit differently and I can't wait to see what sizes and shapes the rest of the crew has come up with. 

I've really been looking forward to using this gorgeous stamp that I just got from Concord & 9th called Grateful for Everything. It is such a beautiful floral image and even though it's intended for the Fall season I just wasn't ready to take it that direction yet. It's perfect for this challenge because the image is large and won't fit on an A2 sized card. This gave me the chance to make a narrower, wider card and fill it with this beautiful image. I heat embossed it in White Satin Pearl Embossing Powder (PW118) from 
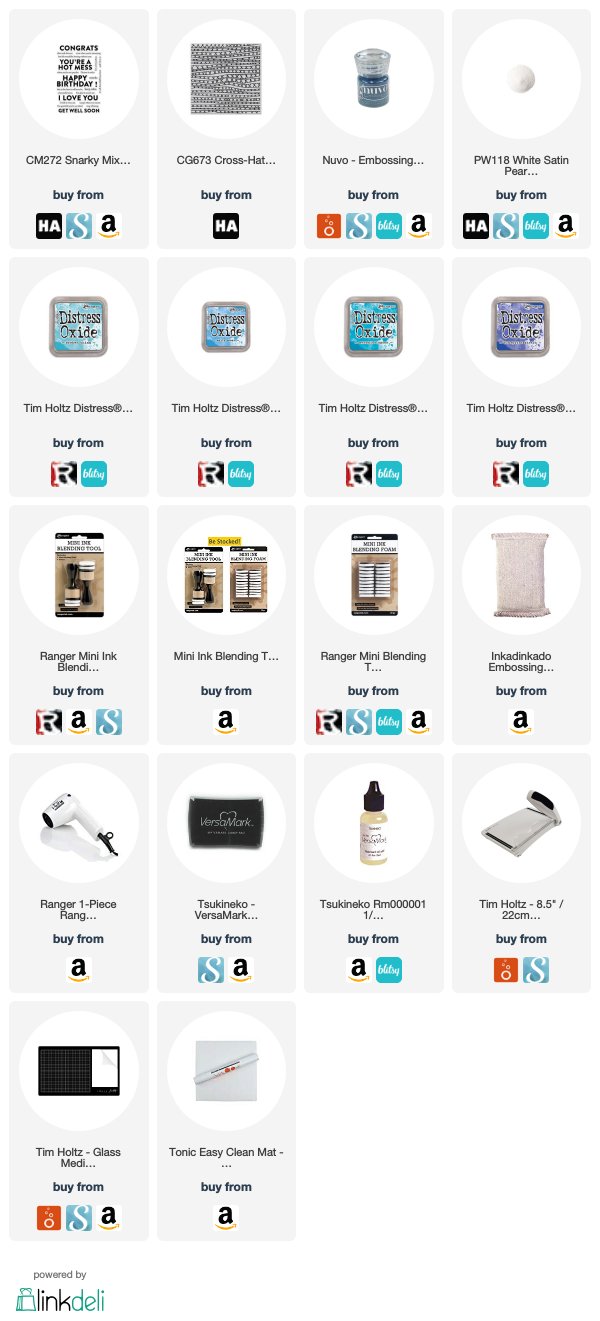
Hero Arts. This embossing powder is so pretty because it takes on a little bit of the color of cardstock that it is embossed on and is pearlescent (sentiment is also embossed in this same EP but looks different because it's on black cardstock). 
#cardbomb, #mariawillis, #heroarts, #concord&9th, #c&9, #altenew, #card, #stamp, #ink, #paper, #technique, #watercolor, #watercolorbleaching, #distressoxideinks, #distressoxides, #distressinks, #timholtz, #copics, #heatemboss, #copicmarkers,

After heat embossing the image I sponged it using my Distress Oxide Inks (colors listed at bottom of post). These inks are such a dream to blend! They look creamy, have a matte finish and even oxidize when you add water. After sponging I flicked some water droplets onto my card with a wet paintbrush. Then I used a paper towel to absorb the water which left behind some pretty, light colored splatter. 
#cardbomb, #mariawillis, #heroarts, #concord&9th, #c&9, #altenew, #card, #stamp, #ink, #paper, #technique, #watercolor, #watercolorbleaching, #distressoxideinks, #distressoxides, #distressinks, #timholtz, #copics, #heatemboss, #copicmarkers,

Next, I used a technique that I learned from the talented Kelly Latevola. She calls it water color bleaching (I think I've called it ink lifting in the past) but then she takes it a step further and incorporates some copic coloring to make her images really pop off of the page. Here's a link to the video I watched where she demonstrates this technique: CLICK HERE. Anyhow, I used a wet paint brush to color over my image. As I wet the image I pressed a paper towel over it to remove some of the ink so that the image looked "bleached." This doesn't remove all of the color but it does leave it looking faded out. After that I went back to the image with my Copic Markers and added shading and drop shadows to give it more detail and add back in some more color where I wanted it. 
#cardbomb, #mariawillis, #heroarts, #concord&9th, #c&9, #altenew, #card, #stamp, #ink, #paper, #technique, #watercolor, #watercolorbleaching, #distressoxideinks, #distressoxides, #distressinks, #timholtz, #copics, #heatemboss, #copicmarkers,

I heat embossed the sentiment from Altenew in the same Hero Arts embossing powder that I used on the floral image. It looks a bit darker and more silvery against the darker cardstock. I popped the image up on foam tape to give it a bit of dimension. 
#cardbomb, #mariawillis, #heroarts, #concord&9th, #c&9, #altenew, #card, #stamp, #ink, #paper, #technique, #watercolor, #watercolorbleaching, #distressoxideinks, #distressoxides, #distressinks, #timholtz, #copics, #heatemboss, #copicmarkers,

To finish the card off I add a coat of Wink of Stella to my image. Then I added some clear sequins in a variety of sizes to give it a little more sparkle.
#cardbomb, #mariawillis, #heroarts, #concord&9th, #c&9, #altenew, #card, #stamp, #ink, #paper, #technique, #watercolor, #watercolorbleaching, #distressoxideinks, #distressoxides, #distressinks, #timholtz, #copics, #heatemboss, #copicmarkers,

Well, that is it for today folks. I hope you've enjoyed my project because I really enjoyed trying out a new (to me) technique. I've put a list of the products that I used and links to the shops where they can be purchased just in case you're interested in trying this technique out for yourself. I am also entering this card in the Simon Says Stamp Wednesday Challenge (Anything Goes)

I hope you'll keep on hopping along with us to check out what the rest of the crew has made for this hop. You can head on over to Jennifer Frost's blog by clicking the next button below.

Have an amazing day!
Maria


PRODUCT SUPPLY LIST AND SHOPS (just click the logos to shop):


-DISTRESS OXIDE INKS:
Picked Raspberry
Twisted Citron
Lucky Clover
Peacock Feathers
Wilted Violet

-BLENDING TOOLS
Ranger Mini Ink Blending Tool (Round)
Ranger Mini Blending Tool Replacement Foams 

-PAINT BRUSH
Tim Holtz Waterbrush Detailer Tip

-Tim Holtz Tools by Tonic Stamp Platform


-White Satin Pearl Embossing Powder (PW118)


-Hello Gorgeous Stamp Set


Monday, September 3, 2018

Altenew Hello Gorgeous!

Hey you guys! Thanks for stopping in today. Last weekend my Mother-in-Law was over at our house for a BBQ and she asked me to make her some thank you cards since she'd run out. She's got a birthday coming up so I'm trying to make her a set of really pretty cards for her stash. I just got this new set from Altenew and it so darn pretty to look at! FYI it's called Hello Gorgeous for good reason. I chose the largest flower stamp from the set and heat embossed it in gold onto watercolor paper.

Then I used four colors of ink total to watercolor. Sometimes I think it's good to try to use fewer colors as it forces me to work on blending and creating new colors. The flowers were done with a pink and a yellow ink that I blended to make different shades of oranges. 

After watercoloring the flowers I added some blue to the background and then added some spatters to grunge up the background a bit more. 

The sentiment is from a Concord&9th set called Grateful for Everything (another mindblowingly gorgeous set). I love the font of this sentiment and I thought it was perfect for a thank you card that didn't actually say, "thank you."

I haven't played along in any challenge blogs for a while so I'm going to link my card up to the Simon Says Stamp Monday (Stamp It On)  and Wednesday Challenges (Anything Goes). I'm also going to play along with the Altenew monthly Inspiration Challenge for the first time. Here's the inspiration photo that they've posted and I went with the theme of floral when I made my card.


That's all for now but I will be back soon as I am blog hopping with the Let's Get Hopping crew in less than 24 hours. I hope you have an amazing day and I will see you back here soon!

Adios for now!
Maria


01 09 10