Hey you guys! It's an exciting day today because today is launch day for the Hero Arts 2019 catalog and let me tell you... this catalog is a doozy! There are so many exciting new products in this catalog and Hero Arts has even revamped their color line with brand new cardstock and inks (gorgeous colors!)! I am really happy to be hopping along with this amazing crew today to share new products with you and to bring you a very generous GIVEAWAY from Hero Arts (details at the bottom of my post).
Before I get too far ahead of myself, let me introduce myself to those of you who are visiting my blog for the first time. My name is Maria Willis and I live with my family in a tiny, little mountain town in California called Boulder Creek. By day I own and run a massage therapy business and by night I trade sleep for crafty time. I've been paper crafting for a few years now and love it. My other hobby is Brazilian Jiu Jitsu (polar opposite of stamping). That's enough about me for now as I'm sure you're here for the cards and not my life story.
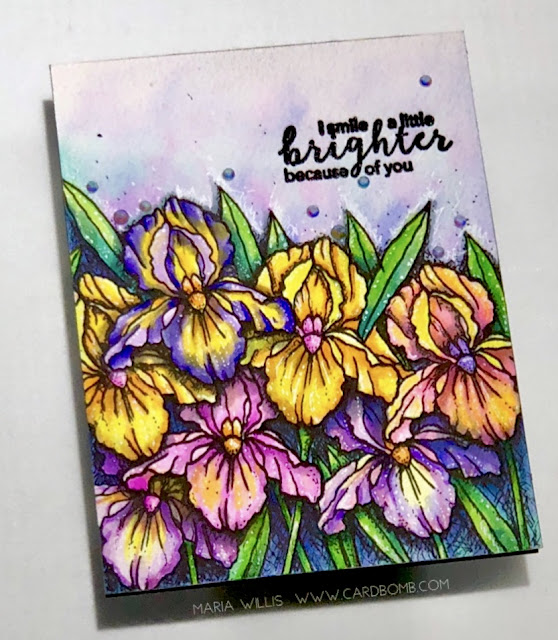
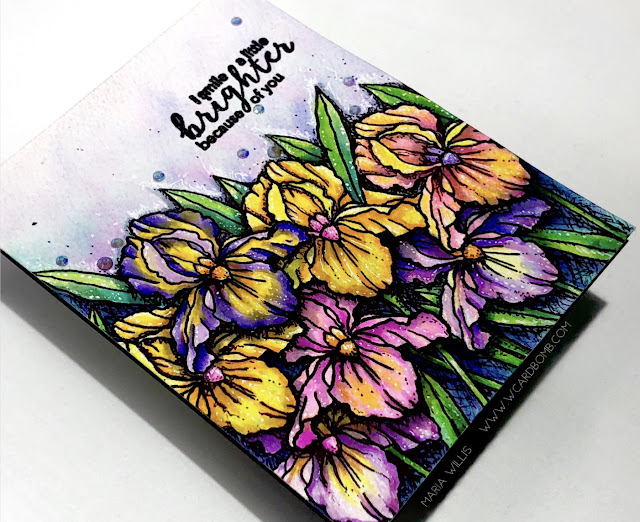
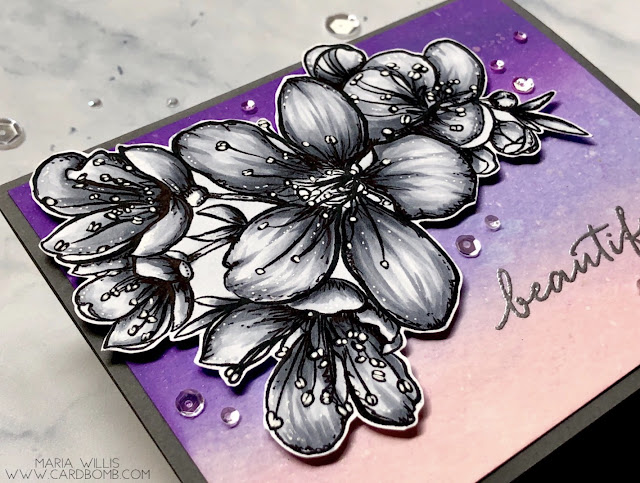
From the second I saw the Color Layering Iris set I knew that I would be using it before anything else. For a quick and easy card you can color layer the stamps for a perfect, detailed look. If you prefer to watercolor or color, it's perfect for that too. I used the outline stamp of the iris and stamped it multiple times masking off between flowers. After stamping the flowers I added in stems and leaves.
I started off by watercoloring each of the flowers with my Arteza Brush Pens and a paint brush. I used Arches cold pressed watercolor paper and a lot of water to get the colors and shading that I wanted.
After watercoloring I wanted to get a little more depth so I decided to add some shading with my Copic Markers. I originally planned to just add shading with the Cool Gray markers but ended up grabbing some colored markers that matched to give the card a little more pop.
I've got this thing where sometimes I have to take a sharpie and scribble all over my cards. I used a black, fine-tipped sharpie to add some detail, darken the nooks and crannies and give my card a "sketchier" look. Then I went in with a white gel pen to add some dots and highlights... and more scribbles to my card.
I added a watercolor wash to the top part of my card and then heat embossed the sentiment in black. I honestly wish that I had stamped it in Hero Arts Intense Black Ink as the image would've looked much crisper. I added some tiny, multicolored gemstones to my card to finish it off with a little bit of sparkle. I hope you like it.
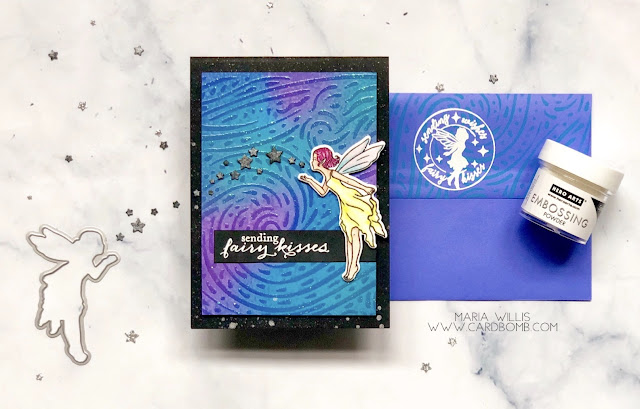
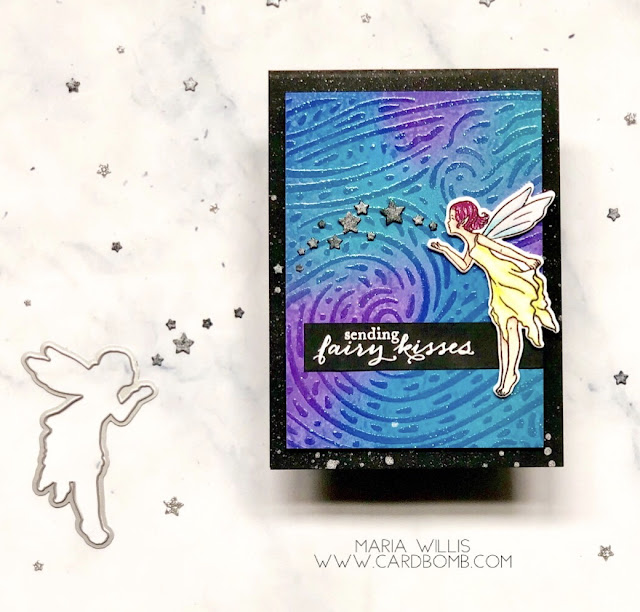
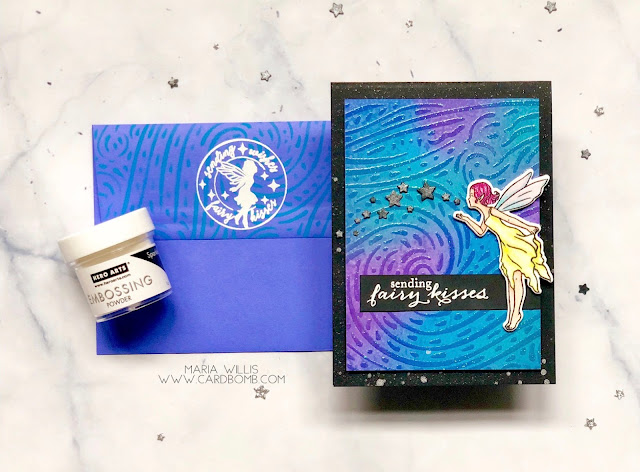
With so many fun new sets in this catalog I couldn't resist making a second card using the Fairy Wishes stamp set and the coordinating dies. I've also used a couple other new products on this card, can you spot them yet?
I just love this little kiss blowing fairy and I thought that the Starry Night Stencil would a perfect background for her. First, I used Distress Oxide Inks to blend the background (Peacock Feathers, Mermaid Lagoon, Wilted Violet, Blueprint Sketch). Then I used a spray bottle to spritz clean water all over one side of the stencil. I laid the wet side of the stencil on top of the Distress Oxide blended background and pressed it down with a paper towel so that the towel would absorb any excess water. I lifted up the stencil and dried my background with a dry paper towel. This process caused the background ink to oxidize and become lighter than the parts of the background that never got wet from the stencil. I made sure the background was completely dry before continuing with the next step.
I dried the stencil off and placed it on the background exactly where it had been the first time (so the design lined up perfectly). Then I took a sponge dauber and applied Versafine Ink to the open areas of the stencil. I lifted the mask off and added Hero Arts Sparkle Embossing Powder to the ink and heat set it. This powder is awesome because it takes on the color of whatever it is applied over and adds a bit of sparkly magic-perfect for a fairy card!
Next I colored my fairy with Copic Markers (I will list all Copic colors for this card at the bottom of my post), cut her out using the coordinating dies and used the Star Confetti Fancy Die to cut out stars in black cardstock. I wanted the stars to shimmer so I spritzed them with Hero Arts White Iridescent Shimmer Mist and let them dry. I also spritzed my black card base with shimmer spray and it looks so sparkly in person! Then I stacked some of the stars up and glued them together.
After heat embossing the sentiment in white, I arranged the fairy on top and added the stars to look like she was blowing star/fairy kisses across the starry night sky.
A fairy card like this one needs a matching envelope and luckily I found the perfect stamp in the Mail Delivery stamp set created by the Stamping Village. This stamp set was created in collaboration by nine different stamp companies and Jennifer McGuire. Not only is it telling of how beautiful this stamp community is but 100% of net profits will go to support the Dreaming Zebra Foundation (they support art and music education for all children across the country regardless of financial background). So, basically, buy this set you guys. Not only will you get a fabulous stamp set, but you will be contributing to art education for youngsters across the USA and that is pretty amazing!
The stamp that I selected for my envelope is the one designed for the set by Hero Arts. After using the Starry Night stencil and some Mermaid Lagoon Distress Oxide ink to decorate the envelope flap, I heat embossed the stamp in white. I like how bold it looks on the envelope.
That's it for today you guys. I hope you are loving the new products as much as I am! Before I send you on your way to the next blog here are the giveaway details...
GIVEAWAY!
Hero Arts is generously giving away four $50 gift certificates! All you have to do for a shot at winning is comment on the blogs in this hop. So, as you hop along enjoying all of the fantastic projects and new products just leave a comment at each stop along the way. Comments will close on February 17, 2019 at 11:59pm PST and the winners will be announced on the Hero Arts blog the following week. Good luck to all of you!!
Thank you so much for stopping by my blog today! It was great to have you here and I hope you'll stop by again soon. If you'd like to follow my blog you can do so by adding your email up at the top of the side bar on the right. If you're interested, you can also follow me on Instagram, Facebook and YouTube.
You are now off to visit the amazing Libby Hickson! The full hop list is included below in case you get lost or like to jump around. Below that are the products that I've used today and the Copic color combinations that I promised you.
Have an amazing day you all!
Maria
BLOG HOP LIST:
COPIC MARKERS- Fairy Card:
Hair: RV02, RV06, RV09
Skin: E00, E11, VOOOO
Wings: CO, B0000, BG000, BG01, RV00
Dress: Y000, Y02, Y06, C1
PRODUCT LINKS:
When you use the following affiliate links I will receive a small commission at no extra cost to you. Thank you!


