Friday, January 29, 2021

Tonic Studios Stamp Club Release, VIDEO and Giveaway: Backgrounds & Borders!

Hi everybody and welcome to the newest Tonic Studios Stamp Club release: Backgrounds & Borders! This month's release is a really fun one and can be used to create so many different backgrounds using both the stamps and dies. It can also be used to make abstract or modern art. The die set has quite a few uses as well but the most obvious is to create sentiments with the large word dies. Before I get deep into this post I want to let you know that there is a GIVEAWAY and the details are at the bottom of my post.

I've also made a VIDEO for you because I think that might be easier to show many of the different ways that you can use this bundle. Click HERE to watch my video. I do want to let you know that once this bundle sells out it is gone for good. So, if you think you might want to add it to your stash I'd recommend picking yours up quickly. Here are links for that:


I made about a bazillion cards so I'm going to keep my descriptions brief today because I also share all of these cards in the video and explain the techniques that I used. 
Cardbomb,maria willis,Tonic Studios,Tonic Studios Stamp Club,stamps,stamping,cards,cardmaking,

Here's that video I've been talking about...
 
If you're having trouble viewing this video please click HERE to watch it.


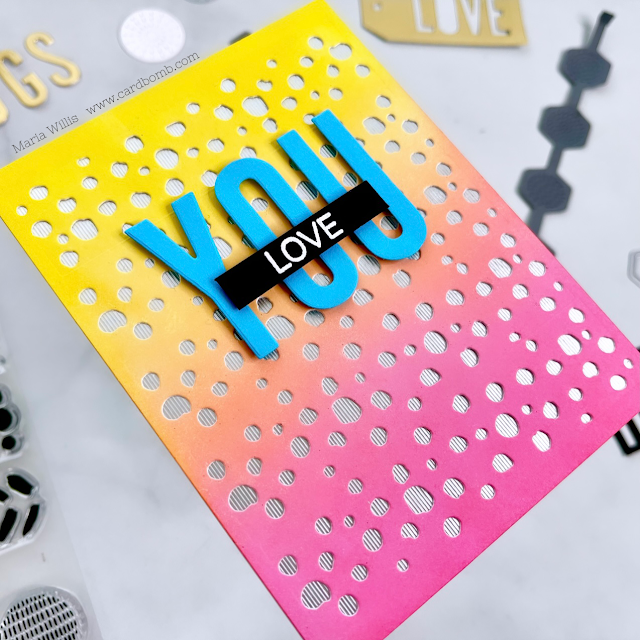
This first card was made by die cutting an ink blended background with one of the the die cutting plates. I layered that on top of textured, silver cardstock.
Cardbomb,maria willis,Tonic Studios,Tonic Studios Stamp Club,stamps,stamping,cards,cardmaking,

Next, I added my stamped and die cut sentiments. 

Cardbomb,maria willis,Tonic Studios,Tonic Studios Stamp Club,stamps,stamping,cards,cardmaking,

For this next card I stamped the background out using white ink. The amazing thing about this stamp set is that each patterned stamp strip is designed so that you can stamp it, move your cardstock one inch and stamp again. These stamps also line up from end to end so that you can stamp large areas seamlessly.
Cardbomb,maria willis,Tonic Studios,Tonic Studios Stamp Club,stamps,stamping,cards,cardmaking,

I stamped part of sentiment onto my card.
Cardbomb,maria willis,Tonic Studios,Tonic Studios Stamp Club,stamps,stamping,cards,cardmaking,

Then finished it off by adding the "Smile" sentiment which I created from the letters of the dies in the set.
Cardbomb,maria willis,Tonic Studios,Tonic Studios Stamp Club,stamps,stamping,cards,cardmaking,

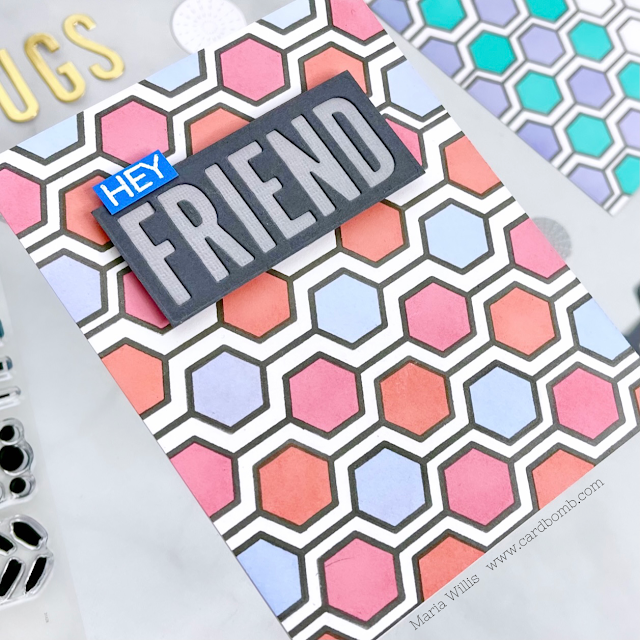
This next card was stamped with the hexagon chain stamp in gray ink.
Cardbomb,maria willis,Tonic Studios,Tonic Studios Stamp Club,stamps,stamping,cards,cardmaking,

Then, I filled in the hexagons in by stamping repeatedly with the solid hexagon stamps.
Cardbomb,maria willis,Tonic Studios,Tonic Studios Stamp Club,stamps,stamping,cards,cardmaking,

I finished the card off by using the negative piece of the die cut and backing it with a lighter color of cardstock.
Cardbomb,maria willis,Tonic Studios,Tonic Studios Stamp Club,stamps,stamping,cards,cardmaking,


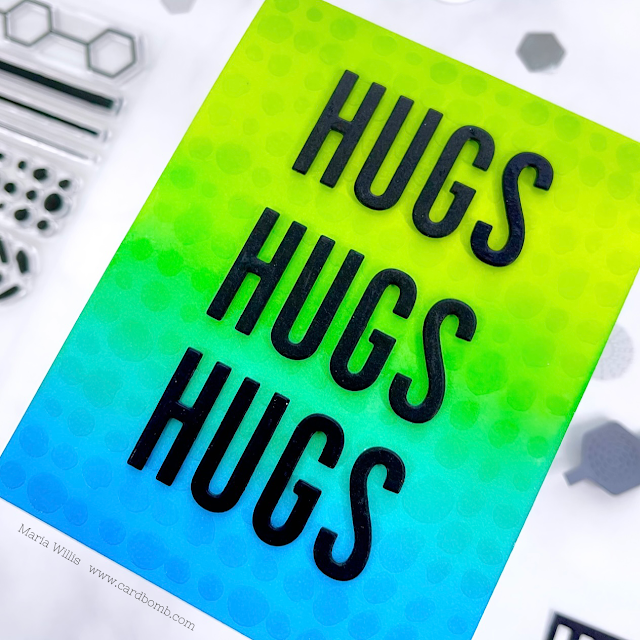
On my next card I ink-blended a cardstock panel and then stamped the whole background with clear embossing ink. I heat embossed it with clear embossing powder.
Cardbomb,maria willis,Tonic Studios,Tonic Studios Stamp Club,stamps,stamping,cards,cardmaking,

Then, I cut the "hugs" sentiment out nine times. I glued three sets together, three times so that I had three thick die cuts to use.
Cardbomb,maria willis,Tonic Studios,Tonic Studios Stamp Club,stamps,stamping,cards,cardmaking,
I glued the dies to my card with liquid glue.
Cardbomb,maria willis,Tonic Studios,Tonic Studios Stamp Club,stamps,stamping,cards,cardmaking,

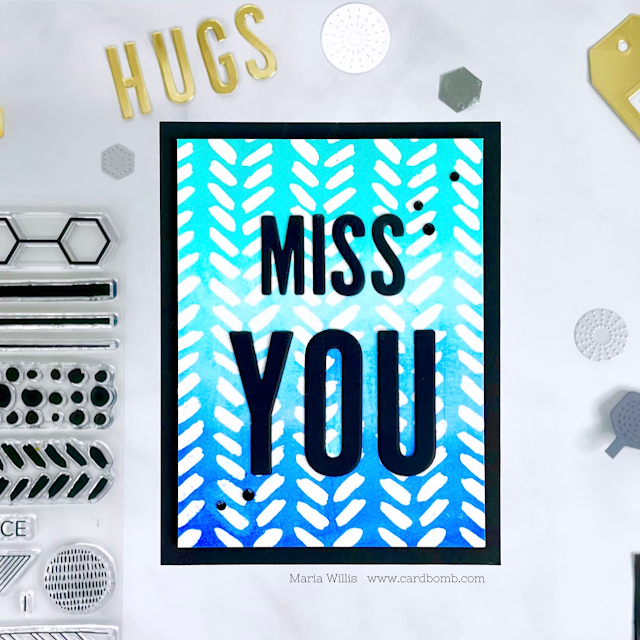
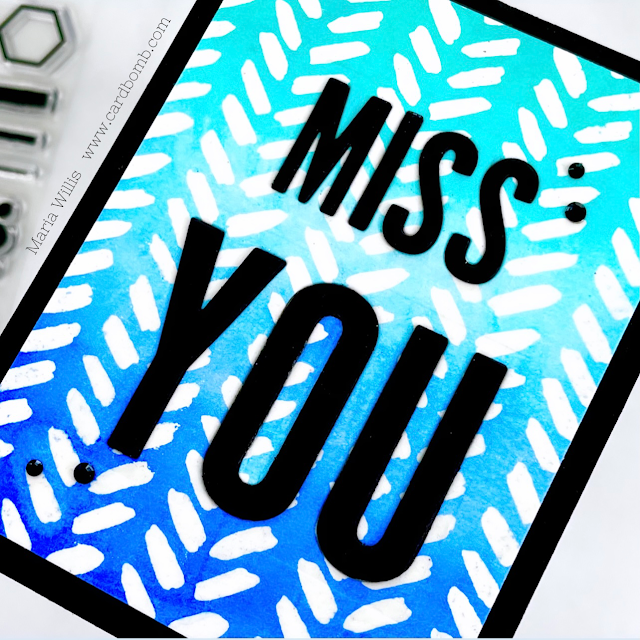
I started my next card by clear embossing my background onto watercolor paper. 
Cardbomb,maria willis,Tonic Studios,Tonic Studios Stamp Club,stamps,stamping,cards,cardmaking,

I watercolored the background using my Nuvo Aquaflow pens. Then, I cut "miss you" out of the panel and saved those letters for my next card.
Cardbomb,maria willis,Tonic Studios,Tonic Studios Stamp Club,stamps,stamping,cards,cardmaking,

I die cut the same sentiment in black and inlaid it into my background panel. I added some black rhinestones and that was it.
Cardbomb,maria willis,Tonic Studios,Tonic Studios Stamp Club,stamps,stamping,cards,cardmaking,

My next card has more of a mixed media look. I ink blended the background in oranges. Then I splattered with shimmer and color and stamped on it in both gray and gold embossing.
Cardbomb,maria willis,Tonic Studios,Tonic Studios Stamp Club,stamps,stamping,cards,cardmaking,

I cut extra die cuts in white and then glued them onto the back of the Miss You dies from my previous card.
Cardbomb,maria willis,Tonic Studios,Tonic Studios Stamp Club,stamps,stamping,cards,cardmaking,

I glued those stacked dies onto my card to finish it off.
Cardbomb,maria willis,Tonic Studios,Tonic Studios Stamp Club,stamps,stamping,cards,cardmaking,

This next card was made using dies only.
Cardbomb,maria willis,Tonic Studios,Tonic Studios Stamp Club,stamps,stamping,cards,cardmaking,

I cut the hexagon strip die in mulitple shades of blues, blue-greens and gray. Then I nested them together to build my background.
Cardbomb,maria willis,Tonic Studios,Tonic Studios Stamp Club,stamps,stamping,cards,cardmaking,

I added gold foil hexagons and sentiments.
Cardbomb,maria willis,Tonic Studios,Tonic Studios Stamp Club,stamps,stamping,cards,cardmaking,

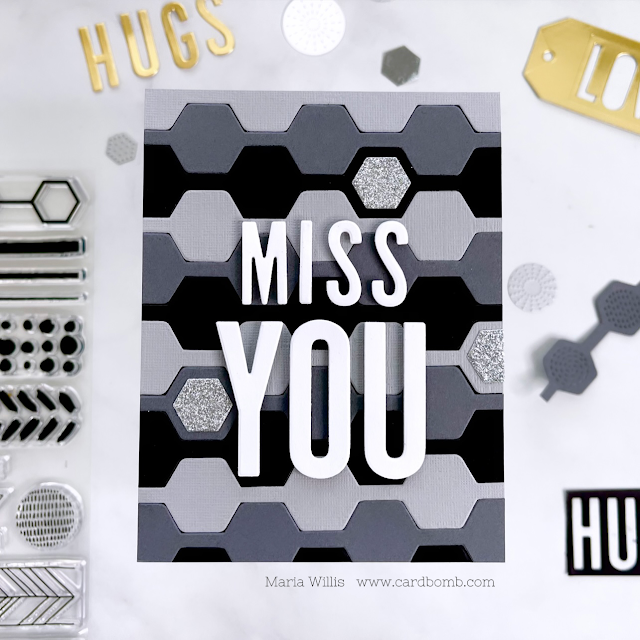
This card was made using the exact same technique but different colors.
Cardbomb,maria willis,Tonic Studios,Tonic Studios Stamp Club,stamps,stamping,cards,cardmaking,

I used glittery silver cardstock for embellishement.
Cardbomb,maria willis,Tonic Studios,Tonic Studios Stamp Club,stamps,stamping,cards,cardmaking,

And, added the bold sentiment in white.
Cardbomb,maria willis,Tonic Studios,Tonic Studios Stamp Club,stamps,stamping,cards,cardmaking,

These stamps can also be stamped randomly to create fun designs. I started this card by watercoloring the background with Nuvo aquaflow pens.
Cardbomb,maria willis,Tonic Studios,Tonic Studios Stamp Club,stamps,stamping,cards,cardmaking,

Then I heat embossed my stamps in black randomly on top of the color.
Cardbomb,maria willis,Tonic Studios,Tonic Studios Stamp Club,stamps,stamping,cards,cardmaking,

I added a sentiment from the Happy Mail stamp set on gray cardstock.
Cardbomb,maria willis,Tonic Studios,Tonic Studios Stamp Club,stamps,stamping,cards,cardmaking,

I went for more of a modern art look with my next card. I masked off a circle and then stamped some lines randomly inside.
Cardbomb,maria willis,Tonic Studios,Tonic Studios Stamp Club,stamps,stamping,cards,cardmaking,

I used those lines as guides for watercoloring.
Cardbomb,maria willis,Tonic Studios,Tonic Studios Stamp Club,stamps,stamping,cards,cardmaking,

Last, I added my heat embossed sentiment.
Cardbomb,maria willis,Tonic Studios,Tonic Studios Stamp Club,stamps,stamping,cards,cardmaking,

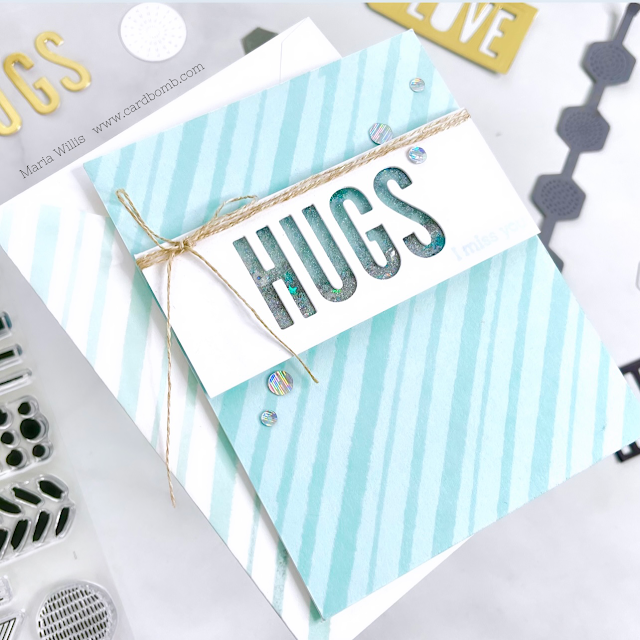
This is a shaker card that I created using the negative piece of one my die cuts.
Cardbomb,maria willis,Tonic Studios,Tonic Studios Stamp Club,stamps,stamping,cards,cardmaking,

The background was created using the stripe stamps arranged on a diagonal.
Cardbomb,maria willis,Tonic Studios,Tonic Studios Stamp Club,stamps,stamping,cards,cardmaking,

Inside of the shaker I added glitter, stars and some sequins.
Cardbomb,maria willis,Tonic Studios,Tonic Studios Stamp Club,stamps,stamping,cards,cardmaking,

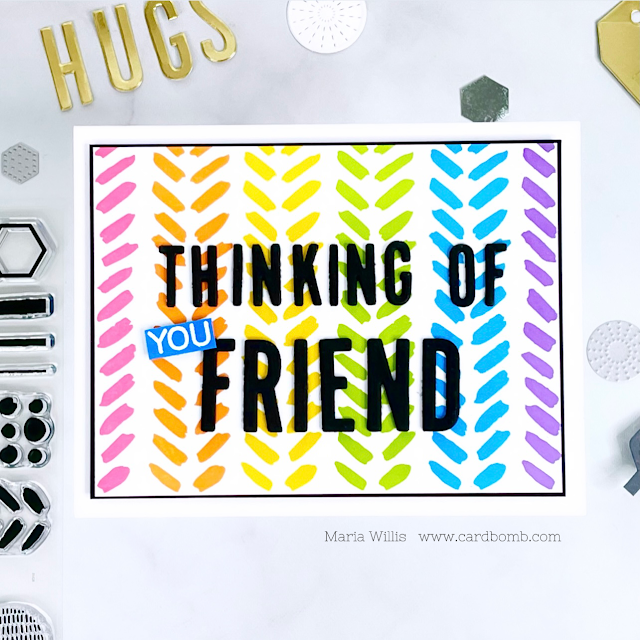
This card was made by repeatedly stamping the background in rainbow colors.
Cardbomb,maria willis,Tonic Studios,Tonic Studios Stamp Club,stamps,stamping,cards,cardmaking,

Then, I mounted the stamped background on black and popped that up on a white cardbase.
Cardbomb,maria willis,Tonic Studios,Tonic Studios Stamp Club,stamps,stamping,cards,cardmaking,

Finally, I added the die cut sentiment.
Cardbomb,maria willis,Tonic Studios,Tonic Studios Stamp Club,stamps,stamping,cards,cardmaking,

My last card is a slimline card. I watercolored the background panel.
Cardbomb,maria willis,Tonic Studios,Tonic Studios Stamp Club,stamps,stamping,cards,cardmaking,

Then I stamped the stripey circle stamps and heat embossed them in white. 
Cardbomb,maria willis,Tonic Studios,Tonic Studios Stamp Club,stamps,stamping,cards,cardmaking,

I used the negative pieces of my die cuts to add the sentiment. The final touch was adding some hearts that I die cut from the Party Animals die set.
Cardbomb,maria willis,Tonic Studios,Tonic Studios Stamp Club,stamps,stamping,cards,cardmaking,

That's all for today you guys! Thanks so much for stopping by and remember to comment below to enter into our giveaway! If you're interested in any of the products that I used today you can check them out below.

Have a great day!

Maria


GIVEAWAY:
One lucky winner will win a £50/$50 Giftcard to Tonic Studios and the Backgrounds & Borders Bundle!
To enter comment on every blog in the hop by 11:59pm PST on February 3, 2021/ 7:59am GST on Feb. 4, 2021
Winner will be announced on February 5th, 2021 on IG and FB so make sure you're following all Tonic accounts!


BLOG HOP LIST:
Amber Rain Davis


PRODUCT SUPPLY LIST:

Hero Arts February 2021 My Monthly Hero: Countdown and a Giveaway!

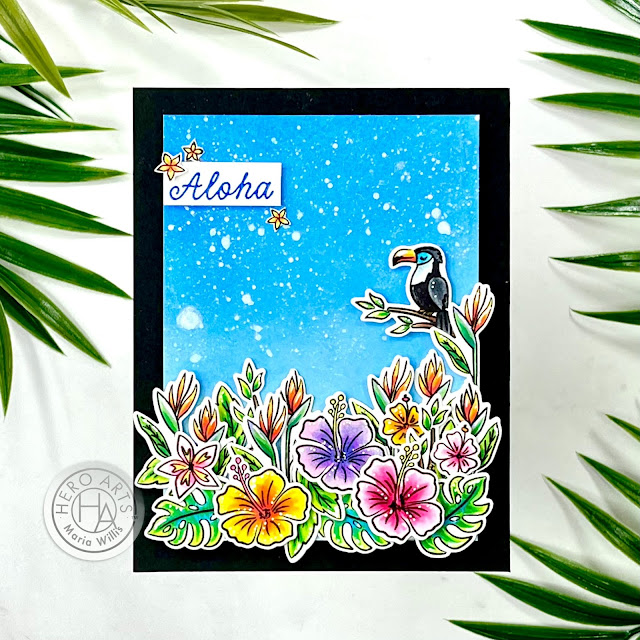
Hi everybody! It's time to count down the days until the next My Montly Hero release from Hero Arts and boy is it a fun one! My sneak peek card is full of tropical flowers and paradise and is totally reminding me how much I need a tropical vacation. 

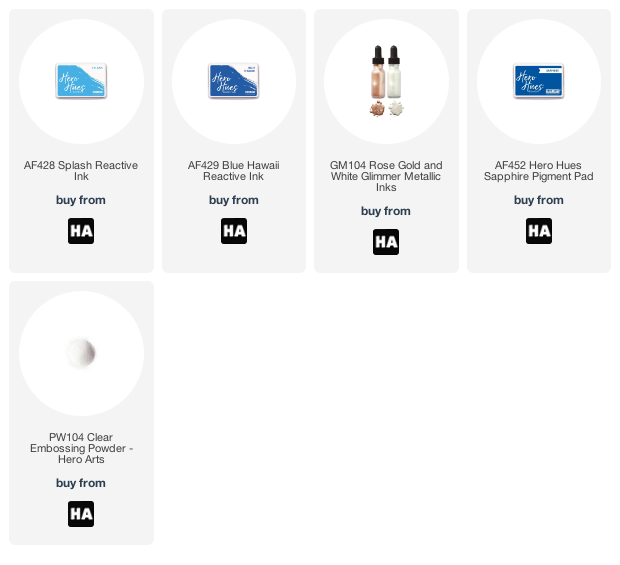
I started my card out by ink blending my background panel in Splash and Blue Hawaii Reactive Inks. Then I splattered it with White Metallic Ink. I popped the background up on a black card base using foam tape for extra dimension.
art,cards,color,ink,cardmaking,stamping,papercraft,My Monthly Hero February 2021,Cardbomb,maria willis,paper,diy,handmade,stamps,Hero Arts,

I colored the toucan, birds of paradise, flowers and leaves with copic markers and cut them out using the coordinating dies.
art,cards,color,ink,cardmaking,stamping,papercraft,My Monthly Hero February 2021,Cardbomb,maria willis,paper,diy,handmade,stamps,Hero Arts,


I arranged all the pieces to cover the bottom of the blue panel and glued them on using glue dots and foam adhesive so that I could add different levels of dimension. To finish my card off I stamped the sentiment in pigment ink and heat embossed it using clear embossing powder.
art,cards,color,ink,cardmaking,stamping,papercraft,My Monthly Hero February 2021,Cardbomb,maria willis,paper,diy,handmade,stamps,Hero Arts,


Ok, you guys, that's it for today! Come back on Monday for the full release because it's amazing and I can't wait to share it with you! Before I go I want to remind you that there is a GIVEAWAY! Head over to the Hero Arts Blog to get the details and enter!

Have a great weekend and I'll see you for the full MMH release on Monday!
Maria


PRODUCT SUPPLY LIST:

Thursday, January 28, 2021

VIDEO: Magical Background with a Gorgeous Iridescent Tree!

Hi everybody! I'm so glad you stopped by today because I've got a fun card to share. I used the Tree With Roots Fancy Die from Hero Arts as my focal point but kept it simple so that my background would pop. I made a video tutorial sharing how to make this style of card and you watch it HERE, or, scroll down to the video below.


Here's that video if you'd like to check it out...
 
If you're having trouble viewing the video you can watch it by clicking HERE.

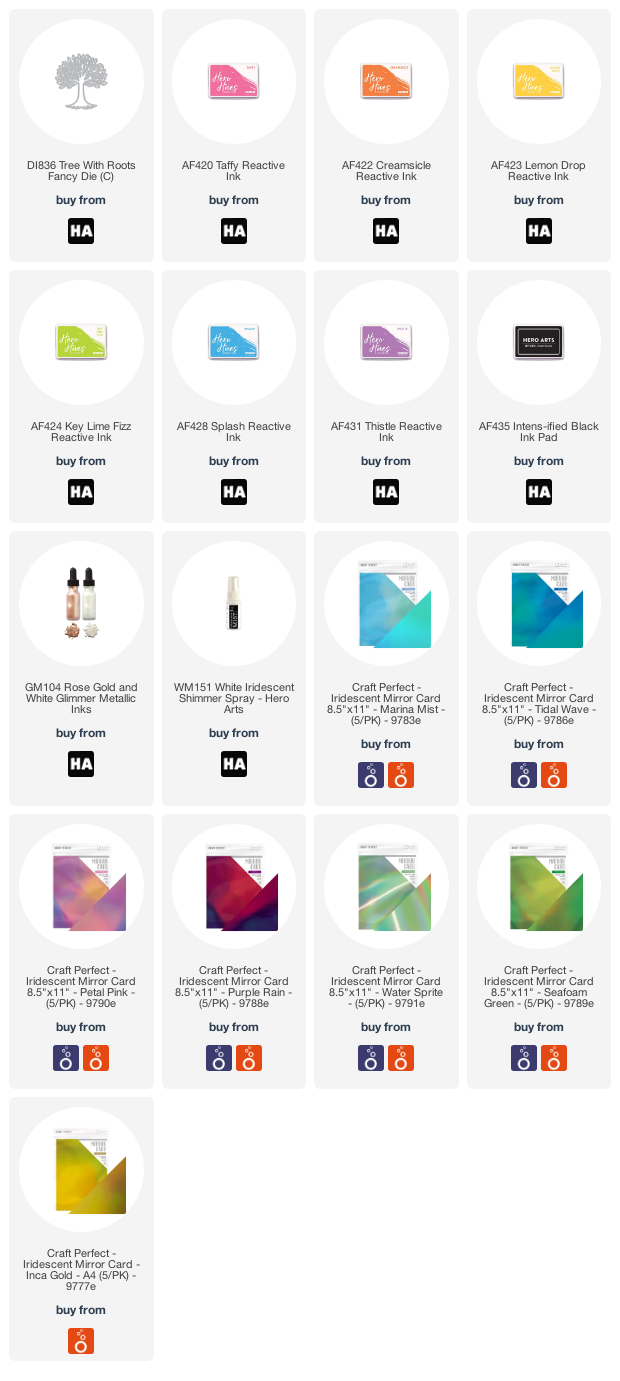
I ink blended my background in rainbow colors using reactive inks. Then I sprayed it with Iridescent Shimmer Spray and splattered it with white metallic ink.

To finish my card off I stamped a sentiment and added my die cut tree. The tree is three layers of white cardstock topped off by a layer a blue iridescent cardstock.

Thanks for stopping by today! I hope you have an amazing day!
Maria.
 

PRODUCT SUPPLY LIST:


Monday, January 25, 2021

HA simple bee cards

Hi everybody! I hope you're having a great day!  I'm just dropping by to share these sweet and simple cards that I made earlier in the month and forgot to share. I used a combination of the Hero Arts My Monthly Hero kit and some of the add-ons from this month's release. 

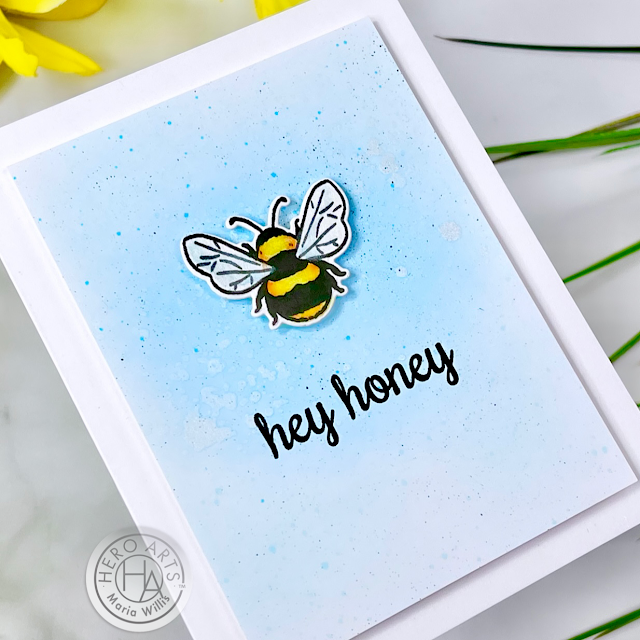
For my first card I ink blended a card panel using Splash Reactive ink. I wanted to add a little extra texture to the background so I sprayed it with White Iridescent Shimmer Mist then splattered it with some watered down Splash ink. 
Cardbomb, Maria Willis,Hero Arts, stamp, stamping, cards, card making, handmade, bees, art, paper, paper craft, ink, diy, color, watercolor, die cutting, ink blending,

I stamped the "hey honey" sentiment from the Bee and Wreath Flowers set in black. Then I added foam adhesive to the back of the ink blended panel and adhered it to a white card base.

Cardbomb, Maria Willis,Hero Arts, stamp, stamping, cards, card making, handmade, bees, art, paper, paper craft, ink, diy, color, watercolor, die cutting, ink blending,

To finish my card off I added a chunky, adorable bee from the My Monthly Hero kit. This bee was stamped in black ink, watercolored with Daniel Smith watercolors and even has some iridescent paint on his wings. 
Cardbomb, Maria Willis,Hero Arts, stamp, stamping, cards, card making, handmade, bees, art, paper, paper craft, ink, diy, color, watercolor, die cutting, ink blending,


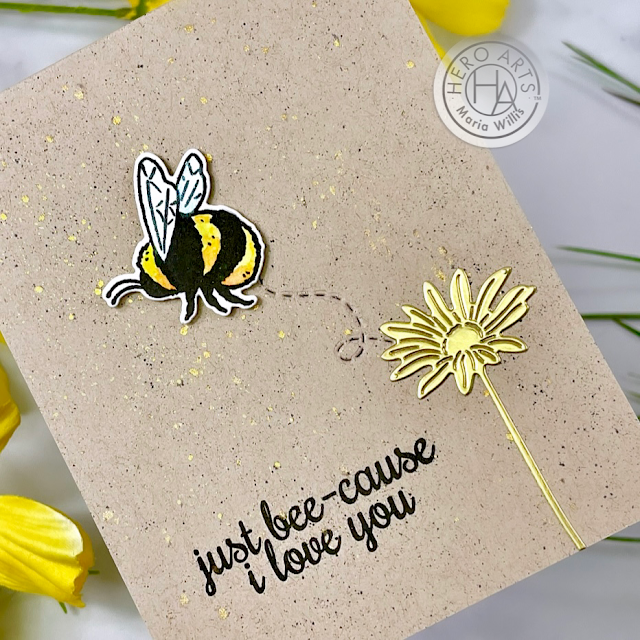
My second card is also simple and sweet and features another buzzy little bee from the MMH kit. This time I started out by splattering my background with both both black ink and gold splatter. Then I stamped my sentiment which is again from the Bee and Flowers Wreath Stamp set. 
Cardbomb, Maria Willis,Hero Arts, stamp, stamping, cards, card making, handmade, bees, art, paper, paper craft, ink, diy, color, watercolor, die cutting, ink blending,

Next, I covered the back of a piece of gold foil cardstock with double sided adhesive tape. I used a beautiful flower die from the Bees and Flowers Fancy Dies and cut a flower from the gold cardstock. This gave me flower shaped sticker. Before adding my flower sticker to the card I used the dashed line die to die cut my card front to make it look like my bee was flying. I did this before adding the flower and bee so that I put them over the ends of the dashed line. 
Cardbomb, Maria Willis,Hero Arts, stamp, stamping, cards, card making, handmade, bees, art, paper, paper craft, ink, diy, color, watercolor, die cutting, ink blending,

I added my golden flower sticker to the bottom right of my card. Then I added my lazy little bee at the end of his flight line with foam tape to give him some dimension.
Cardbomb, Maria Willis,Hero Arts, stamp, stamping, cards, card making, handmade, bees, art, paper, paper craft, ink, diy, color, watercolor, die cutting, ink blending,


That's it for today you guys! I had a ton of fun putting these together and love it when a quick and easy card can also be very pretty. Have you all been mixing up your products to come up with new ideas at lately? If so, let me know in the comments below!

Have an awesome day!
Maria


PRODUCT SUPPLY LIST:

Friday, January 22, 2021

Raise the Woof for Light Up Birthday Cards!

Hi everybody! I hope you're all having a great day today. I'm so glad you stopped by because you are in for a real treat today! Today Hero Arts is teaming up with Pear Blossom Press for a collaboration blog hop. We will be showing off how to use the Pear Blossom Press EZ-Lights with a variety of Hero Arts products. We've got a great blog hop full of really fun light-up cards and some GIVEAWAYS so make sure to hop along with us today. As you hop make sure to leave comments on each of the blogs to enter to win either a $50 gift card to Hero Arts, or, a $50 gift card to Pear Blossom Press

For today's card I was inspired by this set from the Stamping Village. The Hero Arts contribution is so cute (small stamp of weiner dog with three cupcakes on his back) so I decided to recreate the small stamp but much larger. I used the Birthday Paw-ty stamp set to make make my card and it's perfect bc it had all the same elements as my inspiration stamp, but, on a larger scale. I started out by stamping my sentiment and image in Hero Arts INTENS-ified Black ink. I love this ink because it plays nice with both alcohol inks and watercolor. Then, I colored in my image with copic markers.
Cardbomb, Maria Willis, Hero Arts,Pear Blossom Press, cards, cardmaking, handmade, stamps, stamping, ink, paper, paper craft, happy birthday, dogs, cupcakes,light-up card, art, color, diy,copic markers,

Next, I used my craft pick to poke holes in all three of the candle flames. I turned my card over and a grabbed a set of EZ-Lights. Each EZ-Light unit consists of a battery unit that has a button on it and three wires that extend from the battery unit and have tiny light bulbs on their tips. I taped one light bulb behind each hole that I had poked. Then, I secured the battery pack at the bottom left corner of my card front using tape adhesive. This placement will allow for the button to easily be pushed to light up the candles. I gently looped the excess length of wires and taped them to the back of the card. Last, I added a double layer of foam tape and adhered my card face to a top folding card base. To see pictures of what the guts of these cards look like make sure you stop by the Hero Arts blog. I shared a card over there as well and took quite a few pictures of the process of putting the card together. 
Cardbomb, Maria Willis, Hero Arts,Pear Blossom Press, cards, cardmaking, handmade, stamps, stamping, ink, paper, paper craft, happy birthday, dogs, cupcakes,light-up card, art, color, diy,copic markers,

When you press and hold the bottom left corner of my card the candles light up like this...
Cardbomb, Maria Willis, Hero Arts,Pear Blossom Press, cards, cardmaking, handmade, stamps, stamping, ink, paper, paper craft, happy birthday, dogs, cupcakes,light-up card, art, color, diy,copic markers,

I had so much fun making this card today. My idea to recreate the stamp from the Stamping Village set came together so easily. It's simple but the lights really take it up a notch and add a fun-factor! 

Cardbomb, Maria Willis, Hero Arts,Pear Blossom Press, cards, cardmaking, handmade, stamps, stamping, ink, paper, paper craft, happy birthday, dogs, cupcakes,light-up card, art, color, diy,copic markers,

Ok, you guys! That's all I've got for today. I hope you'll keep hopping along with us and check out all of the other fun light-up cards on this blog hop. Remember to comment below for your chance to win the GIVEAWAY! Two lucky winners will be randomly selected from comments along the hop. There are two $50 gift cards up for grabs: one each to Hero Arts and Pear Blossom Press!

I hope you all have a great day!
Maria


BLOG HOP LIST:

Pear Blossom Press/ Amanda Stevens

Kelly Latevola Taylor

Carissa Wiley

Lynnea Hollendonner

Niccole Kulig

Daniel West

Lydia Fiedler

Ilina Crouse

Maria Willis: You are here.

Mindy Eggen

Dana Joy

Seeka 

Libby Hickson

Pocono Pam

Hero Arts

Wednesday, January 20, 2021

Creative Stenciling with Erin Lee Creative January Release!

Hi everybody and welcome to Erin Lee Creative's first release of 2021! This month's release is full of beautiful things (picture of everything with links at end of post) but I decided to focus on this gorgeous Sparkling Palms Stencil. I made two cards using the same stencil to show you two completely different looks with it.

For my first card I started out with white cardstock. I taped it to the stencil so that it would stay in place and ink blended it using blending brushes and my Hero Arts Reactive Inks. I love these inks because they blend so smoothly together and have a dreamy look when applied lightly.

Cardbomb, Maria Willis, Erin Lee Creative, stamps, stamping, cards, cardmaking, handmade, ink, paper, paper craft, crafting, art, color, diy, ink blending, Tonic Studios, Hero Arts

I selected a sentiment from the Stay Golden stamp set. Side note: I have to keep stopping myself from saying, "Stay Golden, Pony Boy." Have any of you read the book, The Outsiders? It's a great a book and that's where that saying comes from (there's a movie too). Anyhow, I heat embossed the sentiment in black sparkle embossing powder onto a double layer of vellum. When I stuck that down I added a wad of metallic black thread to the card.
Cardbomb, Maria Willis, Erin Lee Creative, stamps, stamping, cards, cardmaking, handmade, ink, paper, paper craft, crafting, art, color, diy, ink blending, Tonic Studios, Hero Arts

To finish my card off I added some black sequins and called it a day!
Cardbomb, Maria Willis, Erin Lee Creative, stamps, stamping, cards, cardmaking, handmade, ink, paper, paper craft, crafting, art, color, diy, ink blending, Tonic Studios, Hero Arts

For my second card I used the same Sparkling Palms stencil for a completely different look. This time I started with a beautiful, dark blue-green piece of cardstock. I taped it to the stencil so it wouldn't move while I was using it. This time instead of using ink to fill in the stenciled areas I used liquid adhesive. I did this by squirting liquid adhesive onto my work surface. Then I used a sponge blending tool to pick it up and dab it onto my cardstock through the stencil. I made sure to apply it thinly so that it would not bleed under the stencil and ruin the image.
Cardbomb, Maria Willis, Erin Lee Creative, stamps, stamping, cards, cardmaking, handmade, ink, paper, paper craft, crafting, art, color, diy, ink blending, Tonic Studios, Hero Arts

After I removed the stencil I waited until the glue was dry enough to feel tacky. It didn't take long because I had applied such a thin layer of glue. I grabbed my Nuvo Gilding Flakes in gold and rubbed them all over the card. The golden flakes stuck to the glue revealing my stenciled image. I used my Surface Sweep Brush to remove the extra flakes from my card and to clean up my desk. I know gilding flakes can be daunting for a lot of people but they can be so much fun if you remember to turn off your fan/AC first, don't sneeze, and have the proper tool for easy cleanup (Surface Sweep).
Cardbomb, Maria Willis, Erin Lee Creative, stamps, stamping, cards, cardmaking, handmade, ink, paper, paper craft, crafting, art, color, diy, ink blending, Tonic Studios, Hero Arts
 
To add a sentiment I used the Stay Golden Word Die. I cut it out three times in black and glued the layers together. I wanted it to pop off of my card so I placed the die on vellum, traced around it, and, cut it out. Voila! A perfect halo for my sentiment! I used glue dots to adhere the sentiment piece. To finish my card off I splattered with gold sparkle from my Midas Touch pen, cut down the left side of the cardstock by 1/4", and added some gold sequins. This got mounted onto a black, A2 sized cardbase.
Cardbomb, Maria Willis, Erin Lee Creative, stamps, stamping, cards, cardmaking, handmade, ink, paper, paper craft, crafting, art, color, diy, ink blending, Tonic Studios, Hero Arts


Here's a look at this month's full release from Erin Lee Creative. It's a really fun release with stamps, stand-alone dies, a stencil, and, three kinds of rainbow holographic paper! Click HERE to shop the release now!
Cardbomb, Maria Willis, Erin Lee Creative, stamps, stamping, cards, cardmaking, handmade, ink, paper, paper craft, crafting, art, color, diy, ink blending, Tonic Studios, Hero Arts

I will add links to all of the products that I've used today below in case you're interested in checking any of them out. There's also a fun giveaway and a blog hop. All the info you need is listed below.

Have an awesome day you guys!

Maria


GIVEAWAY:

Comment on all blogs in the hop to be entered to win a $50 gift voucher to shop at Erin Lee Creative! Two winners will be chosen at random from the comments!


BLOG HOP LIST:

Maria Willis: You are here.


PRODUCT SUPPLY LIST:
01 09 10