Showing posts with label #pinkfreshstudios. Show all posts

Friday, October 16, 2020

Pinkfresh Studios: Slimline Release and Giveaway!

Hello everybody and happy Friday! Today I'm joining in the fun of Pinkfresh Studio's new slimline stamp, die and stencil release! There are so many amazing new products and we've got a blog hop to share crafty inspiration and we've got multiple giveaways and some other great perks too (so make sure you check out the end of my blog post).

One of the really cool things about this release is that some of the products were created in trios! You can buy a stamp, die and stencil that are all designed to work together as a product suite. My first card was made using products from one of these trios. I stamped the Incredibly Grateful stamp set in black ink onto watercolor paper. I watercolored it and then used the large coordinating die to cut the whole thing out (there is a die that cuts the inside out too but I didn't use it on this card). To add some depth to the inside of the frame I used some gray copic markers to added shadows.
#cardbomb,#pinkfreshstudios,Pinkfresh Studios,#card,#cards,#greetingcards,#handmade,#watercolor,stamp,  stamping, ink, paper, paper craft, art, diy, die cutting, slim-line cards

After stamping a sentiment from the Incredibly Grateful set I put that piece aside for a minute. Next, I used the Slim Diagonal Stitched dies to cut a piece of white cardstock. I ink blended in a soft blue and then splattered it with a marker. 
#cardbomb,#pinkfreshstudios,Pinkfresh Studios,#card,#cards,#greetingcards,#handmade,#watercolor,stamp,  stamping, ink, paper, paper craft, art, diy, die cutting, slim-line cards

I used the Kelly Alpha lower case dies to cut "hey" out of some gold foil cardstock. This was such an easy and beautiful way to add to the sentiment and fill the space inside of the floral frame. I adhered the letters using glue dots. This gave them a little dimension and also made sure no foam tape would be visible through the cutouts in the letters. I layered the floral frame on top of the stitched die cut rectangle. All of that got glued to a slimline card base. The size I used for all of my cards today is 9" x 7.5" and scored at 3.25". This size works perfectly with many of the Pinkfresh Slimline Dies.
#cardbomb,#pinkfreshstudios,Pinkfresh Studios,#card,#cards,#greetingcards,#handmade,#watercolor,stamp,  stamping, ink, paper, paper craft, art, diy, die cutting, slim-line cards

For my second card I used a different product suite. The stencil and die I used match the Floral Notes stamp set. I don't have the stamp set though and I was thrilled to see how well these stencils work on their own. The Floral Notes Stencils come in a three pack of layering stencils. I started with the largest images and ink blended using pink and purple. Next, I blended the leaves using two tones of green. It was so easy! I just used the lighter color of green first and then went over just part of the leaves with the darker green after that.
#cardbomb,#pinkfreshstudios,Pinkfresh Studios,#card,#cards,#greetingcards,#handmade,#watercolor,stamp,  stamping, ink, paper, paper craft, art, diy, die cutting, slim-line cards

When I got to the third layer it was time to do the centers of the large flowers. Originally I had planned to use yellow embossing powder but when I opened up my drawer and saw this pink, sparkly glacier paste I had to use it. The pictures don't do it justice but this card sparkles like something else! I die cut the flowers  and set them aside.
#cardbomb,#pinkfreshstudios,Pinkfresh Studios,#card,#cards,#greetingcards,#handmade,#watercolor,stamp,  stamping, ink, paper, paper craft, art, diy, die cutting, slim-line cards

I used the Slim Ornate Banner Die set to cut two pieces from white cardstock. The larger one I ink blended to match the pink from my flowers. The smaller one I ink blended in a blue green. When it was dry I stamped the sentiment which is from the You Are My Favorite stamp set, and then splattered the background first with water and then with my Glitter Gloss sparkle pen.
#cardbomb,#pinkfreshstudios,Pinkfresh Studios,#card,#cards,#greetingcards,#handmade,#watercolor,stamp,  stamping, ink, paper, paper craft, art, diy, die cutting, slim-line cards

I adhered all of my layers together using lots of adhesive tape. The final touch was to add some gems and rhinestones in different colors and sizes.
#cardbomb,#pinkfreshstudios,Pinkfresh Studios,#card,#cards,#greetingcards,#handmade,#watercolor,stamp,  stamping, ink, paper, paper craft, art, diy, die cutting, slim-line cards

For my last card I went really simple and I've gotta say that I love when making a simple card still yields a beautiful card! I used the new Argyle layering stencils (set of 2) to create this card. I started out with a piece of white cardstock cut out using the Slim Diagonal Stitched Rectangle Dies. I ink blended the background in yellow and red which yielded and orangey/coral color on the darker side. Then I used the stencil with the large diamond cut outs to ink blend using Unicorn white pigment ink from Hero Arts. I started on the darker side and since my ink was still a little bit wet my sponge blender lifted some of the colored ink and transferred just the right amount to the yellow side. I love how the light diamonds look against a darker background. 
#cardbomb,#pinkfreshstudios,Pinkfresh Studios,#card,#cards,#greetingcards,#handmade,#watercolor,stamp,  stamping, ink, paper, paper craft, art, diy, die cutting, slim-line cards

The second stencil in this set has lines to complete the argyle look. I lined the "x" of the lines up with the centers of my diamonds and am happy with how that placement looks. I decided to heat emboss in gold so I pressed my Versamark ink pad repeatedly over the stencil to ink my background. Then I removed the stencil, poured on my embossing powder and heated it to melt it.
#cardbomb,#pinkfreshstudios,Pinkfresh Studios,#card,#cards,#greetingcards,#handmade,#watercolor,stamp,  stamping, ink, paper, paper craft, art, diy, die cutting, slim-line cards

To finish my card off I added a "Hello" sentiment from the Essentials: Classic Word Die Set. The rest of the sentiment is from the You Are My Favorite stamp set. The final touch was adding a few gems.
#cardbomb,#pinkfreshstudios,Pinkfresh Studios,#card,#cards,#greetingcards,#handmade,#watercolor,stamp,  stamping, ink, paper, paper craft, art, diy, die cutting, slim-line cards

That's all I've got for you today but there is so much more to see if you continue on the blog hop. There's a list below for you to follow along (your next stop will be Mindy Eggen). You can leave me a comment below to enter to win a $25 gift card. 

Have an awesome day!
Maria


GIVEAWAYS:
-Pinkfresh Studios will be giving away this entire amazing release over on their Facebook, Instagram and YouTube platforms! Make sure you visit to get entered to win!
-One lucky winner will be chosen right here on my blog to win a $25 gift card to Pinkfresh Studios! To enter to win you just have to leave a comment below! Good luck!


-Winners will be announced on October 23 over on the Pinkfresh Studios Giveaway page. Winners will have two weeks to claim their prize.


EVERYBODY WINS!:
-From October 16th - October 22nd Pinkfresh Studios is offering FREE SHIPPING (USA) or reduced shipping (international customers) to all customers who place an order of $50 or more. 


-While supplies last you can earn this beautiful die as a gift with a $25 purchase.

-Now through October 22nd, 2020 you can get 20% off of a Memory Misti (largest size Misti that is useful for many slimline products as well as for scrapbooking). Click HERE to purchase the Memory Misti using code: PINK to get your discount.


BLOG HOP LIST:

You are invited to the Inlinkz link party!

Click here to enter


Thursday, April 30, 2020

Pinkfresh Studios April Release and a Giveaway!

Hi Everybody! How are you all doing? I am hanging in there (so much going on)... luckily I have the happy distraction of joining Pinkfresh Studio for their April Stamp and Die Release! This is such a great release and I'm excited to share four cards with you today.

For my first card I used a stamp set called Take Pride (main floral image),  another called, Simply Sentiments Hello (sentiement), and the Believe in Yourself die (Believe). I started out by stamping the floral image in black ink and watercoloring it with my Daniel Smith watercolor paints. Then I cut the image out with the coordinating die. 
#art, #cardbomb, #cards, #copicmarkers, #copics, #craft, #create, #creative, #danielsmith, #danielsmithwatercolors, #diy, #ink, #maria willis, #paper, #papercraft, #pinkfreshstudios, #stamp, #watercolor,

Next, I grabbed a piece of watercolor paper and taped off the background. I ink blended the background with Distress Oxide ink. Then, I splattered the background with water, a shimmer pen  from Tonic Studios, and white metallic ink from Hero Arts. I heat embossed the sentiment onto the bottom of this sheet.
#art, #cardbomb, #cards, #copicmarkers, #copics, #craft, #create, #creative, #danielsmith, #danielsmithwatercolors, #diy, #ink, #maria willis, #paper, #papercraft, #pinkfreshstudios, #stamp, #watercolor,

I die cut the word, "Believe," four times out of black cardstock. I glued each layer together to create dimension. I wanted the sentiment to really pop so I used a white gel pen to write, "Believe," on the die cut. 
#art, #cardbomb, #cards, #copicmarkers, #copics, #craft, #create, #creative, #danielsmith, #danielsmithwatercolors, #diy, #ink, #maria willis, #paper, #papercraft, #pinkfreshstudios, #stamp, #watercolor,

I glued my floral piece to my card front and added, "Believe" on top of that. The final touch was to add some white rhinestones (Hai Supply).
#art, #cardbomb, #cards, #copicmarkers, #copics, #craft, #create, #creative, #danielsmith, #danielsmithwatercolors, #diy, #ink, #maria willis, #paper, #papercraft, #pinkfreshstudios, #stamp, #watercolor,

For my second card I used the same stamp set but went for a one layer card and used my Copic Markers. This card has a much softer look than the first one does. 
#art, #cardbomb, #cards, #copicmarkers, #copics, #craft, #create, #creative, #danielsmith, #danielsmithwatercolors, #diy, #ink, #maria willis, #paper, #papercraft, #pinkfreshstudios, #stamp, #watercolor,

After coloring the main image I used my Cool Gray markers to color the inside of the circle to make it pop. I used two different stamps to create the sentiment which I absolutely love (yes, I did stamp surgery and cut one of the stamps in half).
#art, #cardbomb, #cards, #copicmarkers, #copics, #craft, #create, #creative, #danielsmith, #danielsmithwatercolors, #diy, #ink, #maria willis, #paper, #papercraft, #pinkfreshstudios, #stamp, #watercolor,

It's pretty rare that I create a one layer card but I was determined to keep this one simple. I finished it off by splattering a little bit of gray ink onto the background and adding some subtle rhinestones.
#art, #cardbomb, #cards, #copicmarkers, #copics, #craft, #create, #creative, #danielsmith, #danielsmithwatercolors, #diy, #ink, #maria willis, #paper, #papercraft, #pinkfreshstudios, #stamp, #watercolor,

For my third card I used the new Ornate Floral Die. I cut it out three times in black cardstock, glued the layers together and set it aside. While that dried, I ink blended the background with Distress Oxides. I also splattered the background with Glitter Gloss from Tonic Studios.
#art, #cardbomb, #cards, #copicmarkers, #copics, #craft, #create, #creative, #danielsmith, #danielsmithwatercolors, #diy, #ink, #maria willis, #paper, #papercraft, #pinkfreshstudios, #stamp, #watercolor,

I heat embossed the "hello" from Simply Sentiments Hello in turquoise. I heat embossed the rest of the sentiment in white. I adhered the die cut onto the background and added my sentiment to the top. A variety of sequins and embellishments added a little texture and shine to this card.
#art, #cardbomb, #cards, #copicmarkers, #copics, #craft, #create, #creative, #danielsmith, #danielsmithwatercolors, #diy, #ink, #maria willis, #paper, #papercraft, #pinkfreshstudios, #stamp, #watercolor,

For my last card I used a sentiment from the Simply Sentiments Hello set (this set is seriously so good). I ink blended the background to create a cloud scene. Then I added a rainbow embellishment from Hai supply and the heat embossed sentiment. they go perfectly together and this card came together in minutes.
#art, #cardbomb, #cards, #copicmarkers, #copics, #craft, #create, #creative, #danielsmith, #danielsmithwatercolors, #diy, #ink, #maria willis, #paper, #papercraft, #pinkfreshstudios, #stamp, #watercolor,
Here's a closer look at the rainbow. It's so fun and that little heart on the cloud is such a sweet touch. 
#art, #cardbomb, #cards, #copicmarkers, #copics, #craft, #create, #creative, #danielsmith, #danielsmithwatercolors, #diy, #ink, #maria willis, #paper, #papercraft, #pinkfreshstudios, #stamp, #watercolor,

Ok, you guys, that is it for me today but before I go I wanted to let you know that Pinkfresh Studio has some giveaways! First, you can enter to win a $25 gift certificate just by leaving a comment here on my blog. Pinkfresh will also be giving away this entire release on their blog, IG and YouTube channel. Good luck to all of you! The winners will be announced on May 8th over on the Pinkfresh Studio Giveaway Page. Winners must claim their prize within two weeks so be sure to check to see if you've won.
#art, #cardbomb, #cards, #copicmarkers, #copics, #craft, #create, #creative, #danielsmith, #danielsmithwatercolors, #diy, #ink, #maria willis, #paper, #papercraft, #pinkfreshstudios, #stamp, #watercolor,
Pinkfresh Studio is also offering FREE SHIPPING  to US addresses when your order is $35 or more. International shipping is also discounted for orders over $35. Happy shopping!
#art, #cardbomb, #cards, #copicmarkers, #copics, #craft, #create, #creative, #danielsmith, #danielsmithwatercolors, #diy, #ink, #maria willis, #paper, #papercraft, #pinkfreshstudios, #stamp, #watercolor,

I hope you all have an amazing day today! Keep on hopping along with all of the amazing Pinkfresh Studio inspiration by following the blog roll below.

Bye for now!
Maria Willis


BLOG ROLL:

You are invited to the Inlinkz link party!
Click here to enter


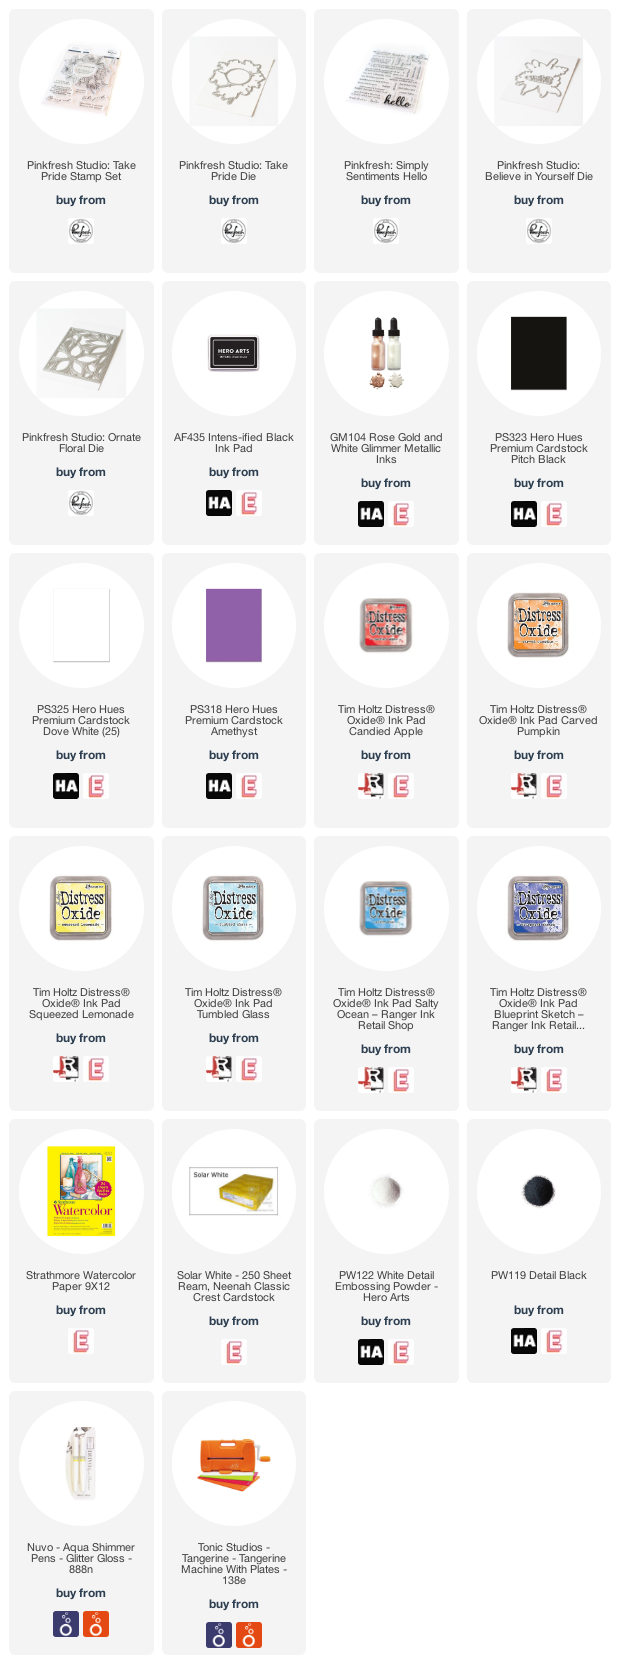
PRODUCT SUPPLY LIST:


Friday, March 20, 2020

Crafty Friends: Pinkfresh and a Discount!

Hey you guys! How are you all doing out there in this crazy world? I'm in California, USA and my family is healthy, safe and on lockdown at home. I'd love to hear how you are all doing so please let me know in the comments below! Since I'm sure many of you are stir crazy I'm happy to say that today is the 20th of the month when I hop my Crafty Friends and we bring you a 20% discount to our featured company! Woohoo! There is no better time for a discount than when you are on lockdown and actually have time to spend getting crafty. I am happy to let you know that this month we are featuring Pinkfresh Studios and they are generously offering all of you a 20% discount to their shop! Details are at the bottom of my post.

For my first card I used the Heart and Soul stamp set and it is such a stunner. It's got one large floral image shaped like a half wreath and quite a few wonderful sentiments.
#mariawillis, #cardbomb, #card, #cardmaking, #cardmaker, #cards, #handmade, #pinkfreshstudios, #stamp, #ink, #paper, #papercraft, #art, #diy, #color, #happybirthday, #heartandsoul, #diecut, #diecutting,

I started off by watercoloring my image with Pinkfresh liquid watercolors. Then I added some Nuvo drops to give it some dimension and shine. When it was dry I fussy cut it out.
#mariawillis, #cardbomb, #card, #cardmaking, #cardmaker, #cards, #handmade, #pinkfreshstudios, #stamp, #ink, #paper, #papercraft, #art, #diy, #color, #happybirthday, #heartandsoul, #diecut, #diecutting,

I taped off the edges of a piece of watercolor paper with some purple tape. Then I ink blended the background using Distress Oxide ink Peacock Feathers. To finish the background I spritzed it with shimmer spray and splattered it with silver metallic paint from Hero Arts.
#mariawillis, #cardbomb, #card, #cardmaking, #cardmaker, #cards, #handmade, #pinkfreshstudios, #stamp, #ink, #paper, #papercraft, #art, #diy, #color, #happybirthday, #heartandsoul, #diecut, #diecutting,

Finally I added a sentiment on yellow cardstock and then some chunky rhinestones to finish it off.
#mariawillis, #cardbomb, #card, #cardmaking, #cardmaker, #cards, #handmade, #pinkfreshstudios, #stamp, #ink, #paper, #papercraft, #art, #diy, #color, #happybirthday, #heartandsoul, #diecut, #diecutting,


For my next projects I made two cards from one background that I cut from the Diagonal Stripes with Window die. I ink blended my background with Distress Oxide inks in Squeezed Lemon, Picked Raspberry and Abandoned Coral. Then, I cut it out with the die. I used the positive part of the die cut for my first card.
#mariawillis, #cardbomb, #card, #cardmaking, #cardmaker, #cards, #handmade, #pinkfreshstudios, #stamp, #ink, #paper, #papercraft, #art, #diy, #color, #happybirthday, #heartandsoul, #diecut, #diecutting,

These colors really pop when paired with some black cardstock so I used foam adhesive to pop the die up. Then I splattered the whole thing with Sparkle from a Tonic Studios Nuvo Shimmer Pen in Glitter Gloss. 
#mariawillis, #cardbomb, #card, #cardmaking, #cardmaker, #cards, #handmade, #pinkfreshstudios, #stamp, #ink, #paper, #papercraft, #art, #diy, #color, #happybirthday, #heartandsoul, #diecut, #diecutting,

The super fun sentiment is cut using Pinkfresh's Classic Word Dies Set. I love that this set provides both the thinner sentiment as well as the "halo" background piece. The final touch for this card was to add enamel dots from Hero Arts and a bunch of random sequins, pearls, rhinestones and confetti stars. I really love how this card came out (it's super sparkly).
#mariawillis, #cardbomb, #card, #cardmaking, #cardmaker, #cards, #handmade, #pinkfreshstudios, #stamp, #ink, #paper, #papercraft, #art, #diy, #color, #happybirthday, #heartandsoul, #diecut, #diecutting,

For my second card  with this die I used the negative pieces. I used positive piece of the die to help me line up all of the thin stripes and popped them up on foam adhesive. 
#mariawillis, #cardbomb, #card, #cardmaking, #cardmaker, #cards, #handmade, #pinkfreshstudios, #stamp, #ink, #paper, #papercraft, #art, #diy, #color, #happybirthday, #heartandsoul, #diecut, #diecutting,

I decided to flip the center piece over before adhering it because I liked the way the contrast looked. I added my sentiment and this time I only used the thin letters so that my colored background would pop.
#mariawillis, #cardbomb, #card, #cardmaking, #cardmaker, #cards, #handmade, #pinkfreshstudios, #stamp, #ink, #paper, #papercraft, #art, #diy, #color, #happybirthday, #heartandsoul, #diecut, #diecutting,

To finish the card off I some black ink splatter and a few enamel dots from Hero Arts. 
#mariawillis, #cardbomb, #card, #cardmaking, #cardmaker, #cards, #handmade, #pinkfreshstudios, #stamp, #ink, #paper, #papercraft, #art, #diy, #color, #happybirthday, #heartandsoul, #diecut, #diecutting,

These cards are bright and happy and totally remind me of the 80's!
#mariawillis, #cardbomb, #card, #cardmaking, #cardmaker, #cards, #handmade, #pinkfreshstudios, #stamp, #ink, #paper, #papercraft, #art, #diy, #color, #happybirthday, #heartandsoul, #diecut, #diecutting,

Ok, that's it for today you guys so let me tell you about this discount before I go. Pinkfresh is offering you a discount of 20% of everything in the store except for new release, sale, and marked down items (ex: bundles). All you have to do to get this discount is use the code CRAFTYFRIENDS20 when you check out from the Pinkfresh Studios site. Happy Shopping! 

#mariawillis, #cardbomb, #card, #cardmaking, #cardmaker, #cards, #handmade, #pinkfreshstudios, #stamp, #ink, #paper, #papercraft, #art, #diy, #color, #happybirthday, #heartandsoul, #diecut, #diecutting,

Have an awesome day you guys! Stay healthy and craft hard!
Maria


CRAFTY FRIENDS BLOG ROLL:
Maria Willis: You are Here.


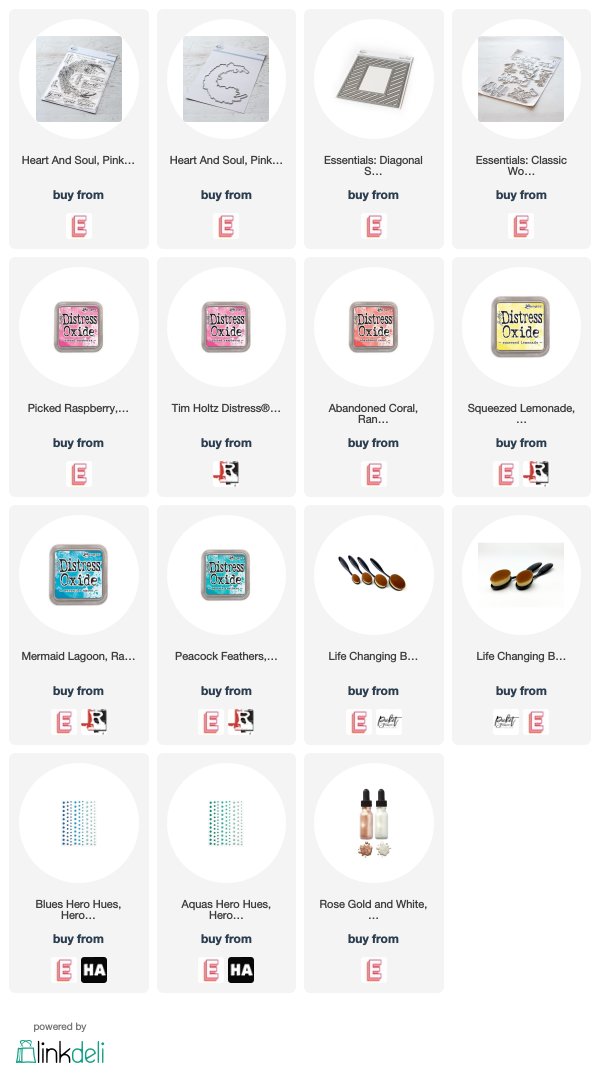
PRODUCT SUPPLY LIST:


01 09 10