Hi everybody! I hope you're having a great day today. Today I'm up on the Tonic Studios Blog sharing a post and a video tutorial and I wanted to make sure that I shared it here with all of you as well...
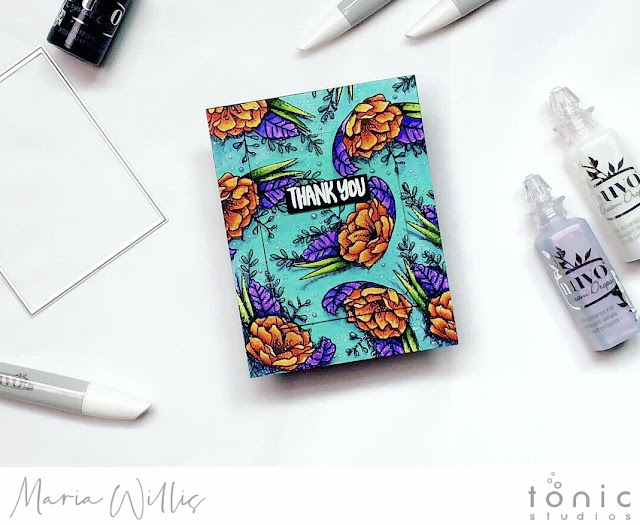
Have you ever started a project and been really happy with how it's going and then you do something to it that ruins it? Well, that's how today's projects came about. I had just gotten the Nuvo alcohol markers and wanted to try them out. So I stamped a card front full of floral images (left card in image below) from the Dainty Daisies set and went to town coloring. These alcohol markers are awesome!
After coloring with the markers I got out some colored pencils to add drop shadows. Then I used a Sharpie and a white gel pen to add shadows and highlights. Black Nuvo drops on the stamens and Dream Drops on the background finished the card off along with a "Thank You" sentiment from the Little Something For Harry set. Dun, dun, dun (total drama) and then I cut my card so that I could frame part of it in black and it looked terrible! I was so bummed that I had cut it, but, once you cut a background there is no going back so I had to figure out a solution.
I tried putting the rectangular piece back inside the frame but it looked like a tragic accident. I decided to pop it up on four pieces of black cardstock... and, voila! Today's technique was born.
You can just see a thin layer of black that frames out the raised piece but it's subtle enough that it still allows the background to be the star of the show.
I decided to make a video to share how easy this technique is. You can do it with a fully colored background like I did in my first card. You can also use your images to frame the raised portion of the card as I did in the video. Of course, you are not limited to using rectangles. This technique would be amazing with any other shape as well. Here's the video...
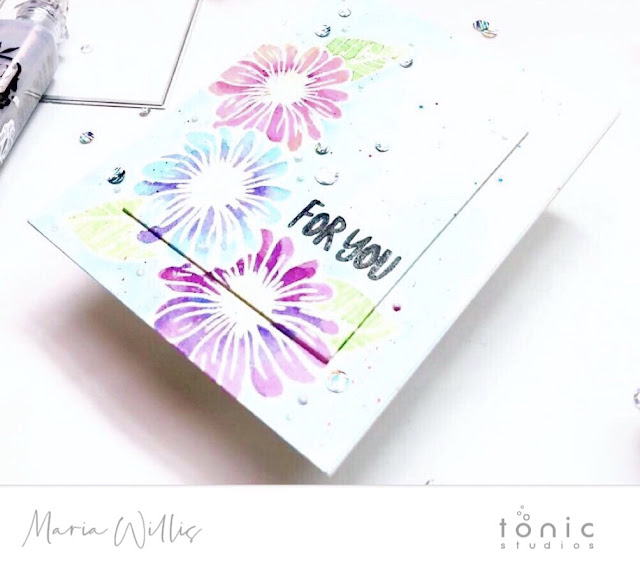
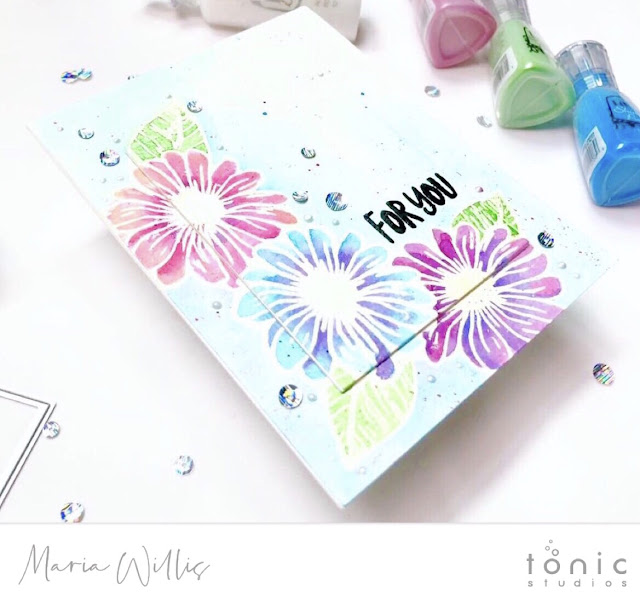
For the second card I used watercolor paper, the emboss resist technique and four of my Nuvo shimmer powders including the new Falling Leaf which is my new favorite green.
I used my stamp positioner and a post-it mask to stamp the flowers and leaves multiple times in versamark ink. Then I used the Nuvo Fine Detail Crystal Clear Embossing Powder and heat embossed my images. I added a little water to my shimmer powder turning them into a paintable medium and I painted the whole card.
Next, I used my rectangle die to cut my card face. I also cut four rectangles out of white cardstock. I glued the white rectangles together and then adhered the image piece on top. After adhering the frame to the card base I glued the thick rectangle piece into the center of the frame.
Some paint (shimmer powder) splatters, Dream Drops and Silver Rain sequins finished the card off nicely. If you'd like to see this technique in action I hope you'll enjoy the video I shared. That's all for today folks. Thank you so much for joining me and I look forward to being back here next week.
Have an amazing day!
Maria
PRODUCT LIST: TONIC STUDIOS UK

PRODUCT LIST: TONIC STUDIOS USA


Absolutely stunning!! The detail in each project is gorgeous and those drops....
ReplyDeleteThank you Jenny! Yes, the drops... totally amazing!
Delete