Hey everybody! I am so excited to have you here today because today is my first post for Tonic Studios as a member of their Social Media Design Team. Tonic Studios has a new blog, and with it, a new design team. Every week day the Tonic DT will be sharing fun projects and lots of inspiration on the blog. The team is made up of some very talented artists and I am absolutely thrilled that Tonic has chosen me to help represent them. When you have a few minutes please go check out Tonic's new blog. It's a fun place to go for inspiration and I hope you'll enjoy it as much as I do. Here's a link to go check them out: CLICK HERE.
Now, on to today's project...
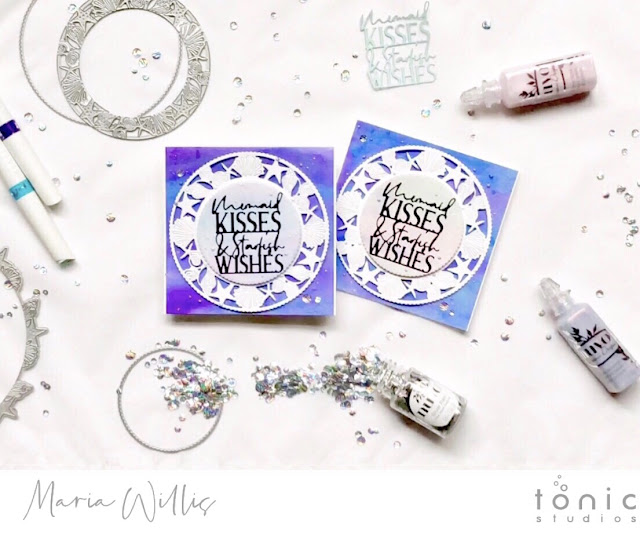
Today I am sharing a project using the Mermaid With Love range of dies. When I saw these dies I knew I had to have them because I love shells, sea stars, mermaids and well designed layering dies. I had so much fun playing around with them and coming up with fun ideas for them that it was hard to decide what kind of project I wanted to share with you. I decided on a shimmery, watercolor project that I hope you will enjoy but mixed media was a close second. There is a video tutorial for this project towards the bottom of this post. I hope you'll take a few minutes to watch it as I share how versatile this die range is. Until I opened these dies and started playing with them I really had no idea how many things you could do with them. In the video I also share some tips for using the dies as well as some tips for assembling this card.
SUPPLIES:
I started with a white card base cut to 5" x 10" and scored at 5" and a piece of watercolor paper cut to 4 & 7/8"squared. I also had a piece of white cardstock for cutting my large die piece, a small piece of watercolor paper for cutting my layering circle (behind sentiment) and a piece of black glossy cardstock backed with double sided adhesive for cutting out the sentiment die. Aside from cardstock you will need Nuvo Markers (Aqua Splash, True Turquoise, Azure Blue, Indigo Dawn), Dream Drops (Indigo Eclipse and Fairy Wings), dimensional foam adhesive, tape runner adhesive, a smooth precision glue pen, and Silver Rain sequins. You will also need my favorite die set from this collection, the Marina Layering Dies and the Mermaid Kisses & Starfish Wishes sentiment die.
HOW TO:
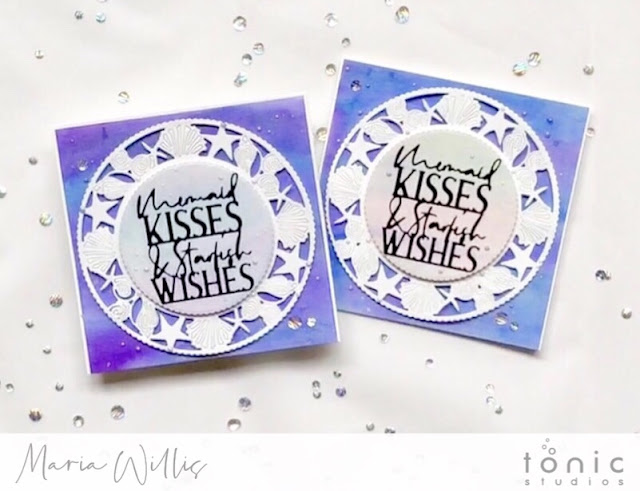
I started by watercoloring my two watercolor pieces using a paint brush and ink from Nuvo Markers. I saturated my watercolor cardstock with water and painted both pieces at the same time making sure that my background piece was much more saturated with color than the smaller piece. I set these aside to dry and did my die cutting next. I used the round seashell and starfish die with a larger cutting ring to cut the detailed die cut from white cardstock. Then I used the smaller cutting ring to die cut a layering circle from the smaller piece of watercolor paper. Last, I cut the sentiment die from the piece of black glossy cardstock and removed the negative pieces from the die being careful to leave the die cut inside of the die. After splattering my watercolor pieces generously with Glitter Gloss I put my card layers together. Both of the larger die cut pieces are popped up on foam adhesive. The sentiment is adhered after removing the backing from the double sided adhesive. Then, I embellished the card with sequins and Dream Drops. Side note: Dream Drops are epic!! Not only are they absolutely gorgeous but they must also be magic because I'm able to get perfect drops with them every. single. time. They are amazing and added just the right touch to this card as they look like pearls.
Here's that video I keep talking about. I hope you'll find it has some helpful information, both about this entire die collection, as well as for putting this card together.
Here's one more look at the cards I'm sharing today...
That's all for today folks! If you're interested in checking out any of the products I've shared today I've added links to all of them below. These are affiliate links and if you make a purchase through them I will make a small commission (thank you!). Thanks so much for stopping today. I hope you all have an amazing day and I will see you back here soon.
Maria
SUPPLY LIST UK SHOP

SUPPLY LIST USA


So pretty! Great job Maria!
ReplyDeleteThank you so much Adrienne!
Delete