Showing posts with label technique. Show all posts

Monday, June 20, 2022

HERO ARTS: Color Week Kickoff! New Color System, Blog Hop, and Giveaway!

Hey everybody! Today is a most amazing day because today Hero Arts is launching a brand new color system! The CORE INKS are getting a makeover (lids will have a new look as well as a built-in palette), there are new colors and some of our old favorites (some which have a new name), new CARDSTOCK colors that match inks, and drumroll please..... INKERS for every single color so that we can ink up our ink pads and use them for techniques! So. Cool! There will also be BUNDLES available!

BASIC COLOR INFO:
There are 57 Core Ink pads and Inkers in this line.
6 brand new to Hero ink colors.
12 brand new to Hero cardstock colors.
Bundles are available for all 57 Core Inks - an ink pad + inker
Bundle is available for purchasing all 6 new Core Ink pads & Free Color Labels

Since we are talking Color we need to touch on color organization for a second... Hero will be selling color labels that you can use to label your products and keep everything organized! I cannot wait to get my hands on them! These color labels will also be included with the bundles mentioned above as well as with the following...

COLOR ME ORGANIZED PROMOTION:
Between June 20-26 you will receive Free Index Labels with your purchase of any 6 ink pads or ink+inker bundles!

Here is a link for you to check out the new collection. Here you'll be able to see old and new colors as well which colors have been renamed. You can also see which inks have a matching color of cardstock.


Last but not least here is a link to the FREE COLOR CHART! 
And, if you already have a favorite new color you can SHOP BY COLOR HERE!

Ok, let's get on to my card! So, my goal was to find a technique that worked well for all of the new inkers and would yield some consistently cool results. I came up with this Paper Towel Printing technique (I am sure someone has done this before but I did figure it out for myself while I was playing). 

I started by adding drops of both Ultra Pink and Summer Sky Inkers to my glass mat. Then I sprayed them with rubbing alcohol until they started to spread and blend together. I laid a piece of paper towel that had a cool, textured pattern to it on top of my colorful, alcohol mess. The paper towel absorbed the color and I removed it and placed it on a dry part of my glass mat. Next, I placed a piece of white cardstock (regular, not watercolor cardstock) on top of the paper towel and rubbed my fingers across the back to transfer the ink from the paper towel onto my cardstock. I lifted the cardstock up and it was left with this gorgeous, textured background that held the design of the paper towel. I set this aside to dry and it dried quickly since the alcohol evaporated much faster than water would have.
Cardbomb,Maria Willis,Hero Arts, color, cards, cardmaking, stamps, stamping, ink, technique, paper towel printing, dies,die cutting, art, diy, handmade

Once my background was dry I heat embossed part of my sentiment on it using Onyx Pigment Ink and Clear Embossing Powder. Next, I added the "Big Hugs" die cut sentiment using liquid adhesive. I wanted these die cuts to have some dimension so I glued together three layers of black die cuts and one layer of white to create a "shadow."
Cardbomb,Maria Willis,Hero Arts, color, cards, cardmaking, stamps, stamping, ink, technique, paper towel printing, dies,die cutting, art, diy, handmade
To finish my card off I added a Pitch Black mat and glued it all to a card base.
Cardbomb,Maria Willis,Hero Arts, color, cards, cardmaking, stamps, stamping, ink, technique, paper towel printing, dies,die cutting, art, diy, handmade

Well, that is it for today you guys! I hope you will join in our giveaway and keep on hopping for tons of inspiration! For more information you can head over to the Hero Arts Color Page, or, if you want to hit the shop right away you can SHOP BY COLOR HERE.
Have an awesome day!
Maria


GIVEAWAY!! 
We will be giving away one set of the six NEW colors of ink - Core Ink Pads and Inkers - to one lucky commenter. We encourage you to comment on every blog in the hop - the more blogs you comment on, the more chances to win! Comments for contest entry close Sunday, June 26 at 11:59pm PT, and the winner will be announced on the Hero Arts blog the following week.


BLOG HOP LIST:
Hero Arts
Mindy Eggen
Seeka
Michelle Short
Lydia Fiedler
Jessica Frost-Ballas
Ilina Crouse
Channin Pelletier
Pocono Pam
Daniel West
Emily Midgett
Maria Willis

Wednesday, May 18, 2022

Hero Arts Summer Catalog and Mixed Media Release: Blog Hop & Giveaways!

Hey everybody! I'm so glad you are stopping by today because is release day for the brand new Hero Arts Summer Catalog 2021! For this release we have a really cool combination of things to share. We've got brand new products, brand new mixed media products (waxes, pearls, paste and a fabulous palette knife!) and we are even putting a mixed media style twist on some products that you may already know and love. Fun! The new catalog is absolutely gorgeous so if you'd like to get a copy for yourself click here.

Today I'll be sharing some of the projects that I made for the catalog as well as a look at the new mixed media products so make sure to stick around until the end of my post (especially if you want to enter the GIVEAWAY). For my first two projects I used exactly the same products to create two very different looks. I used liquid watercolors (as DIY sprays), the Togetherness Flower Bouquet Stamp, the Newspaper Bold Prints, the Diamond Stencil and the Luggage Tag Alphabet Frame Cuts. For my first piece I tore a piece of Strathmore watercolor paper out of a notebook and left the holes on the left side. I cut the piece down and sprayed it DIY sprays made from both liquid water colors and Reactive Ink Inkers. Then, I stamped the floral stamp repeatedly in Onyx Pigment ink and heat embossed it in clear. 
Cardbomb, Maria Willis, Hero Arts, Hero Arts Summer Catalog 2022,mixed media,stamps, stamping, cards, cardmaking, art, color, handmade, craft,watercolor,Hero Paste,heat emboss,texture,technique,dies,die cutting

On the left side of the piece I added dark shadows behind the flowers using a black watercolor pencil and a sharpie. This made the flowers pop forward more. On the right side of the background I stamped the Newspaper Bold Prints into the background in Splash Reactive Ink. Then I used the Diamond stencil and Unicorn White ink to create more subtle background interest. I heat embossed some of the sentiments from the new Art Journal Messages onto the background in white. 
Cardbomb, Maria Willis, Hero Arts, Hero Arts Summer Catalog 2022,mixed media,stamps, stamping, cards, cardmaking, art, color, handmade, craft,watercolor,Hero Paste,heat emboss,texture,technique,dies,die cutting

After splattering the background with both gold and white Glimmer Metallic ink I added a black sentiment die cut using the Luggage Tag Alphabet dies. I love the bold font of these dies and the fact that I can make any sentiment I want with them. To finish this piece up I add highlights with a white posca pen and a few black enamel dots for accents.
Cardbomb, Maria Willis, Hero Arts, Hero Arts Summer Catalog 2022,mixed media,stamps, stamping, cards, cardmaking, art, color, handmade, craft,watercolor,Hero Paste,heat emboss,texture,technique,dies,die cutting

This card uses the same products for a totally different look. This time I used the Hero Arts watercolor paper (A2 sized) and sprayed it with Liquid Watercolor sprays (Indigo and Pink). Then I stamped Newspaper Bold Prints onto some deli paper with permanent ink. I glued a strip of this stamped paper to my card base before applying Hero Paste over the background using the Diamond Stencil and the NEW PALETTE KNIFE which I absolutely love! While the paste was still wet I sprinkled it with White Puff Embossing Powder and heat set it. While the embossing powder was still hot I sprinkled it with Sand Embossing Powder and heat set that to add more texture. I splattered the background with with both white and gold Glimmer Metallic Ink as well as black acrylic paint and set it aside to dry.
Cardbomb, Maria Willis, Hero Arts, Hero Arts Summer Catalog 2022,mixed media,stamps, stamping, cards, cardmaking, art, color, handmade, craft,watercolor,Hero Paste,heat emboss,texture,technique,dies,die cutting

I stamped the flowers in Onyx Pigment Ink and heat embossed them in clear embossing powder before cutting them out with the coordinating die. Then I watercolored them with liquid watercolors (Pink, Orange, Dandelion, Leaf and Jungle Mist). I added extra detail and shadows with black sharpie and gray copic markers before adhering them to my card with foam adhesive.  
Cardbomb, Maria Willis, Hero Arts, Hero Arts Summer Catalog 2022,mixed media,stamps, stamping, cards, cardmaking, art, color, handmade, craft,watercolor,Hero Paste,heat emboss,texture,technique,dies,die cutting

To finish the card off I added a "HEY" sentiment cut using the Luggage Tag Alphabet dies. I adhered the letters using foam tape and then added some black enamel dots.
Cardbomb, Maria Willis, Hero Arts, Hero Arts Summer Catalog 2022,mixed media,stamps, stamping, cards, cardmaking, art, color, handmade, craft,watercolor,Hero Paste,heat emboss,texture,technique,dies,die cutting


My next three projects again use the same products but combine them in different ways for different outcomes. For these projects I am using the Bug Collections Bold Prints Stamp, the Novel Prose Bold Prints Stamp, and, the Love Stamp & Cut. For this card I started out with an A2 sized piece of Paradise cardstock. I used a MISTI to stamp the Bug Collections BP in Canary Pigment ink and heat embossed it in clear. Then, I ink-blended around the edges of the card using Blue Hawaii Reactive Ink and a blending brush. This darkened up the edges and gave the center of the card a glow. Next, I stamped around the edges again using Versamark ink and the Novel Prose BP stamp. I heat embossed that in gold. To finish the background off I added splatters of black acrylic paint.
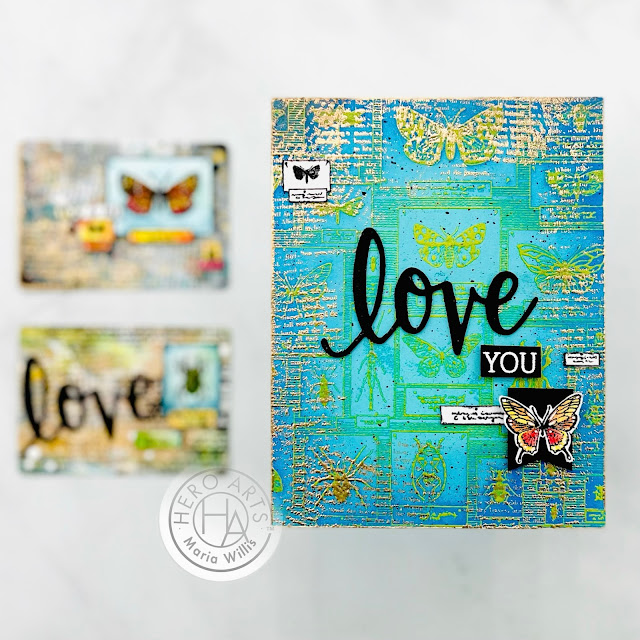
Cardbomb, Maria Willis, Hero Arts, Hero Arts Summer Catalog 2022,mixed media,stamps, stamping, cards, cardmaking, art, color, handmade, craft,watercolor,Hero Paste,heat emboss,texture,technique,dies,die cutting

Next, I stamped the Bug Collection Bold Prints stamp onto watercolor cardstock in Onyx Pigment ink and heat set it with clear embossing powder. Then, I cut out a little piece for the top, left of my card and a butterfly for the bottom right. I also cut out a couple specimen labels to add to the background. I watercolored the butterfly with liquid watercolors and outlined the other pieces in black sharpie. I layered the butterfly onto a black banner from the Love Stamp & Cut set. I also created my sentiment from this set. I placed all of my pieces onto the background and when I was happy with the layout I glued them all done and that was all she wrote!
Cardbomb, Maria Willis, Hero Arts, Hero Arts Summer Catalog 2022,mixed media,stamps, stamping, cards, cardmaking, art, color, handmade, craft,watercolor,Hero Paste,heat emboss,texture,technique,dies,die cutting

For my next two projects I used playing cards. There were two extra cards in the deck so I just grabbed those and I added a layer of both white and black acrylic paint as a backdrop to get started. On this first card I stamped Novel Prose randomly into the background using black ink.
Cardbomb, Maria Willis, Hero Arts, Hero Arts Summer Catalog 2022,mixed media,stamps, stamping, cards, cardmaking, art, color, handmade, craft,watercolor,Hero Paste,heat emboss,texture,technique,dies,die cutting

I added circles using bubble wrap and Aquamarine Pigment Ink that I heat embossed in clear. Then, I stamped Novel Prose again, this time using Versamark ink and I heat embossed that in Sand Embossing Powder. I splattered the background with white acrylic paint and Gold Glimmer Metallic Ink before smearing more gold and black acrylic paint around the edges. At some point in this process I also stamped some "XOXO" sentiments into the background.
Cardbomb, Maria Willis, Hero Arts, Hero Arts Summer Catalog 2022,mixed media,stamps, stamping, cards, cardmaking, art, color, handmade, craft,watercolor,Hero Paste,heat emboss,texture,technique,dies,die cutting

To finish this playing card up I added cuttings from the Bug Collections stamp and Love Stamp & Cut that I watercolored and outlined in black. I also added some gold string behind them and some enamel dots to add a little extra texture. 
Cardbomb, Maria Willis, Hero Arts, Hero Arts Summer Catalog 2022,mixed media,stamps, stamping, cards, cardmaking, art, color, handmade, craft,watercolor,Hero Paste,heat emboss,texture,technique,dies,die cutting

For this Love Bug playing card I basically applied the same techniques as on the butterfly playing card. I heat embossed Novel Prose in white and then again with Sand Embossing Powder. 
Cardbomb, Maria Willis, Hero Arts, Hero Arts Summer Catalog 2022,mixed media,stamps, stamping, cards, cardmaking, art, color, handmade, craft,watercolor,Hero Paste,heat emboss,texture,technique,dies,die cutting

I wanted to add more color to the background so I smeared some Leaf and Jungle Mist Liquid Watercolor on with my finger. It worked better than I thought it would and I think it looks really cool.
Cardbomb, Maria Willis, Hero Arts, Hero Arts Summer Catalog 2022,mixed media,stamps, stamping, cards, cardmaking, art, color, handmade, craft,watercolor,Hero Paste,heat emboss,texture,technique,dies,die cutting

When I added the "Love" die cut I covered it in Clear Lacquer so that it would be shiny. I also added Clear Lacquer to the beetle so he looked three dimensional and to the "Bug" sentiment. I did the the "Bug" sentiment by hand since there wasn't one in the set. The final step was to add some white enamel dots.
Cardbomb, Maria Willis, Hero Arts, Hero Arts Summer Catalog 2022,mixed media,stamps, stamping, cards, cardmaking, art, color, handmade, craft,watercolor,Hero Paste,heat emboss,texture,technique,dies,die cutting

Ok! Now let's move on and check out some of the new and super awesome mixed media products that are launching today! We've got two brand new mediums and an addition to one existing product line. Here's what we've got:
   
        -Gold
        -Black
        -White (Pearlescent finish)
        -Buy them in a Bundle!

        -Gold
        -Silver
        -Pewter
        -White (Pearlescent finish)
        -Buy them in a Bundle!

        -Pearl
        -Buy them in a Bundle!

Now, here's a look at what we've got. These are swatches of all three colors of the new HERO WAXES. The waxes are a wax based product that dries permanent on most surfaces. They are great for doing a variety of techniques with. On these swatches I show that they can be applied smoothly with a palette knife (top left), textured (bottom left), heated with a heat tool to bubble them (top right), and applied with a dry brush to add texture (bottom right). They are amazing to burnish over texture on your projects, for use with stencils and for many other techniques. You can buy these waxes individually or as a bundle.
Cardbomb, Maria Willis, Hero Arts, Hero Arts Summer Catalog 2022,mixed media,stamps, stamping, cards, cardmaking, art, color, handmade, craft,watercolor,Hero Paste,heat emboss,texture,technique,dies,die cutting

Next up we have the new HERO PEARLS in four gorgeous colors! All four of these of a striking, metallic finish that is very eyecatching. As you can see from the swatches they can be applied in a variety of ways-here, I've used my finger, used the tip to draw a squiggle, and then made some pearls as embellishments. The colors all look stunning on both dark and light cardstock and are easy to make beautiful "pearls" with (no hershey's kiss look with these drops as they are self-leveling). You can buy these individually or as a bundle.
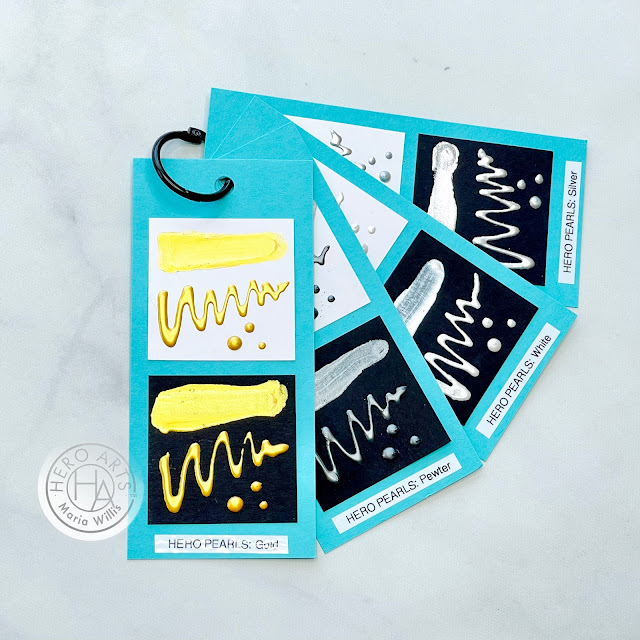
Cardbomb, Maria Willis, Hero Arts, Hero Arts Summer Catalog 2022,mixed media,stamps, stamping, cards, cardmaking, art, color, handmade, craft,watercolor,Hero Paste,heat emboss,texture,technique,dies,die cutting

Finally, we have the newest addition to our Hero Paste line with this gorgeous, new HERO PEARL PASTE. This paste is similar to others in our line (currently we have our original paste, glitter paste and now Pearl paste). It is white with a pearlescent finish and had great coverage on both light and dark cardstocks. You can add color this paste by adding a few drops of either liquid watercolor or Inkers. If you already have the two existing pastes you can pick up the Pearl paste by itself, or, if you want all three pastes you can grab the bundle. 
Cardbomb, Maria Willis, Hero Arts, Hero Arts Summer Catalog 2022,mixed media,stamps, stamping, cards, cardmaking, art, color, handmade, craft,watercolor,Hero Paste,heat emboss,texture,technique,dies,die cutting

Here's a look at all of the swatches for the new mediums together... Aren't they fun?!
Cardbomb, Maria Willis, Hero Arts, Hero Arts Summer Catalog 2022,mixed media,stamps, stamping, cards, cardmaking, art, color, handmade, craft,watercolor,Hero Paste,heat emboss,texture,technique,dies,die cutting

Before I go there are two new tools that I have to tell you about because you are going to need them!

First we've got the new stamp Scrubbing Block! This is a block that is easy to hold in your hand and allows you scrub your stamps clean while they are in your MISTI! This tool makes it easy to clean your Bold Print stamps too! Check it out HERE!

We've also got a brand new Palette Knife! I absolutely love because it's made out of metal and wood. I love tools made of natural materials so much more than plastic tools. This palette knife is also really great because of the shape of the knife. It is shaped like an elongated diamond and has a narrow tip that is easy to dip into your product containers to pick up your product. Check out this awesome, new Palette Knife HERE!

Ok, you guys! That is it for today so I hope you'll keep hopping along with us to check out the new goodies and tons of creative inspiration from the Hero Arts Creative Team. Remember to enter our giveaway too (details below)!

Have an awesome day!
Maria


GIVEAWAY:


BLOG HOP LIST:


PRODUCT SUPPLY LIST (Affiliate Links may be used at no extra cost to you):
Thursday, May 20, 2021

Hero Arts Summer Catalog 2021 Release and Blog Hop

Hi everybody! I am so excited because today is launch day for the new Hero Arts Summer Catalog and it is on fire! You can check out the whole catalog HERE if you'd like to but first join us for an amazing blog hop full of crafty inspiration using the new products. I've got four cards to share with you today so let's get to it!

For my first card I paired the new Brick Wall Bold Prints, the new Message Strips Stamp and Cut, and the Hello There Stamp & Cut. I started by ink blending my background panel in Taffy, Lemon Drop and Splash Reactive Inks.

Cardbomb, Maria Willis,Hero Arts, Hero Arts Summer Catalog 2021, cards, card making, stamps, stamping, ink, paper, paper craft, color, diy, stencils, mixed media,die cutting, heat embossing, technique

Next, I put my background in my Misti along with the Brick Wall Bold Prints stamp and stamped it using Unicorn White Pigment ink. This resulted in my background having a light and subtle look. Now, if you've used pigment ink before you know it can take a little time to dry... I don't always have the patience for all of that waiting so I tossed some clear embossing powder onto the wet ink and heat embossed it. This added extra texture and shine to my "bricks." When I stamped, the ink on my background reacted with the wet ink and some of it lifted off my card and the color stayed on the stamp. I used that residual ink to stamp a second background panel which you will see on my last card today.
Cardbomb, Maria Willis,Hero Arts, Hero Arts Summer Catalog 2021, cards, card making, stamps, stamping, ink, paper, paper craft, color, diy, stencils, mixed media,die cutting, heat embossing, technique

I heat embossed the "I miss you" from the new Message Strips Stamp & Cut in Onyx Pigment ink and clear embossing powder. Then, I mounted my background onto a black card base and added "Hello There" and some enamel dots to finish my card off.
Cardbomb, Maria Willis,Hero Arts, Hero Arts Summer Catalog 2021, cards, card making, stamps, stamping, ink, paper, paper craft, color, diy, stencils, mixed media,die cutting, heat embossing, technique

My next card is a slimline card and although it looks pretty fancy it really wasn't all that hard to make. I recently made a similar card using different products so if you'd like to watch the process you can find that video HERE. I used my slimline stencils to cut out a panel and then ink blended it using Lemon Drop, Taffy and Splash reactive inks (my three favorite reactive inks). Then I used the new Floral Tile Stencil to add Moonstone Glimmer Paste to the background. Now, this isn't a slimline stencil so I just readjusted it and added more paste where I wanted it. 
Cardbomb, Maria Willis,Hero Arts, Hero Arts Summer Catalog 2021, cards, card making, stamps, stamping, ink, paper, paper craft, color, diy, stencils, mixed media,die cutting, heat embossing, technique

I heat embossed the new Succulent Bouquet stamp in silver onto vellum. This is so easy and creates such a gorgeous look! I die cut the succulents and then adhered them to my background using foam which I had cut into small pieces to hide it from sight.
Cardbomb, Maria Willis,Hero Arts, Hero Arts Summer Catalog 2021, cards, card making, stamps, stamping, ink, paper, paper craft, color, diy, stencils, mixed media,die cutting, heat embossing, technique

To finish my card off I added a sentiment using both the Thinking of You Stamp & Cut as well as the Message Strips Stamp & Cut. The final step was to add some jewels and pearls for a little bling.
Cardbomb, Maria Willis,Hero Arts, Hero Arts Summer Catalog 2021, cards, card making, stamps, stamping, ink, paper, paper craft, color, diy, stencils, mixed media,die cutting, heat embossing, technique

This next card was made using the new Looking Glass Canyon Lands dies. This is just one set in an amazing collection of Looking Glass dies and I hope that you'll check them out! There are also two different sized stencils to help you with alignment so that you can always get perfect placement of your dies! I cut all three dies out of separate pieces of cardstock and then colored them with copic markers. I also prepared a background sky using splash ink and White Iridescent Shimmer Spray. 
Cardbomb, Maria Willis,Hero Arts, Hero Arts Summer Catalog 2021, cards, card making, stamps, stamping, ink, paper, paper craft, color, diy, stencils, mixed media,die cutting, heat embossing, technique

Next, I layered my die cuts together making sure that they were properly aligned (when I made this card I didn't have the alignment stencils yet and had to wing it). I adhered the layers using foam tape so that there would be depth to my scene. 
Cardbomb, Maria Willis,Hero Arts, Hero Arts Summer Catalog 2021, cards, card making, stamps, stamping, ink, paper, paper craft, color, diy, stencils, mixed media,die cutting, heat embossing, technique
Once my little die cut scene was properly put together, I used a square die to cut a black card panel. I created a gold frame using two square dies and glued that on to frame the hole. Then I heat embossed my sentiment below the frame. I adhered my little scene to the back of the black cardstock so that it was perfectly framed. I added extra foam tape to the back of the panel and attached it to a cardbase to finish off the card.
Cardbomb, Maria Willis,Hero Arts, Hero Arts Summer Catalog 2021, cards, card making, stamps, stamping, ink, paper, paper craft, color, diy, stencils, mixed media,die cutting, heat embossing, technique

For my final card I used the background that was leftover from my first card using the Brick Wall Bold Prints stamp. I added it to a piece of Mist cardstock and then added my sentiment using the Big Hugs and Message Strips Stamp & Cut dies. 
Cardbomb, Maria Willis,Hero Arts, Hero Arts Summer Catalog 2021, cards, card making, stamps, stamping, ink, paper, paper craft, color, diy, stencils, mixed media,die cutting, heat embossing, technique

I thought the card needed a little something more so I added some tiny arrows from the US Map Infinity Die set.
Cardbomb, Maria Willis,Hero Arts, Hero Arts Summer Catalog 2021, cards, card making, stamps, stamping, ink, paper, paper craft, color, diy, stencils, mixed media,die cutting, heat embossing, technique

Ok, you guys, that's all I've got for today! Thanks so much for stopping by and I hope you will continue on with the rest of this inspiration filled blog hop celebrating the launch of the Hero Arts Summer Catalog. Make sure to check out the Giveaway info below and leave a comment right here on my blog to be entered to win!

Have an awesome day!
Maria


GIVEAWAY:
Hero Arts will give away THREE $50 gift cards, drawn from the comments left across the hop. Enter by Sunday, May 30th at 11:59pm pacific, and the winner will be announced on the Hero Arts blog the following week.


BLOG HOP LIST:


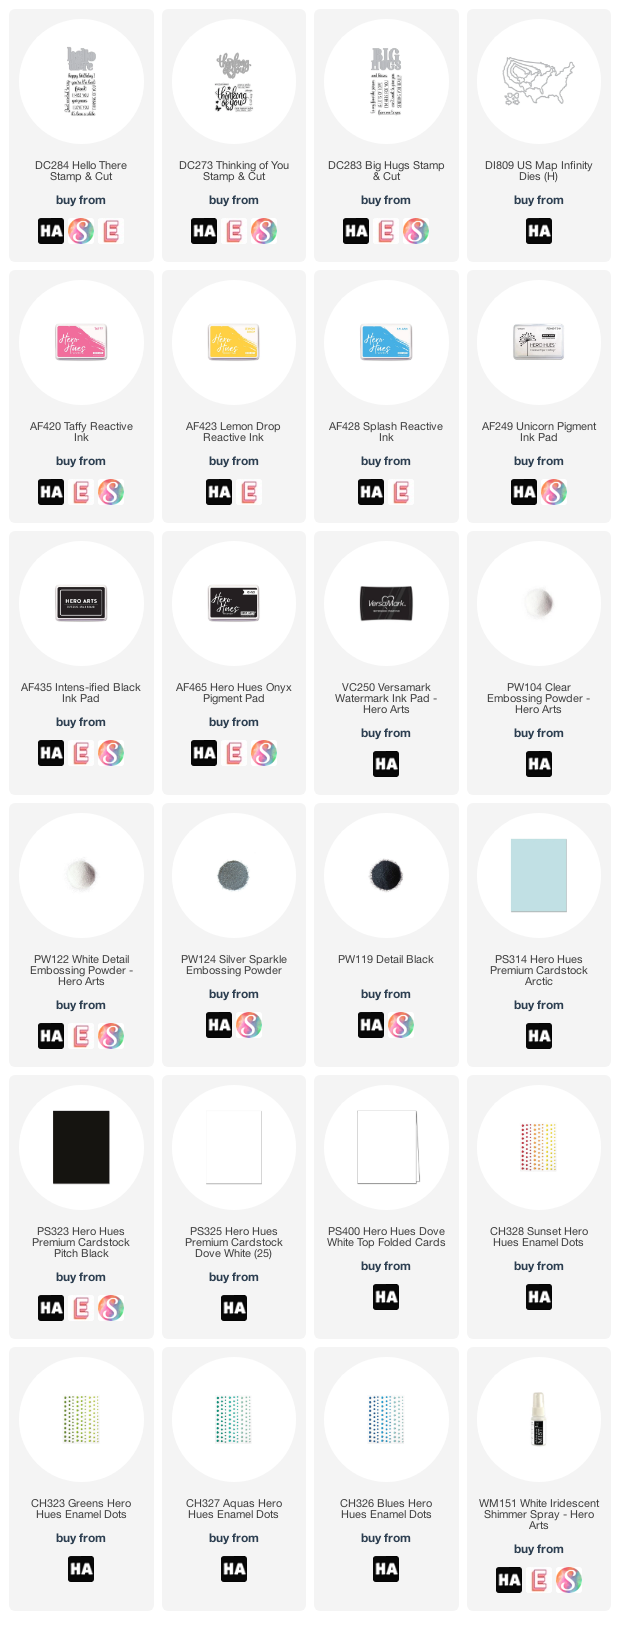
PRODUCT SUPPLY LIST:

Saturday, December 26, 2020

Tonic Studios Stamp Club Release, VIDEO, and Giveaway: Shoot For the Moon!

Hi everybody! It's time for a new Stamp Club release from Tonic Studios! This month's release is called Shoot For the Moon (Click here for UK link) and it is fantastic! The release includes a large 6" x 8" stamp set and the same size coordinating die set. Some of the dies in the set match the stamps and others are stand-alone dies. For more info you can head over to Tonic Studios  (USA/UK) to check it out.

Before I get too far into this post (because I've got eight cards to share with you today) I want to let you know that we've got a great GIVEAWAY and a really inspiring blog hop today. All of the info is at the bottom of my post so be sure to check it out. 
Cardbomb, Maria Willis, Tonic Studios,Tonic Studios USA,Tonic Studios Stamp Club, cards, cardmaking, stamps, stamping, die cutting, inkblending, ink, paper, papercraft, video tutorial, technique


I've also made a video for you sharing many different ways that you can use the Shoot For the Moon (UK bundle) bundle...

Here's a look at the full bundle...


My first card today showcases the full moon die, galaxy star stamp and many of the dies from the set. 
Cardbomb, Maria Willis, Tonic Studios,Tonic Studios USA,Tonic Studios Stamp Club, cards, cardmaking, stamps, stamping, die cutting, inkblending, ink, paper, papercraft, video tutorial, technique

I watercolored all of the pieces, added some grunge with glitter gloss and embellishment splatters, brushed mousse on the mountain tops and then layered all of the pieces with foam tape.
Cardbomb, Maria Willis, Tonic Studios,Tonic Studios USA,Tonic Studios Stamp Club, cards, cardmaking, stamps, stamping, die cutting, inkblending, ink, paper, papercraft, video tutorial, technique

I heat embossed a sentiment from the Happy Mail Envelope stamp set (Happy Mail UK) to finish the card off. This card ended up having so much depth and dimension. It's a 5" x 7" card so it really makes a statement!
Cardbomb, Maria Willis, Tonic Studios,Tonic Studios USA,Tonic Studios Stamp Club, cards, cardmaking, stamps, stamping, die cutting, inkblending, ink, paper, papercraft, video tutorial, technique

My second card is a simple card that features the tree stamp stamped in black ink on top of an ink blended moon.

Cardbomb, Maria Willis, Tonic Studios,Tonic Studios USA,Tonic Studios Stamp Club, cards, cardmaking, stamps, stamping, die cutting, inkblending, ink, paper, papercraft, video tutorial, technique

I splattered the background with Midas Touch Shimmer Pen and popped the panel up onto a gray cardbase.
Cardbomb, Maria Willis, Tonic Studios,Tonic Studios USA,Tonic Studios Stamp Club, cards, cardmaking, stamps, stamping, die cutting, inkblending, ink, paper, papercraft, video tutorial, technique

After adding a heat embossed sentiment I finished the card off with some sequins.
Cardbomb, Maria Willis, Tonic Studios,Tonic Studios USA,Tonic Studios Stamp Club, cards, cardmaking, stamps, stamping, die cutting, inkblending, ink, paper, papercraft, video tutorial, technique

My third card is 100% stamping. I used Nuvo Hybrid inks to stamp everything and you can see all of the techniques I used in my video. 

Cardbomb, Maria Willis, Tonic Studios,Tonic Studios USA,Tonic Studios Stamp Club, cards, cardmaking, stamps, stamping, die cutting, inkblending, ink, paper, papercraft, video tutorial, technique

First, I stamped the trees in gradient colors so that some would appear to be in the background and others in the foreground.
Cardbomb, Maria Willis, Tonic Studios,Tonic Studios USA,Tonic Studios Stamp Club, cards, cardmaking, stamps, stamping, die cutting, inkblending, ink, paper, papercraft, video tutorial, technique

I stamped the full moon with the back of the detailed full moon stamp. 
Cardbomb, Maria Willis, Tonic Studios,Tonic Studios USA,Tonic Studios Stamp Club, cards, cardmaking, stamps, stamping, die cutting, inkblending, ink, paper, papercraft, video tutorial, technique

For my fourth card I used the large half-moon die. This die is big and can easily carry a card on it's own.
Cardbomb, Maria Willis, Tonic Studios,Tonic Studios USA,Tonic Studios Stamp Club, cards, cardmaking, stamps, stamping, die cutting, inkblending, ink, paper, papercraft, video tutorial, technique

I cut it out using Holowaves Iridescent  cardstock and popped it up with foam tape on a watercolored background.
Cardbomb, Maria Willis, Tonic Studios,Tonic Studios USA,Tonic Studios Stamp Club, cards, cardmaking, stamps, stamping, die cutting, inkblending, ink, paper, papercraft, video tutorial, technique

I added some small stars covered in embellishment mousse to the background. The background is also splattered with Glitter Gloss to give it a little shimmer.
Cardbomb, Maria Willis, Tonic Studios,Tonic Studios USA,Tonic Studios Stamp Club, cards, cardmaking, stamps, stamping, die cutting, inkblending, ink, paper, papercraft, video tutorial, technique

My next card is a slimline card. I've used just two stamps for this card (tree and sentiment). I stamped the tree stamp repeatedly using Distress Oxide inks.
Cardbomb, Maria Willis, Tonic Studios,Tonic Studios USA,Tonic Studios Stamp Club, cards, cardmaking, stamps, stamping, die cutting, inkblending, ink, paper, papercraft, video tutorial, technique

Then, I used the same colors of Distress Oxide inks to splatter the background to grunge it up a little. I also splattered on some Midas Touch to give it a little bit of golden magic.
Cardbomb, Maria Willis, Tonic Studios,Tonic Studios USA,Tonic Studios Stamp Club, cards, cardmaking, stamps, stamping, die cutting, inkblending, ink, paper, papercraft, video tutorial, technique

The moon is one of my favorite parts of this card. I cut out a small circle and covered it with white and gray stone drops. Then I dabbed my fingers in the wet stone drops to create peaks. I heated the wet stone drops with my heat tool and this caused them to bubble slightly. I brushed some platinum embellishment  mousse on both the moon and some stars I had cut out. I glued the stars to the background of my card and added a few to the moon as well. I love all that grungy, texture!
Cardbomb, Maria Willis, Tonic Studios,Tonic Studios USA,Tonic Studios Stamp Club, cards, cardmaking, stamps, stamping, die cutting, inkblending, ink, paper, papercraft, video tutorial, technique

I stamped the sentiment in black and that was it. 
Cardbomb, Maria Willis, Tonic Studios,Tonic Studios USA,Tonic Studios Stamp Club, cards, cardmaking, stamps, stamping, die cutting, inkblending, ink, paper, papercraft, video tutorial, technique

I think I may save this card to give to my husband.
Cardbomb, Maria Willis, Tonic Studios,Tonic Studios USA,Tonic Studios Stamp Club, cards, cardmaking, stamps, stamping, die cutting, inkblending, ink, paper, papercraft, video tutorial, technique

This next card features the mountain range stamp. I used an easy watercolor technique that I share in my video to color it.

Cardbomb, Maria Willis, Tonic Studios,Tonic Studios USA,Tonic Studios Stamp Club, cards, cardmaking, stamps, stamping, die cutting, inkblending, ink, paper, papercraft, video tutorial, technique

I added an ink blended moon and background above the mountain range. I water colored some water in below the mountain range.
Cardbomb, Maria Willis, Tonic Studios,Tonic Studios USA,Tonic Studios Stamp Club, cards, cardmaking, stamps, stamping, die cutting, inkblending, ink, paper, papercraft, video tutorial, technique

I splattered the background with Glitter Gloss and added a sentiment to finish off this card.
Cardbomb, Maria Willis, Tonic Studios,Tonic Studios USA,Tonic Studios Stamp Club, cards, cardmaking, stamps, stamping, die cutting, inkblending, ink, paper, papercraft, video tutorial, technique

This next card is totally different from any of the other cards. I started out by heat embossing the tree branches around the edges of my cardstock. Then I used shimmer powders to create a wild night sky.
Cardbomb, Maria Willis, Tonic Studios,Tonic Studios USA,Tonic Studios Stamp Club, cards, cardmaking, stamps, stamping, die cutting, inkblending, ink, paper, papercraft, video tutorial, technique

I cut out the half moon using the die and then I watercolored the moon yellow using shimmer powder.
Cardbomb, Maria Willis, Tonic Studios,Tonic Studios USA,Tonic Studios Stamp Club, cards, cardmaking, stamps, stamping, die cutting, inkblending, ink, paper, papercraft, video tutorial, technique

I popped the moon and sentiment up on foam tape to finish off this card.
Cardbomb, Maria Willis, Tonic Studios,Tonic Studios USA,Tonic Studios Stamp Club, cards, cardmaking, stamps, stamping, die cutting, inkblending, ink, paper, papercraft, video tutorial, technique

For my eighth and final card I used an easy masking technique (yep, it's in the video) to create a forest scene. 
Cardbomb, Maria Willis, Tonic Studios,Tonic Studios USA,Tonic Studios Stamp Club, cards, cardmaking, stamps, stamping, die cutting, inkblending, ink, paper, papercraft, video tutorial, technique

I used the large half moon die cut out of irridescent cardstock to frame the forest scene.
Cardbomb, Maria Willis, Tonic Studios,Tonic Studios USA,Tonic Studios Stamp Club, cards, cardmaking, stamps, stamping, die cutting, inkblending, ink, paper, papercraft, video tutorial, technique

I mounted the scene onto a square cardbase that was rubbed with gold embellishment mousse and splattered with white gouache.
Cardbomb, Maria Willis, Tonic Studios,Tonic Studios USA,Tonic Studios Stamp Club, cards, cardmaking, stamps, stamping, die cutting, inkblending, ink, paper, papercraft, video tutorial, technique

Ok, that's all for me today you guys but before I go I've got tell you about a fantastic giveaway from Tonic Studios!

GIVEAWAY!!
Tonic Studios will be giving one lucky winner this Shoot For the Moon (UK link) release AND a $50 gift card to spend at Tonic Studios ( £50 if you're in the UK!)! That is such a fantastic giveaway and someone is going to be so happy! To enter the giveaway you need to comment on every blog in this blog hop (the list of blog hoppers is down below). Get your comments in by 11:59 pm PST on January 3rd, 2021. The winner will be announced on the Tonic Studios Instagram and Facebook accounts on January 5th, 2021 (so make sure you're following the Tonic Studios social media accounts). Good luck to you all!


Ok, the blog hop list is below (or just head over to Michelle's blog right now). I've also linked most of the products that I've used today in case you'd like to check anything out. 

Have an awesome day (or evening if you're on the other side of the Earth from me)! Bye for now.

Maria.


BLOG HOP LIST:

Maria Willis

Michelle Short

Mindy Eggen

Seeka

Amber Rain Davis

Daniel West

Ilda Dias

Jen Kray

Jennifer Kotas

Lydia Fiedler


PRODUCT SUPPLY LIST:

01 09 10