Showing posts with label #ocean. Show all posts

Monday, August 3, 2020

Hero Arts August My Monthly Hero Kit and a Giveaway!

Happy Monday and welcome to the launch of this month's Hero Art's My Monthly Hero kit! If you this is your first time hearing about the kit here's the skinny... On the third Monday of every month Hero Arts releases an exclusive stamping/craft kit. The kits are usually valued well over $70 but only cost $34.99. The catch is that there are only a limited number of kits and once they sell out they are gone forever. You can make sure to always get a kit by subscribing. In addition to the MMH kits there are always fantastic add-ons that coordinate with the theme of the kit. 

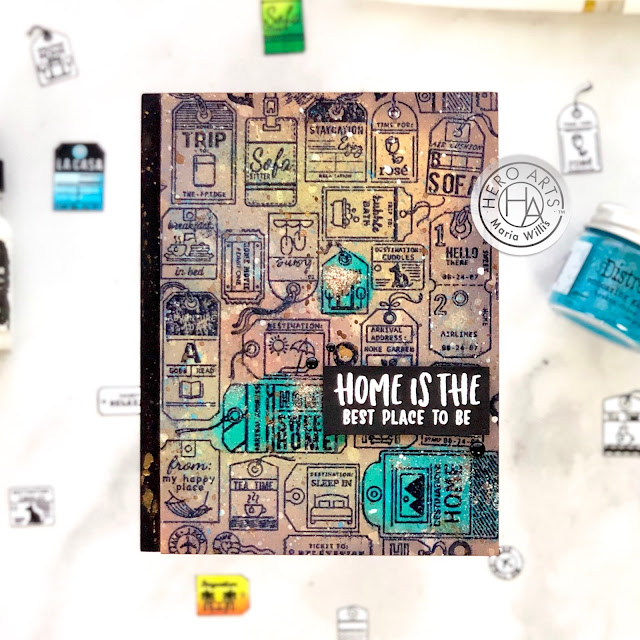
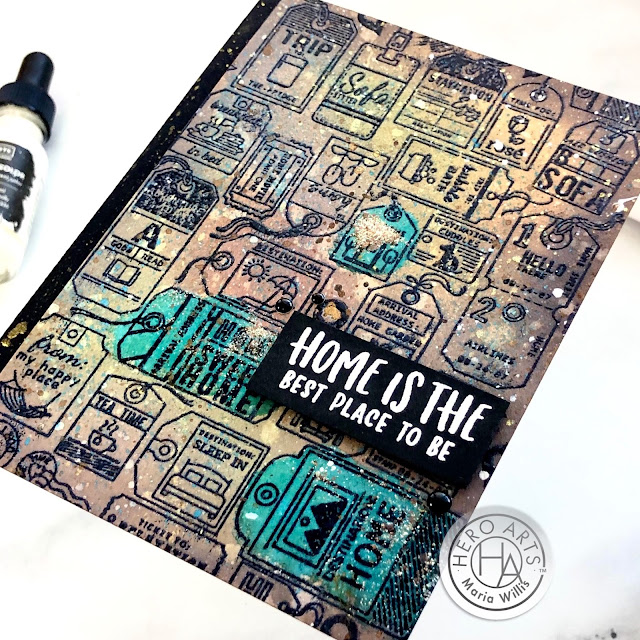
For all of my cards today I have started with one of these add-ons, a background stamp called, Destination Home Bold Prints. Sometimes it's fun to take one stamp and see just how far you can take it. That's what I've done today and I've got a fun range of cards to share with ranging from clean and simple cards to grungy with a mixed media look. The first card I'm sharing is my favorite of the bunch and has one of the more mixed media looking backgrounds.
#cardmaking, #cards, #craft, #create, #distressoxideinks, #diy, #handmadecards, #ink, #mixedmedia, #paper, #stamp, Cardbomb, Hero Arts, maria willis, My Monthly Hero Kit August 2020, Tim Holtz, #ocean, #octopus, #copicmarkers, #copics

This background was first, heat embossed in Sand embossing powder, and then ink blended. I used a second background stamp called, State-cation Bold Prints to add some extra stamped detail in black.
#cardmaking, #cards, #craft, #create, #distressoxideinks, #diy, #handmadecards, #ink, #mixedmedia, #paper, #stamp, Cardbomb, Hero Arts, maria willis, My Monthly Hero Kit August 2020, Tim Holtz, #ocean, #octopus, #copicmarkers, #copics

After adding some splatters I finished the card off by adding a Copic colored octopus and sentiment adorned with other little critters.
#cardmaking, #cards, #craft, #create, #distressoxideinks, #diy, #handmadecards, #ink, #mixedmedia, #paper, #stamp, Cardbomb, Hero Arts, maria willis, My Monthly Hero Kit August 2020, Tim Holtz, #ocean, #octopus, #copicmarkers, #copics

My second card is clean and simple. I watercolored the background (heat embossed in white) with ink from my Hero Arts Reactive Inks. 
#cardmaking, #cards, #craft, #create, #distressoxideinks, #diy, #handmadecards, #ink, #mixedmedia, #paper, #stamp, Cardbomb, Hero Arts, maria willis, My Monthly Hero Kit August 2020, Tim Holtz, #ocean, #octopus, #copicmarkers, #copics

Then I added a die cut sentiment that I had cut out three times and stacked for dimension.
#cardmaking, #cards, #craft, #create, #distressoxideinks, #diy, #handmadecards, #ink, #mixedmedia, #paper, #stamp, Cardbomb, Hero Arts, maria willis, My Monthly Hero Kit August 2020, Tim Holtz, #ocean, #octopus, #copicmarkers, #copics

My third card has an embossed, trapped resist technique for the background. It's ink blended in contrasting colors to make it pop.
#cardmaking, #cards, #craft, #create, #distressoxideinks, #diy, #handmadecards, #ink, #mixedmedia, #paper, #stamp, Cardbomb, Hero Arts, maria willis, My Monthly Hero Kit August 2020, Tim Holtz, #ocean, #octopus, #copicmarkers, #copics

Again I kept this card simple and finished it off with a die cut sentiment and some enamel dots.
#cardmaking, #cards, #craft, #create, #distressoxideinks, #diy, #handmadecards, #ink, #mixedmedia, #paper, #stamp, Cardbomb, Hero Arts, maria willis, My Monthly Hero Kit August 2020, Tim Holtz, #ocean, #octopus, #copicmarkers, #copics

My next card was made with the same technique as the last card but this time I decided to go with a birthday theme.
#cardmaking, #cards, #craft, #create, #distressoxideinks, #diy, #handmadecards, #ink, #mixedmedia, #paper, #stamp, Cardbomb, Hero Arts, maria willis, My Monthly Hero Kit August 2020, Tim Holtz, #ocean, #octopus, #copicmarkers, #copics

I feel like backgrounds like these can be used for almost anything that you want and since I need some birthday cards that was that. 
#cardmaking, #cards, #craft, #create, #distressoxideinks, #diy, #handmadecards, #ink, #mixedmedia, #paper, #stamp, Cardbomb, Hero Arts, maria willis, My Monthly Hero Kit August 2020, Tim Holtz, #ocean, #octopus, #copicmarkers, #copics

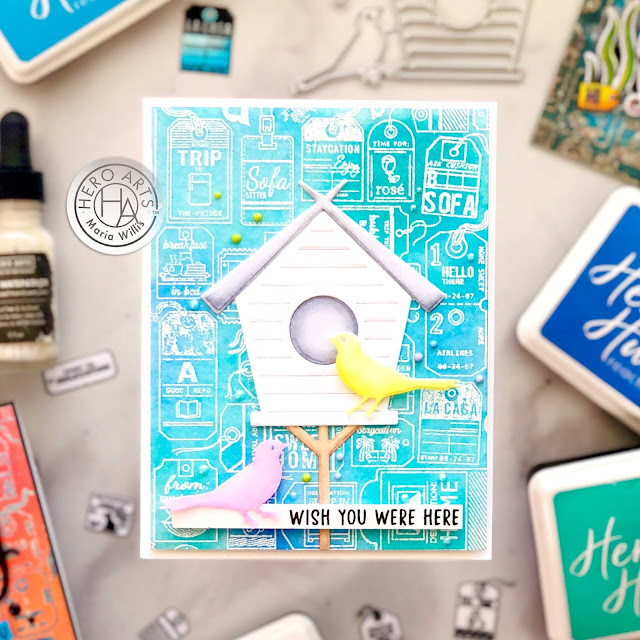
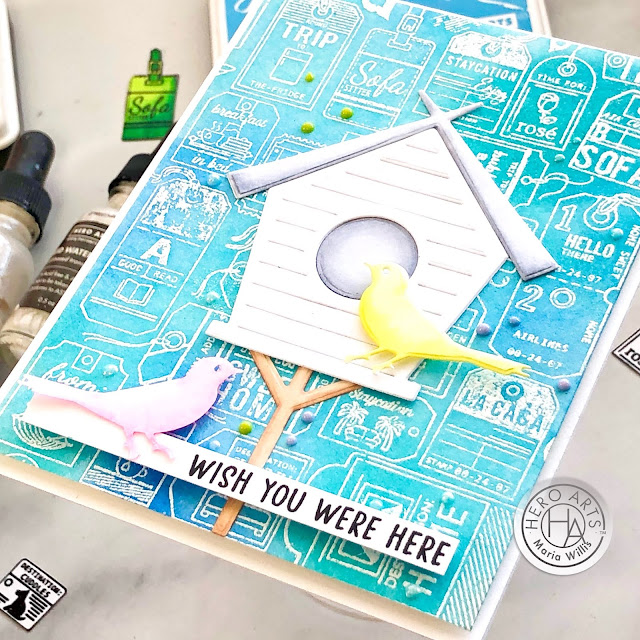
My next card features a simple ink blended look and a stand-alone die from this release. The die is called the Bird House Fancy Die.
#cardmaking, #cards, #craft, #create, #distressoxideinks, #diy, #handmadecards, #ink, #mixedmedia, #paper, #stamp, Cardbomb, Hero Arts, maria willis, My Monthly Hero Kit August 2020, Tim Holtz, #ocean, #octopus, #copicmarkers, #copics

I used my copic markers to add some subtle color the birdhouse and birds. Then I adhered those along with a sentiment.
#cardmaking, #cards, #craft, #create, #distressoxideinks, #diy, #handmadecards, #ink, #mixedmedia, #paper, #stamp, Cardbomb, Hero Arts, maria willis, My Monthly Hero Kit August 2020, Tim Holtz, #ocean, #octopus, #copicmarkers, #copics

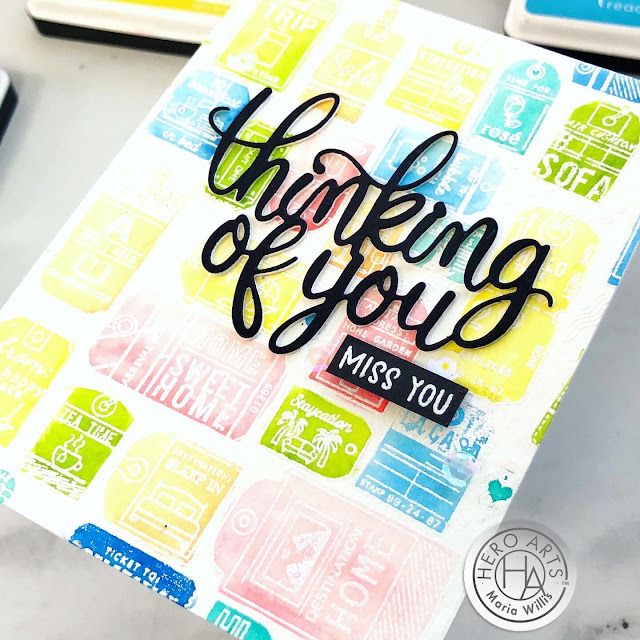
This card was pretty easy to make. I took a background that I had heat embossed in black and then colored in some of the tags in rainbow colors with my copic markers. I cut them out and adhered them with foam tape over the sentiment.
#cardmaking, #cards, #craft, #create, #distressoxideinks, #diy, #handmadecards, #ink, #mixedmedia, #paper, #stamp, Cardbomb, Hero Arts, maria willis, My Monthly Hero Kit August 2020, Tim Holtz, #ocean, #octopus, #copicmarkers, #copics

The sentiment is heat embossed in black embossing powder straight onto the card face.
#cardmaking, #cards, #craft, #create, #distressoxideinks, #diy, #handmadecards, #ink, #mixedmedia, #paper, #stamp, Cardbomb, Hero Arts, maria willis, My Monthly Hero Kit August 2020, Tim Holtz, #ocean, #octopus, #copicmarkers, #copics

This card was clean and simple until I decided to ink splatter the background and then cover it in a rainbow of Nuvo drops. I love the extra color and added dimension from the drops.
#cardmaking, #cards, #craft, #create, #distressoxideinks, #diy, #handmadecards, #ink, #mixedmedia, #paper, #stamp, Cardbomb, Hero Arts, maria willis, My Monthly Hero Kit August 2020, Tim Holtz, #ocean, #octopus, #copicmarkers, #copics

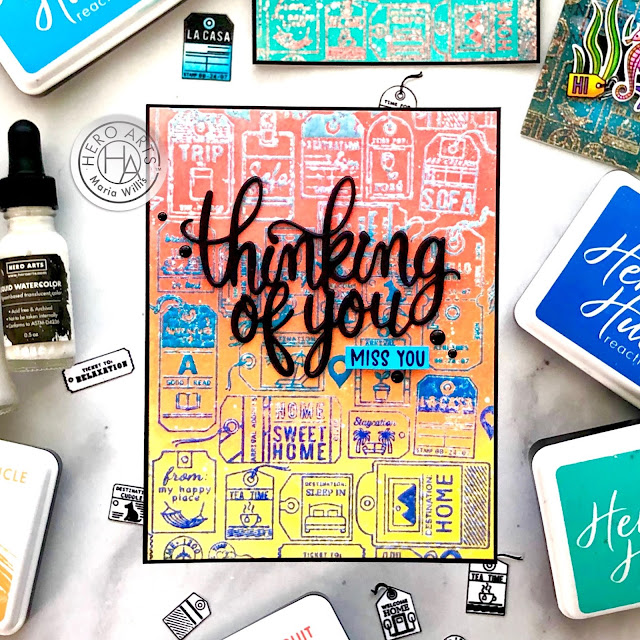
For my last card today I went for more of a grungy look. I ink blended in browns and then used some Tim Holtz embossing glaze on top of some of the tags in the background. I also sprinkled some sand embossing powder on top of that just to add some more texture.
#cardmaking, #cards, #craft, #create, #distressoxideinks, #diy, #handmadecards, #ink, #mixedmedia, #paper, #stamp, Cardbomb, Hero Arts, maria willis, My Monthly Hero Kit August 2020, Tim Holtz, #ocean, #octopus, #copicmarkers, #copics
After splattering some white and bronze metallic paint and some Nuvo Midas Touch I added a sentiment and called it done.
#cardmaking, #cards, #craft, #create, #distressoxideinks, #diy, #handmadecards, #ink, #mixedmedia, #paper, #stamp, Cardbomb, Hero Arts, maria willis, My Monthly Hero Kit August 2020, Tim Holtz, #ocean, #octopus, #copicmarkers, #copics


Now, I did film myself making these backgrounds but I wasn't able to get the video done in time for this post. So, watch for that video coming later (probably today)!

That's all I've got for now you guys so I hope you will enter yourself into the giveaway for a $50 Hero Arts gift card (just leave a comment below and you're automatically entered). To continue on this hop just head on over to visit the fabulous Lydia Fiedler over at her blog. You can also check out the whole list of blog hoppers below. As always, I'm linking up the products that I've used today down below so that if you want to check anything out it's all right there for you. 

Thanks for stopping by today and I will catch you all back here soon!
Have an awesome day!

Maria


GIVEAWAY:
Hero Arts will give away one $50 gift card, drawn from the comments left across the hop. Enter by Sunday, August 9th at 11:59pm pacific, and the winner will be announced on the Hero Arts blog the following week.


BLOG ROLL:

Hero Arts
Seeka
Nichol Spohr
Mindy Eggen
Michelle Short
Mariana Grigsby
Maria Willis: YOU ARE HERE.
Lydia Fiedler
Laurie Willison
Julee Tilman
Jessica Frost-Ballas
Janette Kausen
Ilina Crouse
Emily Midgett
Debi Adams
Daniel West
Channin Pelletier


PRODUCT SUPPLY LIST:

Monday, April 6, 2020

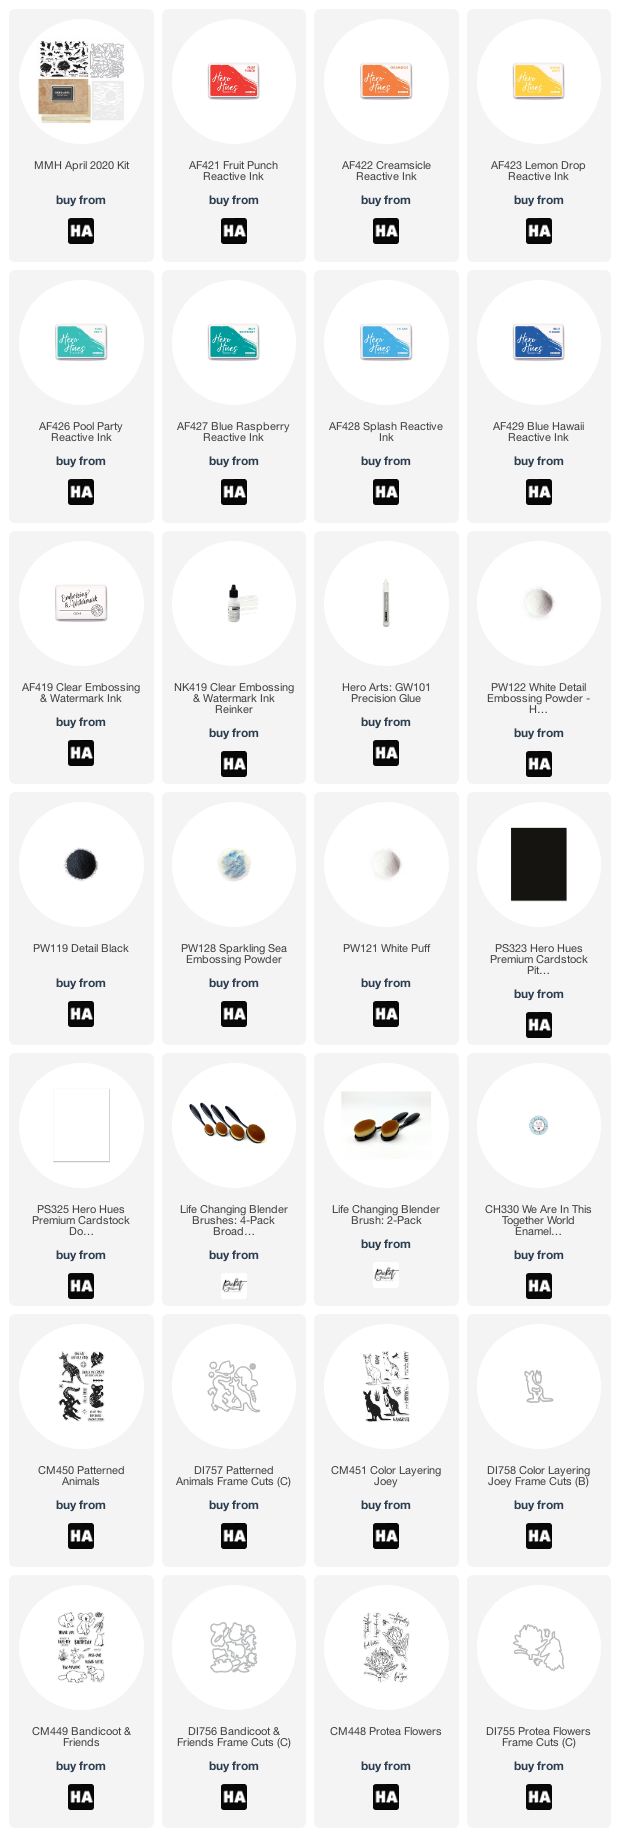
My Monthly Hero Release with Video Tutorial and a Giveaway!

Hi Everybody! Guess what day it is?! It's the first Monday of the month and that means it's time for the Hero Arts My Monthly Hero kit release! If this is your first time hearing about the MMH kit you can CLICK HERE for more information. This month's kit is all about Australia. It wasn't long ago that Australia suffered a devastating amount of damage from relentless fires. Among the damage was great loss of life to much of Australia's wildlife. This month's kit is a tribute to Australia and it is truly beautiful! For my card I made an ocean scene (video tutorial below)...

#cardbomb, #mariawillis, Hero Arts, #heroarts, #mymonthyhero, #stamp, #ink, #paper, #cards, #cardmaker, #cardmaking, #handmade, #handmadecards, #craft, #papercraft, #diy, #art, #color, #sharks, #ocean, #video, #videotutorial,

...but the kit is full of images of a variety of wildlife as well as trees, terrain and other items to help you build scenes (check out that stencil!). 

#cardbomb, #mariawillis, Hero Arts, #heroarts, #video, #videotutorial, #mymonthyhero, #stamp, #ink, #paper, #cards, #cardmaker, #cardmaking, #handmade, #handmadecards, #craft, #papercraft, #diy, #art, #color, #sharks, #ocean,

Here's a link to my video if you'd like to check it out:


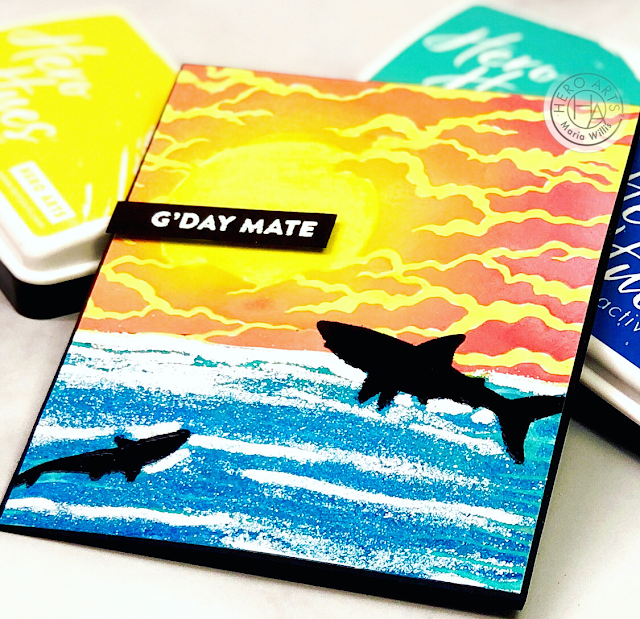
I love the stencil included in this month's kit and I decided to use it to create an ocean scene with a fiery sky!
#cardbomb, #mariawillis, Hero Arts, #heroarts, #mymonthyhero, #video, #videotutorial, #stamp, #ink, #paper, #cards, #cardmaker, #cardmaking, #handmade, #handmadecards, #craft, #papercraft, #diy, #art, #color, #sharks, #ocean,
I started off by heat embossing the sharks in black. Next, I masked off the top portion of the stencil so that I could focus on the lower half of the card. I ink blended the ocean using Hero Arts reactive inks in blues and blue greens. Then I used a sponge dauber to add some embossing ink. I sprinkled that Sparkling Sea embossing powder to give the water a salty, shimmering texture. I used an embossing pen on top of that and heat embossed some puffy white embossing powder to give the look of sea foam.
#cardbomb, #mariawillis, Hero Arts, #heroarts, #mymonthyhero, #video, #videotutorial, #stamp, #ink, #paper, #cards, #cardmaker, #cardmaking, #handmade, #handmadecards, #craft, #papercraft, #diy, #art, #color, #sharks, #ocean,

Next, I cleaned off my stencil and masked off the bottom portion. I ink blended the sky in Hero Arts Reactive Inks in yellows, corals and bright pink. Then, I used a yellow Copic marker to fill in the white space so that it looked like it was glowing.
#cardbomb, #mariawillis, Hero Arts, #heroarts, #video, #videotutorial, #mymonthyhero, #stamp, #ink, #paper, #cards, #cardmaker, #cardmaking, #handmade, #handmadecards, #craft, #papercraft, #diy, #art, #color, #sharks, #ocean,

To finish my card off I mounted it onto a top-folding black card base and added a heat embossed sentiment from the kit. I love how striking those black sharks look against the bright ink colors.

This kit is so much fun! I hope to have time to create more with it soon because I had so many ideas for it. Interestingly enough while the world seems to be standing still I am busier than ever. I have just closed my business (so I'm cleaning out a huge commercial space) and we are also moving house. Soon things will settle down over here and I will have more time to craft. In the mean time, I cannot wait to see what you all will create with this kit!

Before i go here is some important information:

GIVEAWAY:
Hero Arts will be giving away a $50 gift certificate to one lucky winner! To enter just leave a comment here on my blog.

SHIPPING:
Shipping is estimated to begin on April 20th. Aaron (owner of Hero Arts) and his family will be shipping the kits themselves. Please be patient as there are just three of them and thousands of kits to be sent. Thank you Aaron, Laura and son for your dedication!

RUBBER STAMP AVAILABILITY:
Did you know that Hero Arts employees hand cut the rubber stamps?! They also hand mount the rubber stamps onto wood blocks for wood stamps. The amount of care that goes into Hero Arts products is truly amazing. Due to the Shelter In Place that is currently in effect in California  there are no employees in the warehouse to cut and mount these stamps for us. For now, they will be unavailable. 

WE ARE ALL IN THIS TOGETHER!
Now, more than ever, it is so important to remember that we are all in this together. Hero Arts has created this beautiful pin as a reminder to us all. 100% of net profits from the sale of this pin will be donated to support COVID-19 disaster relief.

#cardbomb, #mariawillis, Hero Arts, #heroarts, #mymonthyhero, #stamp, #ink, #paper, #cards, #cardmaker, #cardmaking, #handmade, #handmadecards, #craft, #papercraft, #diy, #art, #color, #sharks, #ocean,

Ok, you guys! That's it for today. Head on over to Seeka's blog and see what beautiful things she has created to share with us today!

Hugs to you all, stay healthy, stay Happy!
Maria


BLOG ROLL:
Hero Arts
Michelle Short
Jessica Frost-Ballas
Channin Pelletier
Daniel West
Ilina Crouse
Debi Adams
Janette Kausen
Yana Smakula
Lydia Fiedler
Jennifer McGuire
Julee Tilman
Maria Willis
Seeka
Laurie Willison
Amy Kolling
Libby Hickson


PRODUCT SUPPLY LIST:


Monday, April 15, 2019

Mermaid Kisses and Starfish Wishes

Hey everybody! I am so excited to have you here today because today is my first post for Tonic Studios as a member of their Social Media Design Team. Tonic Studios has a new blog, and with it, a new design team. Every week day the Tonic DT will be sharing fun projects and lots of inspiration on the blog. The team is made up of some very talented artists and I am absolutely thrilled that Tonic has chosen me to help represent them. When you have a few minutes please go check out Tonic's new blog. It's a fun place to go for inspiration and I hope you'll enjoy it as much as I do. Here's a link to go check them out: CLICK HERE.

Now, on to today's project...
#cardbomb, #mariawillis, #tonicstudios, #tonicstudiosusa, #mermaid, diecutting, #ocean, #watercolor, #color, #art, #diy, shells, #cards, #handmade, #paper, #papercraft, #ink, #stamp, #craft,


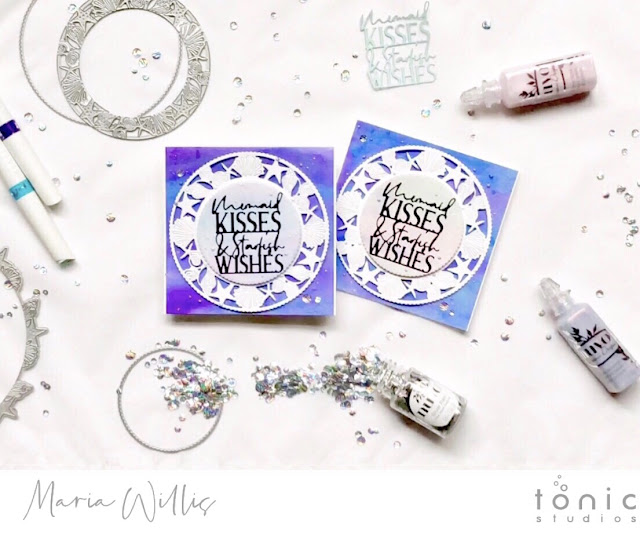
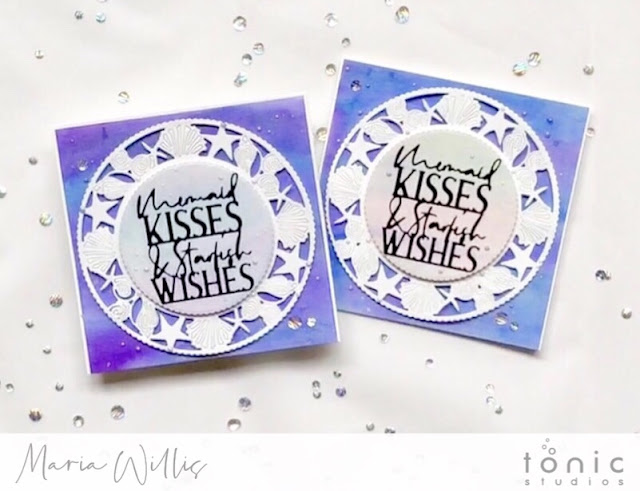
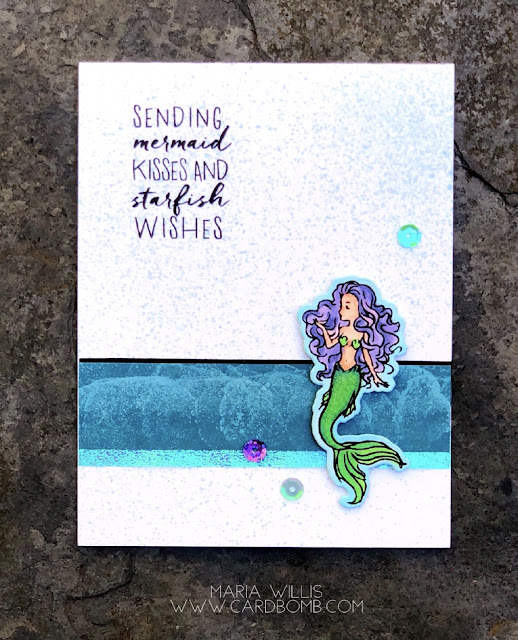
Today I am sharing a project using the Mermaid With Love range of dies. When I saw these dies I knew I had to have them because I love shells, sea stars, mermaids and well designed layering dies. I had so much fun playing around with them and coming up with fun ideas for them that it was hard to decide what kind of project I wanted to share with you. I decided on a shimmery, watercolor project that I hope you will enjoy but mixed media was a close second. There is a video tutorial for this project towards the bottom of this post. I hope you'll take a few minutes to watch it as I share how versatile this die range is. Until I opened these dies and started playing with them I really had no idea how many things you could do with them. In the video I also share some tips for using the dies as well as some tips for assembling this card.

#cardbomb, #mariawillis, #tonicstudios, #tonicstudiosusa, #mermaid, diecutting, #ocean, #watercolor, #color, #art, #diy, shells, #cards, #handmade, #paper, #papercraft, #ink, #stamp, #craft,


SUPPLIES:
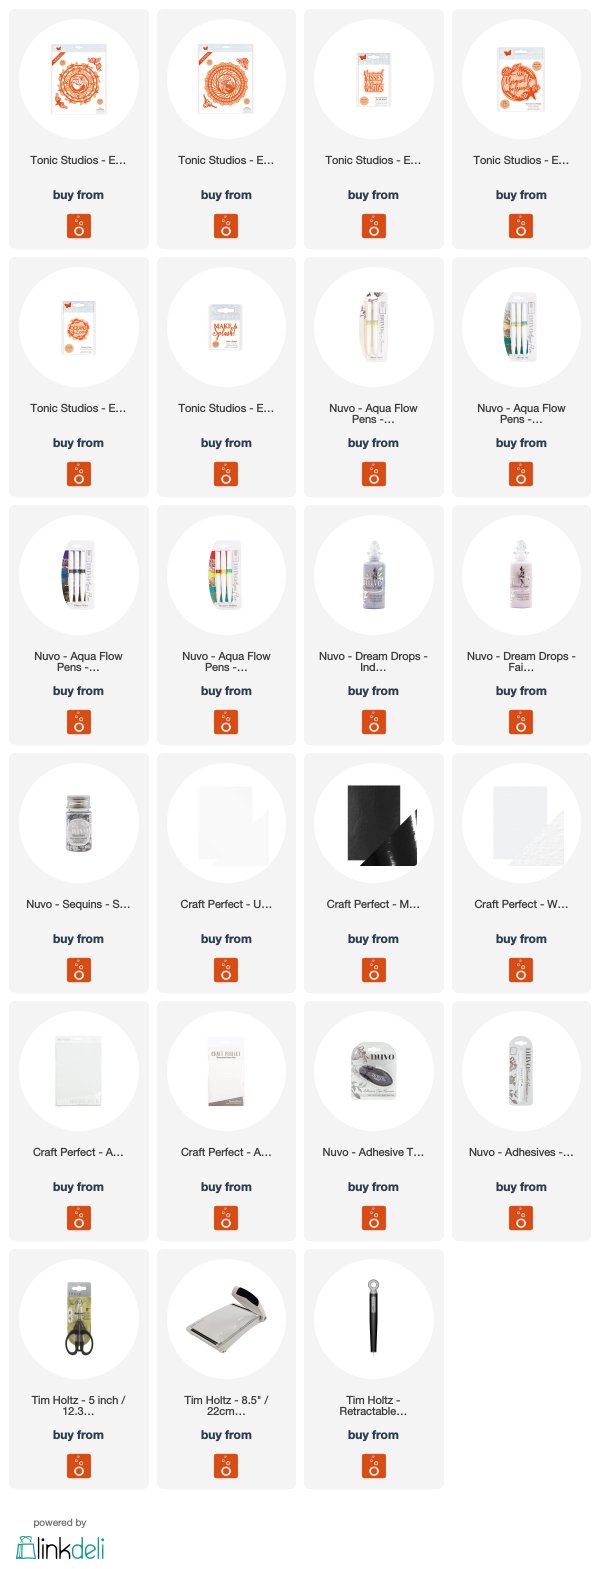
I started with a white card base cut to 5" x 10" and scored at 5" and a piece of watercolor paper cut to 4 & 7/8"squared. I also had a piece of white cardstock for cutting my large die piece, a small piece of watercolor paper for cutting my layering circle (behind sentiment) and a piece of black glossy cardstock backed with double sided adhesive for cutting out the sentiment die. Aside from cardstock you will need Nuvo Markers (Aqua Splash, True Turquoise, Azure Blue, Indigo Dawn), Dream Drops (Indigo Eclipse and Fairy Wings), dimensional foam adhesive, tape runner adhesive, a smooth precision glue pen, and Silver Rain sequins. You will also need my favorite die set from this collection, the Marina Layering Dies and the Mermaid Kisses & Starfish Wishes sentiment die.

HOW TO:
I started by watercoloring my two watercolor pieces using a paint brush and ink from Nuvo Markers. I saturated my watercolor cardstock with water and painted both pieces at the same time making sure that my background piece was much more saturated with color than the smaller piece. I set these aside to dry and did my die cutting next. I used the round seashell and starfish die with a larger cutting ring to cut the detailed die cut from white cardstock. Then I used the smaller cutting ring to die cut a layering circle from the smaller piece of watercolor paper. Last, I cut the sentiment die from the piece of black glossy cardstock and removed the negative pieces from the die being careful to leave the die cut inside of the die. After splattering my watercolor pieces generously with Glitter Gloss I put my card layers together. Both of the larger die cut pieces are popped up on foam adhesive. The sentiment is adhered after removing the backing from the double sided adhesive. Then, I embellished the card with sequins and Dream Drops. Side note: Dream Drops are epic!! Not only are they absolutely gorgeous but they must also be magic because I'm able to get perfect drops with them every. single. time. They are amazing and added just the right touch to this card as they look like pearls.
#cardbomb, #mariawillis, #tonicstudios, #tonicstudiosusa, #mermaid, diecutting, #ocean, #watercolor, #color, #art, #diy, shells, #cards, #handmade, #paper, #papercraft, #ink, #stamp, #craft,

Here's that video I keep talking about. I hope you'll find it has some helpful information, both about this entire die collection, as well as for putting this card together.


Here's one more look at the cards I'm sharing today...

#cardbomb, #mariawillis, #tonicstudios, #tonicstudiosusa, #mermaid, diecutting, #ocean, #watercolor, #color, #art, #diy, shells, #cards, #handmade, #paper, #papercraft, #ink, #stamp, #craft,


That's all for today folks! If you're interested in checking out any of the products I've shared today I've added links to all of them below. These are affiliate links and if you make a purchase through them I will make a small commission (thank you!). Thanks so much for stopping today. I hope you all have an amazing day and I will see you back here soon.

Maria


SUPPLY LIST UK SHOP


SUPPLY LIST USA

Wednesday, June 27, 2018

Hero Arts: June My Monthly Hero Kit & Add-ons

Hi guys! I hope you all are doing well and getting lots of crafting time in. I have been a wild woman this past week. My son got out of school and got his first job! We've been so busy with paperwork and meetings and shopping for his work uniforms (among other things) that I haven't had much time to craft or even to blog the things I made weeks ago. I do have some AWESOME  news though! 

I started out the month playing along with Kathy Racoosin's 30 day coloring challenge (and fell off the bandwagon when life struck but that's ok!). A while back I realized that her Coloring Challenge Road Trip would be at Hero Arts which is only a couple of hours away from me! I was so excited at the possibility of attending and then so bummed when I realized that I was too late and the event was full. I decided to message Kathy to see if there was a waiting list. Today I heard back from Hero Arts and there is room for me to attend! That means that this coming Saturday I will be spending the day at Hero Arts with an amazing group of crafty people. We will just color all day long and apparently eat turkey sandwiches for lunch. Woohoo! So, this is the perfect chance for me to share some of the projects I've made recently using Hero Arts products.

This card features the June My Monthly Hero kit and one of the add-on sets called Seal of Approval. This card was custom ordered for a boy (Ethan) who was turning ten. 
#cardbomb, #mariawillis, #heroarts, #mymonthyhero, #beach, #ocean, #sea, #seal, #timholtz, #distressinks, #distressoxideinks, #cards, #cardmaking, #stamp, #ink, #paper, #papercraft,

I sponged the sand and stamped the ocean with Distress Oxide inks. I wanted a softer look to the ocean so before stamping the second and darker layer of water, I spritzed the inked up stamp to oxidize the ink. I was happy with the way it blended into the larger body of water. Instead of stamping the third layer of water with the finest detail in ink... I decided to use my White Puff Embossing Powder from Wow Embossing to add some sea foam to the top of the water. I love how that embossing powder adds life and texture to the card. I watercolored the sky with Distress Oxides and stamped the clouds in white pigment ink. The clouds weren't bright enough for me so I used a white gel pen to outline the tops of them. Last, I stamped the birds in gray archival ink. 
#cardbomb, #mariawillis, #heroarts, #mymonthyhero, #beach, #ocean, #sea, #seal, #timholtz, #distressinks, #distressoxideinks, #cards, #cardmaking, #stamp, #ink, #paper, #papercraft,

Now, since this card was for a ten year old I decided to make it interactive and I rigged a little mechanism on the side to make the ball bounce around a little. Here's what it looks like when it's in motion...


It's pretty basic but apparently Ethan loved it and that is all that matters. It was pretty simple to make but I wanted to share a picture of the guts of the card so that you could see what I did. After coloring the ball with Copic markers I used a hole punch to punch out a hole that was smaller than the ball. I wanted the ball to have room to move without the hole being visible from the front of the card. I put a small piece of foam adhesive on the back of the ball and fit the adhesive through the hole that I had punched. Then I used a 1/4" strip of cardstock to connect two circles that I had punched out with punches (but you could also dies or cut by hand). I attached the larger circle to the foam adhesive on the back of the ball and placed it so the smaller circle would stick out the side to move the ball around. Then I used foam adhesive to create a channel for the mechanism to sit inside, added adhesive to the rest of the card and attached it to my card base. 
#cardbomb, #mariawillis, #heroarts, #mymonthyhero, #beach, #ocean, #sea, #seal, #timholtz, #distressinks, #distressoxideinks, #cards, #cardmaking, #stamp, #ink, #paper, #papercraft,

My seal was also colored with Copic Markers. Ethan's name was created by die cutting the letters out of paper that was sponged with color. I taped off the bottom half of the letters and used the Sand Embossing Powder that came in the kit to heat emboss the top of his name. You can't see it in the photo but the sand EP has quite a bit of copper in it and it gleams like Fool's Gold. It's a really cool product!
#cardbomb, #mariawillis, #heroarts, #mymonthyhero, #beach, #ocean, #sea, #seal, #timholtz, #distressinks, #distressoxideinks, #cards, #cardmaking, #stamp, #ink, #paper, #papercraft,

This set made it so easy to create a gorgeous beach scene that I am sure I'll be using it often in the future.
#cardbomb, #mariawillis, #heroarts, #mymonthyhero, #beach, #ocean, #sea, #seal, #timholtz, #distressinks, #distressoxideinks, #cards, #cardmaking, #stamp, #ink, #paper, #papercraft,

I'm going to enter this card into the A Blog Named Hero monthly challenge. The theme for this month is Summertime Fun and I think this card fits the theme.

#cardbomb, #mariawillis, #heroarts, #mymonthyhero, #beach, #ocean, #sea, #seal, #timholtz, #distressinks, #distressoxideinks, #cards, #cardmaking, #stamp, #ink, #paper, #papercraft,


Alright, y'all. It is late in my neck of the woods and I need to head off to bed now. Thank you so much for stopping by and I will see you back here soon.

Have an awesome day!
Maria


Friday, June 8, 2018

#TGIFC163 - Sketch Challenge

Hello everybody and welcome back for another fabulous TGIF Challenge! I'm sad to say that this will be my last week with the TGIF Design Team. If you follow my blog then you know that I've resigned from Stampin' Up! so that I can expand my creativity and use products from all of the amazing stamp and craft companies out there. TGIF is a team that is made of SU Demos. As I am no longer a demo I am stepping down from the design team. I am excited for my new crafty adventures but this design team holds a special place in my heart as all of the members are really wonderful human beings. I will miss creating alongside them.

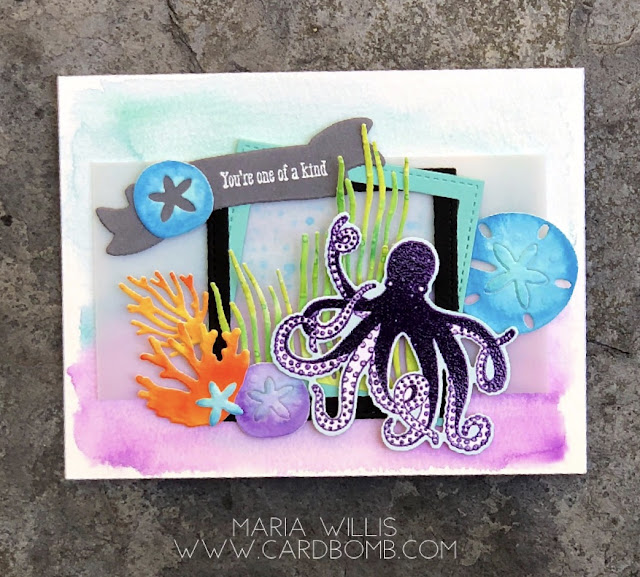
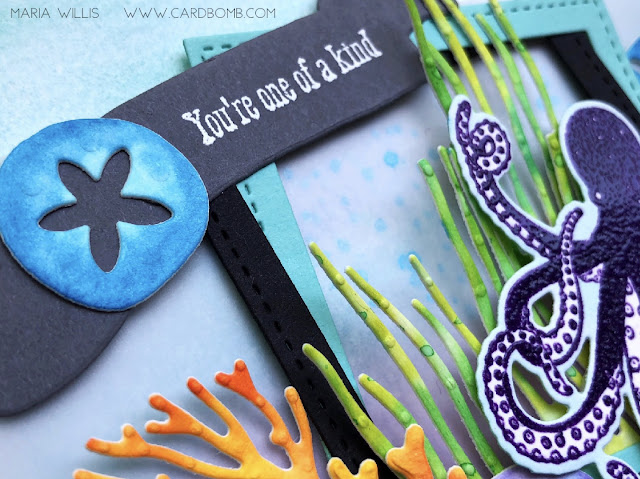
This week we've got an awesome Sketch Challenge for you! Here's my take on it using a new stamp set from SU's new catalog. The set is called Sea of Textures and has a matching set of dies that is pretty epic! I started out by watercoloring my background and a bunch of extra pieces of paper to cut my shells and coral from. Then I layered a piece of vellum over the background and started arranging my pieces.
#cardbomb, #stampinup, #cards, #watercolor, #seaoftextures, #octopus, #stamps, #ink, #paper, #stamping, #art, #ocean,

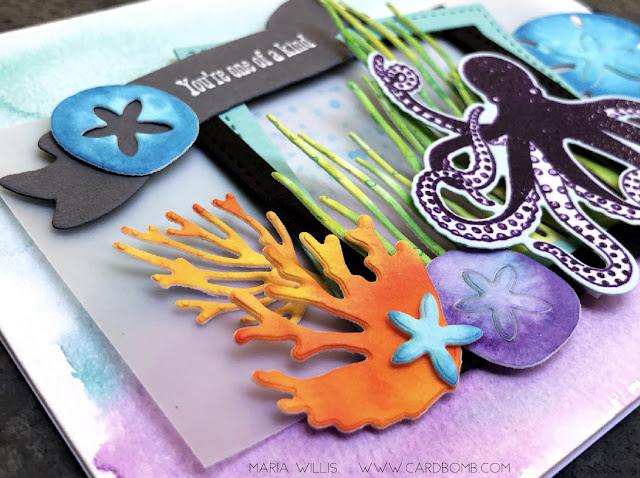
Here you can see close up of the gorgeous die cut pieces. The sand dollar is really cool bc you can pop the center out or leave it in. 
#cardbomb, #stampinup, #cards, #watercolor, #seaoftextures, #octopus, #stamps, #ink, #paper, #stamping, #art, #ocean,

The sentiment is heat embossed in white embossing powder and I added a blue sea star to the banner to anchor it to the design. If you look closely, you can see that behind the seagrass I added some blue dots for detail with an alcohol marker.
#cardbomb, #stampinup, #cards, #watercolor, #seaoftextures, #octopus, #stamps, #ink, #paper, #stamping, #art, #ocean,

The octopus is stamped in Gorgeous Grape ink and heat embossed in clear. He's such a cool looking guy and I like that it looks like he is walking across the sea floor. 
#cardbomb, #stampinup, #cards, #watercolor, #seaoftextures, #octopus, #stamps, #ink, #paper, #stamping, #art, #ocean,


That's it for today you guys! If you'd like to see what the rest of the Design Team has done with this sketch then head on over to the TGIF Challenge Blog! Here's a graphic of the sketch for you to check out. If you've got a great idea on how to interpret it then please play along with us this week!


Bye guys! I'll be back with another fun post in the next day or so. 

Have an amazing day!
Maria

mariawillis@hotmail.com


Saturday, May 12, 2018

Exciting Changes and a Mermaid Card!

Hi Everybody! I'm here with some pretty big news today. If you've followed my blog at all over the last few years then you know that I have been a Stampin' Up! Demonstrator pretty much since I discovered stamping. Stampin' Up! is an amazing company and I'm so happy to have started my stamping journey with them. 

Lately, I have been branching out with my creativity and have been enjoying playing around with different inks and different brands of products. I have become really excited about some of these products and want to use, share and promote them. For this reason I have made the decision to resign from Stampin' Up! I will still be sharing my projects here on the blog, as well as on Instagram, Facebook and Youtube. The difference is that going forward I will be using products from a wide variety of companies and brands. I believe that this will allow me to take my creativity to the next level and I am so jazzed to get started on this new journey. 

You will see me start using different inks and different media over the next couple of months and I hope you will like what you see. If you're curious about what products I am using, and where I am getting them, please head on over to my "Shop" page to see the companies that I am now affiliated with. I will do my best to share product links at the bottom of my posts as well.

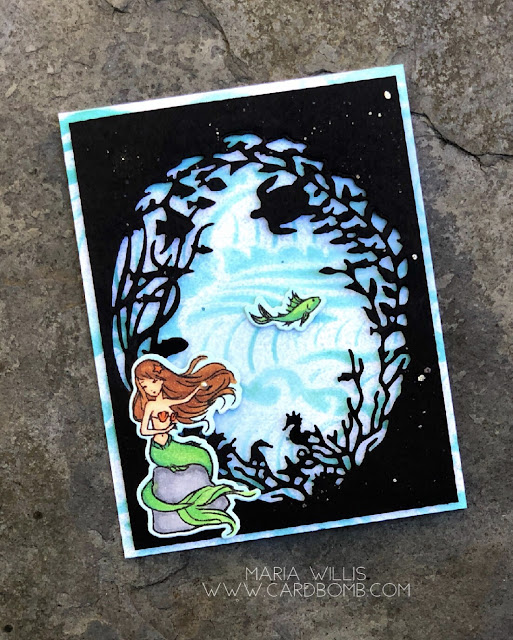
I'll kick this news off by a sharing a card I made featuring some Hero Arts products. Hero Arts is an amazing company based in Northern California and it's located only a couple of hours away from me. I was able to visit their factory in March and it was pretty amazing! For this card I've used the Mermaid Kisses (CM160) stamp set and matching Frame Cuts (D1456).
#cardbomb, #mariawillis, #heroarts, #mermaidkisses, #cards, #stamps, #stamping, #ink, #paper, #stencils, #dies, #ocean, #sealife, #handmade, #diy, #creative,

I used my Copic Markers to color in the mermaid and the fish. These markers are alcohol based and are amazing for getting a seamless blend in your coloring. I added a pearl to the mermaid's hand because it looked like she should be holding something.
#cardbomb, #mariawillis, #heroarts, #mermaidkisses, #cards, #stamps, #stamping, #ink, #paper, #stencils, #dies, #ocean, #sealife, #handmade, #diy, #creative,

Have you noticed all of those fantastic little sea creatures delicately cut out to frame the background? That amazing die is called the D1385 Reef Border and Frame Fancy Dies (E). It really has incredible detail and was so easy to cut out (no paper tearing and it easily releases from the die).
#cardbomb, #mariawillis, #heroarts, #mermaidkisses, #cards, #stamps, #stamping, #ink, #paper, #stencils, #dies, #ocean, #sealife, #handmade, #diy, #creative,

My background piece was made using the Hero Arts SA110 Mermaid Sea Waves Stencil on Shimmery White Cardstock. This stencil has such fun detail and I sponged over it using my Pool Party ink (Stampin' Up!) and sponge daubers and then spritzed over the whole thing with a light mist of Island Indigo ink. I popped each layer up on foam adhesive to give it some dimension and then splattered the whole thing with clear Wink of Stella to give it some sparkle.
#cardbomb, #mariawillis, #heroarts, #mermaidkisses, #cards, #stamps, #stamping, #ink, #paper, #stencils, #dies, #ocean, #sealife, #handmade, #diy, #creative,

That's it for today you guys. I hope all of you Moms out there have an amazing Mother's Day!
See you back here soon!

Have an amazing day!

Maria
mariawillis@hotmail.com


PRODUCT LIST:


Wednesday, April 25, 2018

Mermaid Kisses

Hey guys! Happy Wednesday! I'm just stopping by to share this fun mermaid card using Mermaid Kisses (CM160) and matching frame cuts (D1456 E) from Hero Arts. This set has three gorgeous mermaids and lots of sea creatures that are so much fun to color.  I thought the mermaid would look cool with some purple hair so I busted out my Copics and colored away. It looks to me like the mermaid is blowing a kiss so this sentiment is her perfect match. The background of my card is spritzed with a mixture of alcohol and Stampin' Up! reinker in Island Indigo. I love the fun ocean spray look that a spritzer can give you (and mixing with alcohol instead of water means it drys even faster). 

Cardbomb, Maria Willis, Hero Arts, Simon Says Stamp, #simonsaysstamp, #ssswchallenge, #cardbomb, #heroarts, #cards, #stamps, #ink, #mermaidkisses, #mermaid, #copics, #handmade, #papercraft, #paper, #color, #ocean, #creative, #crafty

One of my favorite things about coloring this mermaid was adding the stippling on her tail. First, I colored her tail with a mixture of greens. Then, I took the colorless blender pen and tapped it over the tail so that it would lift just a little color and mimic the look of scales. 
Cardbomb, Maria Willis, Hero Arts, Simon Says Stamp,  #cardbomb, #heroarts, #simonsaysstamp, #ssswchallenge,  #cards, #stamps, #ink, #mermaidkisses, #mermaid, #copics, #handmade, #papercraft, #paper, #color, #ocean, #creative, #crafty

Simon Says Stamp has an awesome Wednesday challenge going on today. It's an "Anything Goes" challenge and that means that this card fits the bill. If you want to check out the amazing cards that the SSS Design Team has made to share some inspiration just click HERE

I hope you liked my card today. I've got more mermaid fun heading your way soon. If you don't want to miss out on future posts I'd love to have you subscribe to my blog by clicking on the subscribe by email button at the top right of my blog.  If you've got any questions please feel free to let me know. You can get in touch with me via the comments below or by email.

Have an awesome day you guys!

Maria
mariawillis@hotmail.com


01 09 10