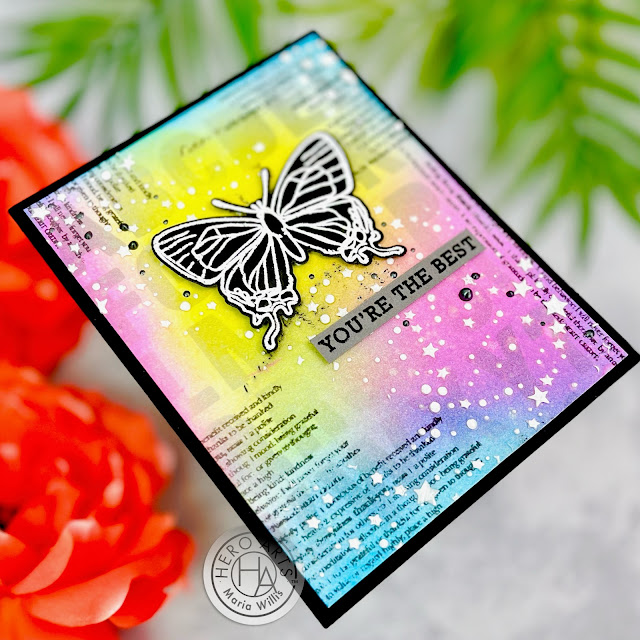
Hi everybody! I'm glad you're here because I had so much fun making the card that I'm sharing with you today. Earlier this week Hero Arts had a stunning new release and it was all about those butterflies! The add-ons are equally fabulous so today I'm sharing two of my favorite add-ons with you: the Beautiful Butterflies Bundle and the Background Texture Strips.
Now, I'm the kind of crafter who always has colorful scraps of past projects lying around. I noticed I had a piece of white cardstock that I had been using to get some ink off of my blending brushes and it was such a pretty color combination that I decided to use the scrap. It also had some random stamping using the the script stamp from the Background Texture Strips so it was truly meant to be used for this card.
I cut the paper down to A2 size and finished ink blending it in Ultra Pink, Lemon Yellow, and, Summer Sky. I wanted to add a little more visual texture to the background so I splattered it with rubbing alcohol to create some lighter spots and I also sprayed it with White Iridescent Shimmer Spray. I wanted to some more "shadow" to the background so I used the Luggage Tag Alphabet Frame Cuts (still connected) to create a stencil. I gently ink-blended the negative portion of the die cut using Granite Core ink and focusing on the outer edges of the card face. This left me with a soft, beautiful background that had a lot of visual texture...

But, If you know me, you know that I like texture that I can touch! So I grabbed the Background Texture Strips stamp set and I decided to use the stamp that looks like tiny newspaper print (remember there was already some of the scripty stamp on the background from a previous project). I used the newspaper print stamp (on a stamping block) with Moonstone Pigment ink around the edges of the card-face and then I heat embossed it in clear so that it was shiny and raised. Next, I used the Star Cluster Stencil and my Pearl Hero Paste to add some stars to the background. Note that this has a gorgeous pearlescent finish. The pearlescent finish faded into the background shimmer and I had really wanted more contrast so the stars popped off the background. In the end I decided to color all of the paste with a white gel pen to get the contrast I wanted (hot tip: use the regular Hero Paste for more contrast). 
To create a focal point for my card I heat embossed a butterfly from the
Beautiful Butterflies set in White Embossing Powder on Pitch Black Cardstock. I die cut it with the coordinating dies and adhered it with foam tape. My sentiment is from the
Sending Love Mail stamp set and I heat embossed it on Charcoal cardstock using Onyx Pigment ink and Clear Embossing Powder. The final touch was to add some Pewter Hero Pearls to the background.
Alright, that's it for today! I hope you all have a great day and I will see you back here soon!
Maria


No comments:
Post a Comment