Showing posts with label #birthday. Show all posts

Wednesday, May 20, 2020

Crafty Friends: Honeybee Stamps and a Discount!

Hi everybody! How are you all today? Well, I'm happy to be here because I am hopping along with my Crafty Friends. Today we are featuring the fabulous Honey Bee Stamps! Melissa (the owner) has generously offered an exclusive discount code for us to share with you! The code is at the bottom of my post (make sure you shop through the link provided) if you are interested.

I've made a ton of cards today because once I got going I just couldn't stop. For my first two cards I used this gorgeous floral stamp set called Everything Wonderful. It's designed by the talented Emily Midgett and I jus love it. I stamped the image onto Arches cold pressed watercolor paper in Hero Arts INTENSE-ified black ink.
#cardbomb, maria willis, #honeybeestamps, #stamp, #ink, #paper, #papercraft, #craft, #create, #art, #diy, #color, #watercolor, #flower, #birthday,

Then I used my Karin markers and a paint brush to watercolor the image.
#cardbomb, maria willis, #honeybeestamps, #stamp, #ink, #paper, #papercraft, #craft, #create, #art, #diy, #color, #watercolor, #flower, #birthday,

After watercoloring I used my cool cray copic markers to add some drop shadows. I enhance the shadows by adding scribbles and dots with a fine-tipped sharpie.
#cardbomb, maria willis, #honeybeestamps, #stamp, #ink, #paper, #papercraft, #craft, #create, #art, #diy, #color, #watercolor, #flower, #birthday,

I cut the image out with the Honeybee Stamps deckled edge dies and adhered it to a black card base using foam adhesive. The finishing touch was to add a few subtle sequins.
#cardbomb, maria willis, #honeybeestamps, #stamp, #ink, #paper, #papercraft, #craft, #create, #art, #diy, #color, #watercolor, #flower, #birthday,

My next card features the same stamp set, Everything Wonderful. This time I stamped the image off the edge of the watercolor cardstock to get a different look.
#cardbomb, maria willis, #honeybeestamps, #stamp, #ink, #paper, #papercraft, #craft, #create, #art, #diy, #color, #watercolor, #flower, #birthday,
 I watercolored this piece with my Daniel Smith watercolor paints. 
#cardbomb, maria willis, #honeybeestamps, #stamp, #ink, #paper, #papercraft, #craft, #create, #art, #diy, #color, #watercolor, #flower, #birthday,

I heat embossed the sentiment in white onto black cardstock and cut out the sentiment by hand. This Sympathy sentiment set does have fantastic coordinating dies but for this card I wanted a really close cut so I decided to do it by hand.
#cardbomb, maria willis, #honeybeestamps, #stamp, #ink, #paper, #papercraft, #craft, #create, #art, #diy, #color, #watercolor, #flower, #birthday,

After adding the sentiment I added some Nuvo Dream Drops in Cloud Nine to add some subtle but gorgeous embellishment to the card.
#cardbomb, maria willis, #honeybeestamps, #stamp, #ink, #paper, #papercraft, #craft, #create, #art, #diy, #color, #watercolor, #flower, #birthday,

Here's a side by side look at both of these cards. It's amazing how different you can make the same stamp set look just by stamping or coloring it differently.
#cardbomb, maria willis, #honeybeestamps, #stamp, #ink, #paper, #papercraft, #craft, #create, #art, #diy, #color, #watercolor, #flower, #birthday,
For my next two cards I used the same Candle Cover Plate die. On this first card I ink blended a piece of white cardstock using Distress Oxide inks. Then I used the die to cut both the ink blended piece and a solid black piece of cardstock. I pieced all of the colorful candles into the black background.
#cardbomb, maria willis, #honeybeestamps, #stamp, #ink, #paper, #papercraft, #craft, #create, #art, #diy, #color, #watercolor, #flower, #birthday,
I used the Birthday stamp set and honey cuts to create my sentiment and I love how sparkly it looks in that silver glitter paper. The sentiment is all popped up on foam for some fun dimension and of course I added a few sequins to bling my card out a little bit.
#cardbomb, maria willis, #honeybeestamps, #stamp, #ink, #paper, #papercraft, #craft, #create, #art, #diy, #color, #watercolor, #flower, #birthday,
For my second card I used the extra pieces from my first birthday card. I took the ink blended background, pieced in a few of the black candles for some contrast and added a sentiment.
#cardbomb, maria willis, #honeybeestamps, #stamp, #ink, #paper, #papercraft, #craft, #create, #art, #diy, #color, #watercolor, #flower, #birthday,
The sentiment is from the Wish stamp set and matching honey cuts. I love these combo sets as they are so versatile and useful.
#cardbomb, maria willis, #honeybeestamps, #stamp, #ink, #paper, #papercraft, #craft, #create, #art, #diy, #color, #watercolor, #flower, #birthday,
 Here's a look at both of my birthday cards side by side.
#cardbomb, maria willis, #honeybeestamps, #stamp, #ink, #paper, #papercraft, #craft, #create, #art, #diy, #color, #watercolor, #flower, #birthday,

And, that is it for me today folks! Before you go here's that awesome discount that Melissa is offering to you. It's a 20% on anything in the store at Honey Bee Stamps from now through May 21st. All you need to do to get this discount is use my link (CLICK HERE) and use the code CRAFTYFRIENDS20 when you check out. Enjoy and please thank Melissa if you order because she is super amazing to offer this to all of us!

#cardbomb, maria willis, #honeybeestamps, #stamp, #ink, #paper, #papercraft, #craft, #create, #art, #diy, #color, #watercolor, #flower, #birthday,


I hope you all have an amazing day! If you'd like to continue on the hop please head on over to my friend Becky's blog. There's a list of all blog hoppers below if you'd like to follow the list.

If you want to check out any of the products that I've used today I am adding them to a list below so that you can find them easily. Enjoy!

Bye for now!
Maria


CRAFTY FRIENDS BLOG ROLL:
Sara Sherlock
Lydia Fiedler
Jill Hilliard
Jen Timko
Amy Kolling
Jenny Hall
Tanya Boser
Ilina Crouse
Maria Willis: You are Here.
Becky Roberts: Next
Sandi MacIver
Sue Plote


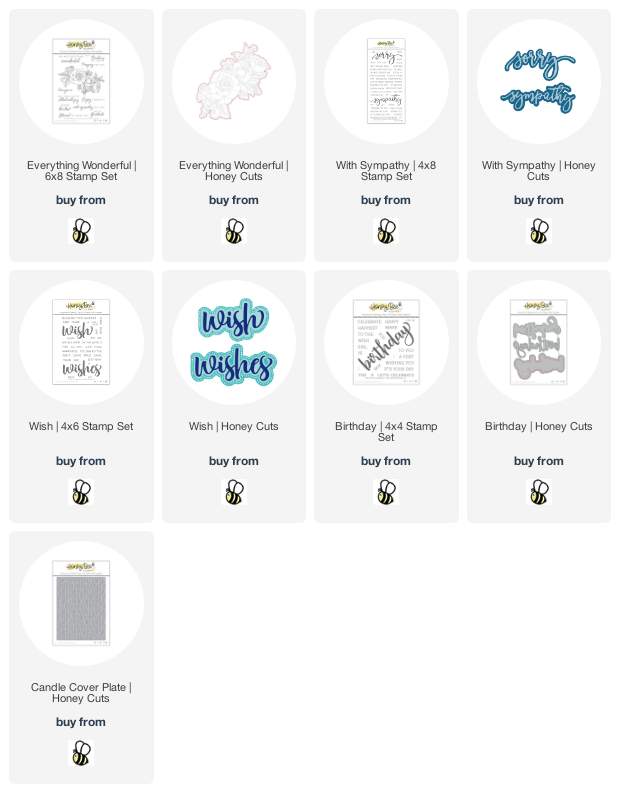
PRODUCT SUPPLY LIST:


Sunday, December 10, 2017

Stamping Sunday Blog Hop - Stampin' Blends

Hey everybody! I'm so excited today because I've been asked to hop along with the Stamping Sunday crew as their guest designer. What an honor! The theme for the hop is Stampin' Blends so it'll be fun to see the different and creative way everyone has used them. The Stampin' Blends markers are alcohol based markers and are great for so many uses. The obvious use to color on paper but keep on reading to find a couple of other uses for them.

For this hop I decided to try something that I haven't tried before and I used my Stampin' Blends on acrylic to create a fun, artsy, faux-watercolored look. 


I started my card by selecting an acrylic sheet from the Petal Passion Memories & More Card Pack (available when the new Occasions Catalog Launches on January 3, 2017). This acrylic sheet was preprinted with some subtle white flowers on it. I used those flowers as a guide for my coloring and colored on the textured side as the texture held the color well. For the flowers I used the Daffodil Delight and Calypso Coral Blends. The leaves were done with Old Olive.
At first I wasn't sure that the smooth acrylic was going to hold the ink very well. I had started with Soft Sky and decided to use the light Bermuda Bay Stampin' Blends to do the background. I started to see a light layer of color. As the color started to dry I was able to add to it by coloring a second layer of color over the first layer. This also moved some of the color around resulting in a brush stroke look that I think looks like a soft and pretty watercolor painting. 

When I was done coloring, I layered the acrylic sheet over a piece of Whisper White Cardstock and added Iridescent Sequins with reckless abandon. This all got layered over Sahara Sand cardstock and some Very Vanilla Lace Trim.  After that I embellished with some Calypso Coral Ombre Ribbon, some Linen Thread, a tassel and tag from the Corrugated Elements pack. If you look closely you can tell that I colored that tiny little piece behind the sentiment with my Calypso Coral Blends. Originally, I was going to use Calypso Coral cardstock but the color was too bold. The Stampin' Blends were the perfect shade for this project. I didn't end up using it (because I LOVE this ombre ribbon) but I actually made a custom color ribbon for this project out of white ribbon colored with my Stampin' Blends. It colored evenly and dried quickly and was an easy way to get just the color of ribbon you were hoping for. 


I've also made a box to show the versatility of the Stampin' Blends markers. For this project I used a strip of black and white DSP (Petal Passion DSP) and colored it in with my Blends. I used both of the Pool Party, Bermuda Bay and Night of Navy markers to create an ombre look on the DSP. 

Here's a closer look at the DSP so that you can see how well the colors blend. It's unbelievable easy too. I like to start with my light marker, then I use the darker one. After both colors are laid down, I use the lighter of the colors to blend the line where the two colors meet. It's really great that you can do this and it does not ruin your markers!

Another fun way to use the Stampin' Blends markers is to color your embellishments. I already mentioned making custom color ribbon and you can do the same thing with your rhinestones too! I used the light Night of Navy marker to color these sparkly bits before adding them to my layered sentiment piece. I love that we can now have many colors of rhinestones that match SU colors perfectly. 

Here's a last look at my box and that Blends colored DSP peeking through as an accent piece. 

That's it for today folks! Thanks for stopping by my blog and I hope you'll keep on hopping with us to see what the rest of the crew has made. If you'd like to keep on hopping please follow the list of names in the Blog Roll below until you've seen everybody's beautiful creations. 

A huge thanks to Sara Levin and the Stamping Sunday team for inviting me to join them this week. It's been fun ladies!

Have an awesome day everybody!

Maria Willis

BLOG ROLL:


Want to shop with me? No problem, just click the button below. 
Let me know if you have any questions!
Email: mariawillis@hotmail.com


Want a great discount on Stampin' Up! Products and to have a fun new stamping family? Join me on this fun adventure! I can't wait to be your super excited Stampin' Up! side kick and support lady! In case you didn't know, you can join Stampin' Up! just for the discount and never sell a single product. If you want to know the details just let me know. If you're looking for a discount on your favorite hobby (stamping and paper crafting with Stampin' Up! products) and want to earn money doing it... let me know! I'd love to talk with you whatever your interest might be! If you want to see a little more info go ahead and click the button below. Looking forward to hearing from you!


Sunday, July 23, 2017

#GDP096- CASEing Tanja Kolar

Hey everybody and happy Sunday! It has been so long since I've played along with a challenge blog and this week's challenge over at #GDP096 was just too good to pass up! This week the Global Design Project is CASEing its' very own Tanja Kolar and check out this gorgeous card that we get to use as inspiration. 


When you CASE a card you can take anything from it that you want and use it in your own card. I chose to use Tanja's layout. I switched the squares out for circles and added a larger sentiment.  I love that two cards using the same layout can look so very different. My sentiment is from the Window Shopping stamp set. The little "To You" on the hand-cut banner is from the Tabs For Everything set.


I really had fun layering all of these beautiful pieces. The flower is put together from two pieces from the Eclectic Layers Thinlits. The tiny leaves were watercolored using Lemon Lime Twist and Emerald Envy and then cut using the same framelits as the flower. I hand cut both the sentiment piece in Berry Burst and the little banner in Pool Party.  The circle was cut using my stitched circle framelits and the Gold Foil Doily, Gold Metallic Thread, Pick a Pattern Washi Tape and Metallic Sequins were the perfect finishing touches for this card. 


I'm so glad I had a chance to play along with #GDP096 this week! If you're looking to see more amazing projects using Tanja's card as inspiration head on over to the Global Design Project Blog and check out all of the amazing cards over there. 

Happy Sunday and Thanks for stopping by today! As always, please let me know if you have any questions or are interested in purchasing products to make some cards of your own. I've got a full list of products below so feel free to click on through to my store if you're interested. BONUS: This month we've got a great deal going on and for every $50 that you spend in July you will receive a coupon for $5 to spend in August! 

Bye for now!
Maria.


PRODUCT LIST:

Need more stamps now? Never fear! I've got you covered!
Let me know if you have any questions!


Want a great discount on Stampin' Up! Products and to have a fun new stamping family? Join me on this fun adventure! I can't wait to be your super excited (possibly way too enthusiastic... No! That's not possible!) Stampin' Up! side kick and support lady! In case you didn't know, you can join Stampin' Up! just for the discount and never sell a single product. If you want to know the details just let me know. If you're looking for a discount on your favorite hobby (stamping and paper crafting with Stampin' Up! products) and want to earn money doing it... let me know! I'd love to talk with you whatever your interest might be! If you want to see a little more info go ahead and click the button below. Looking forward to hearing from you!


Thursday, June 22, 2017

Birthday Boys!

Hey you all! Thanks for stopping by today. I've got two fun but simple Birthday Boy cards for you today. Every once in a while my Dad calls me and asks me to make cards for his friends... sometimes at the last minute. Well, I can't say no to my dad so sometimes I need to bust out cards that he will love in a pretty big hurry. Here's what I came up with over the last two weeks when he called me for cards. This is actually the second of the two cards he ordered but I'm sharing it first because I just love that little turtle! My dad asked me to put Omani's name on his card. Omani is a young guy who makes amazing jewelry/art using twisted wires and gorgeous rocks. I can't help but think of beautiful metal and jewel tones when I think of him. This So Eclectic DSP was perfect  for his card and really allowed for the gold lettering to pop off of the card. After I stamped the birthday sentiment the card still looked like it needed something. My husband thought it needed a birthday cake but I found this little turtle (DSP) and cut it out instead. I love this cute little guy!


My second card is for my Dad's buddy Joseph. My Dad met both Joseph and Omani through an amazing program called CASA. It's a program that sets kids who are in the foster system up with a responsible and caring adult who is able to remain constant in their life. My Dad is one of the mentors or "Casas" in this program. Joseph was my Dad's first Casa kid and their story is really inspiring. Joseph is now a succesful young adult and he and my Dad have remained friends even after Joseph aged out of the program. They have such a strong bond that they have become the "poster children" for the program. I'll post a video of them after Joseph's card. So, I didn't have much notice for this card and I ended up making it in the middle of the night so that I could give it to my Dad in the morning. For such a last minute card I was happy with how it came out. Thank goodness Stampin' Up! has such amazing products that I was able to do something fun at the last second.

Here's the video about CASA featuring Joseph and my Dad. If you've got a program like this in your area (it is a national program so you might!) and you are looking for a way to make a difference I highly recommend it. It's a great way to make a difference in someone's life.


That's all for today. Thank you for stopping by, you know I'm always so glad that you do.
Have an amazing day!

-Maria.


Need more stamps now? Never fear! I've got you covered!
Let me know if you have any questions!


Want a great discount on Stampin' Up! Products and to have a fun new stamping family? Join me on this fun adventure! I can't wait to be your super excited (possibly way too enthusiastic... No! That's not possible!) Stampin' Up! side kick and support lady! In case you didn't know, you can join Stampin' Up! just for the discount and never sell a single product. If you want to know the details just let me know. If you're looking for a discount on your favorite hobby (stamping and paper crafting with Stampin' Up! products) and want to earn money doing it... let me know! I'd love to talk with you whatever your interest might be! If you want to see a little more info go ahead and click the button below. Looking forward to hearing from you!


Monday, June 19, 2017

Basic Mermaid

Hey everybody! Happy Tuesday to ya! Yesterday I shared a Magical Mermaid card that was possibly one of my favorite cards ever. Today I've got what I'm calling the Basic Mermaid... because after yesterday's mermaid this one just seems... basic. But let's be real! Sometimes you don't have hours to make a card and you need a quick and easy card that is still pretty. 

I watercolored this mermaid after heat embossing in clear onto watercolor paper. Her tail is Lemon Lime Twist and Emerald Envy with some sparkly Clear Wink of Stella on top. Her skin is Powder Pink and her hair is Real Red. The new Naturally Eclectic DSP made my job super easy as it provided me with an easy "water" background. 


I heat embossed my sentiment in white onto vellum and layered the mermaid on top. Adding some of the new and fabulous Iridescent Sequins in different sizes and colors helped to finish the card off easily.

I really am loving this mermaid set! I do have some ideas on how to experiment with it but haven't had time to do it yet. Soon, I hope! Please let me know if you have any questions at all. If you are interested in purchasing any of the supplies to make this set yourself please let me know. You can also click the "Shop Now" button below, or, click on any of the products in the carousel below and it will take you to my online store.

Thanks for stopping by today! Hope your day is terrific!
Maria.


PRODUCT LIST:


Need more stamps now? Never fear! I've got you covered!
Let me know if you have any questions!


Want a great discount on Stampin' Up! Products and to have a fun new stamping family? Join me on this fun adventure! I can't wait to be your super excited (possibly way too enthusiastic... No! That's not possible!) Stampin' Up! side kick and support lady! In case you didn't know, you can join Stampin' Up! just for the discount and never sell a single product. If you want to know the details just let me know. If you're looking for a discount on your favorite hobby (stamping and paper crafting with Stampin' Up! products) and want to earn money doing it... let me know! I'd love to talk with you whatever your interest might be! If you want to see a little more info go ahead and click the button below. Looking forward to hearing from you!


Sunday, June 18, 2017

Magical Mermaid

Hey Everybody! Happy Monday! I hope you've all had a great weekend and a terrific Father's Day if you were celebrating it. I made my husband a pile of french toast and sausage and then we went to see The Mummy. It's gotta be over 100 degrees Fahrenheit today (yesterday hit 117) and we are roasting. I really need to get some yard work done but i'm thinking hitting the craft room and sweating less is probably a better idea. Anyhow, not so long ago I shared a technique for Glossy Paper called Alcohol Ink Blending. In my tutorial video I shared some samples and I thought it would be fun to show you what I made with them. So, this is the first of those cards and I love how well the background pairs with the Magical Mermaid stamp set...


I had so much fun with every single detail of this card. Luckily that background was already made and once I got a good look at it I knew I'd be pairing it with this gorgeous mermaid!

The mermaid was the first thing I did. I heat embossed her in clear on watercolor paper and then watercolored her using an aqua painter. Her tail is a combination of Lemon Lime Twist, Emerald Envy and a healthy coating of Clear Wink of Stella. Her skin is Powder Pink and her hair is a combo of Perfect Plum and Elegant Eggplant. If you look closely you can see that I colored outside of the lines. I did that on purpose so that when I cut my mermaid out she wouldn't have a white outline that would contrast with the background of the card. Also, because I heat embossed her in clear (which appears white), if I had a white border I think she would've looked weird-as if the details of her body didn't have an edge or were not grounded. I'm not sure I'm explaining that well so I hope it makes sense. 

One of my favorite details of this card is this fun little tag! I cut it out by hand, punched a hole in the top and heat embossed the sea star in white. Adding the gold ribbon and the gold thread added a nice contrast and helped tie it in to the rest of the card.

I heat embossed the seaweed (the seaweed!! isn't it beautiful!! I love that stamp.) in gold multiple times across the bottom of the card. Then I added some of these new iridescent sequins... so, take a second and check out these sequins. They are amazing! The colors are so rad and I love that they come in different sizes! I used my fine tip glue pen to stick those down. 

To finish my card off I heat embossed my sentiment in black onto vellum (stamp in versa mark, then in black archival, stamp image on vellum, then use clear embossing powder) and added a strip of Basic Black to ground it a little better onto the card. I love the way the curve of the mermaid seems to fit so perfectly with that stitched oval. 

I've seen a lot of people requesting to see the insides of cards lately. I always finish the insides of my cards but I rarely share them. I'll try to work on that since it seems that there really is interest. I heat embossed the seaweed in gold onto whisper white cardstock (it's really whisper white, not shimmer paper). Then I used a combination of my aqua painter and my clear wink of stella to paint this in (Emerald Envy, Lemon Lime Twist and Tempting Turquoise). The Wink of Stella works amazingly for "watercoloring" on regular cardstock. The solution helps move the color around without saturating the paper and causing pilling or warping. Pretty awesome!

Alright, here's a last look at this Magical Mermaid. I sure hope you think she's magical too!


In case you missed my post on how to create Alcohol Ink Blended backgrounds, like the one I featured today, here's a link to my video tutorial:

Alright folks, that's it for today. Thank you so much for stopping by and checking out my card today. As always, if you are interested in purchasing any of the products that I showcased today, you can shop in my online store by clicking on the link below or by clicking on any of the products in the carousel below. If you have any questions or comments please ask! I'm here to help and I love hearing back from you.

Have an amazing day you all!
Maria.


PRODUCT LIST:


Need more stamps now? Never fear! I've got you covered!
Let me know if you have any questions!


Want a great discount on Stampin' Up! Products and to have a fun new stamping family? Join me on this fun adventure! I can't wait to be your super excited (possibly way too enthusiastic... No! That's not possible!) Stampin' Up! side kick and support lady! In case you didn't know, you can join Stampin' Up! just for the discount and never sell a single product. If you want to know the details just let me know. If you're looking for a discount on your favorite hobby (stamping and paper crafting with Stampin' Up! products) and want to earn money doing it... let me know! I'd love to talk with you whatever your interest might be! If you want to see a little more info go ahead and click the button below. Looking forward to hearing from you!


Thursday, March 9, 2017

OSAT Blog Hop- Birthday Bash!

Hey everybody! Happy Thursday and welcome to this month's One Stamp At a Time Blog Hop. This month our them is Birthday Bash and I hope you'll join us to see all of the creative birthday ideas this crew has to share. I'm loving the theme this month because my birthday is only a couple of days away and I'm looking forward to it!


For my card this month I decided to use the Bokeh Technique and to give you a quick tutorial just in case you've never tried it before. 

First, use sponge daubers to blend Soft Sky, Marina Mist and Wisteria Wonder inks onto your background. Start with the lightest color first.    

Next, use either circle framelits or circle punches in a variety of sizes to cut circles in a piece of window sheet. Using a sponge dauber gently sponge White Craft ink onto your sponged background using the window sheet as a mask. Sponge circles all over the background and overlap some circles too! Make sure not to cover the entire background as you do want color peeking through.


Set it aside to let the ink dry... This is more or less what your background should look like (feel free to use different colors).


Stamp your fairy image in Basic Gray Archival onto Whisper White. Cut it out with the Stitched Oval Framelit. Use a sponge dauber to blend Soft Sky ink onto the background of the image.Use the Watercolor pencils to color the fairy’s hair and skin (Calypso Coral is perfect for a skin tone!) then use an Aquapainter to blend it. Use your Aquapainter and Wisteria Wonder ink to color the dress. Be careful not to use too much water. Use clear Wink of Stella to add fairy dust to the fairy’s wings and dress.

Adhere your Bokeh background to the Marina Mist card face and then attach those pieces to the card face. Optionally, you can add Clear Wink of Stella to some of your Bokeh circles (I did). Add your flagged banner and silver ribbon. Then add your image piece with dimensionals. Stamp the sentiment on a scrap of Wisteria Wonder and add it to the bottom corner. To finish up your card add sequins in silver and clear using mini glue dots. 


My project this month is inspired by the generosity of one of my clients. Yesterday when he arrived for his appointment with me, one of my clients presented me with a beautiful tulip cookie! It was originally wrapped in a wax paper type bag that didn't allow you to see how beautiful the cookie was. I decided that I would wrap it back up in a way that it could show off a little. I used a clear envelope to put the cookie in and decorated it with a fun birthday topper. 

Isn't that a beautiful cookie?! I just love the sentiment too!


Thanks for stopping by my blog today. I hope you'll keep on hopping along with the OSAT hop to see all of the other fabulous birthday creations!
See you soon!
-Maria


Next up on the hop is the talented Renee Ondrajka! Just click the Next button to head her way.

BLOG ROLL:
Lori Mueller
Melissa Davies
Marisa Gunn
Jennifer Hill
Tina Rackley Riddle
Crystal Komara
Kelly Acheson
Lisa Altman
Sue Plote
Rick Adkins
Jeanna Bohanon
Maria Willis: You are HERE!
Renee Ondrajka: NEXT!
Pam Staples
Andrea Tracy-Tucker
Megan Thompson
Justin Krieger


CARD SUPPLIES:


PROJECT SUPPLIES:


Need more stamps now? Never fear! I've got you covered!
Need more stamps now? Never fear! I've got you covered! Don't forget that during Sale-a-Bration (now) for every $50 USD you spend before taxes you will get to select a FREE item from the SAB catalog! If you are looking for the ultimate Stampin' Starter kit then now is the time! For $99 you will get to pick $125 in products of your choice plus any two stamp sets from the Main or Occasions Catalog! It really doesn't get better than that! Let me know if you have any questions!


Want a great discount on Stampin' Up! Products and to have a fun new stamping family? Join me on this fun adventure! I can't wait to be your super excited (possibly way too enthusiastic... No! That's not possible!) Stampin' Up! side kick and support lady! In case you didn't know, you can join Stampin' Up! just for the discount and never sell a single product. If you want to know the details just let me know. If you're looking for a discount on your favorite hobby (stamping and paper crafting with Stampin' Up! products) and want to earn money doing it... let me know! I'd love to talk with you whatever your interest might be! If you want to see a little more info go ahead and click the button below. Looking forward to hearing from you!


01 09 10