Showing posts with label #techniques. Show all posts

Friday, September 25, 2020

Tonic Studios Stamp Club Release: Heartfelt Corsage

Hello everybody! I am so excited to have you here for the launch of the new Stamp Club from Tonic Studios! This is the first in what will be a monthly release that will launch on the last Friday of every month (with the exceptions of holidays). This month's release is called Heartfelt Corsage and it is a beauty (it's a stamp and die bundle plus an add-on stamp set)!  Oh! There's also a $100 Giftcard Giveaway! The info for the giveaway is at the bottom of my post so make sure you enter before you go. Now, here's a peek at some of the many cards I've made with this release...
Cardbomb, Tonic Studios, Tonic Studios USA, Tonic Studios Stamp Club, #tonicstudiosstampclub, stamps, stamping, cards, card making, ink, paper, paper craft, watercolor, video tutorial, shaker cards, envelope art

Before I get excited and get ahead of myself I want to give you more info about the release. So, to know everything there is to know head on over to Tonic Studios to check it out. If you're in the UK Click Here, and if you're in the USA Click Here. In case you've noticed that my face and name are on the banner below... Yup, that's me. I got to help design these products which makes this release even more exciting for me!
Cardbomb, Tonic Studios, Tonic Studios USA, Tonic Studios Stamp Club, #tonicstudiosstampclub, stamps, stamping, cards, card making, ink, paper, paper craft, watercolor, video tutorial, shaker cards, envelope art

I've made a little video to walk you through the products that are available in this release so here's that video to start you off. Heads up that I've actually got three videos for you today so make sure to keep reading until the end.


Now that you've had a good look at the Heartfelt Corsage stamps and dies we can get into my first cards. I've used one of the main floral stamps to create some popped up shaker cards. This stamp is perfectly sized to be the focal point of your card and it also works to decorate your envelopes with.
Cardbomb, Tonic Studios, Tonic Studios USA, Tonic Studios Stamp Club, #tonicstudiosstampclub, stamps, stamping, cards, card making, ink, paper, paper craft, watercolor, video tutorial, shaker cards, envelope art

Here's a video sharing how I made these shaker cards...


To make these cards I started by ink blending the background with a stencil. Then, I cut multiple die cuts out of cardstock and an acrylic sheet.
Cardbomb, Tonic Studios, Tonic Studios USA, Tonic Studios Stamp Club, #tonicstudiosstampclub, stamps, stamping, cards, card making, ink, paper, paper craft, watercolor, video tutorial, shaker cards, envelope art

I layered the die cuts on top of each other and adhered them to create a focal point with a hollow center.
Cardbomb, Tonic Studios, Tonic Studios USA, Tonic Studios Stamp Club, #tonicstudiosstampclub, stamps, stamping, cards, card making, ink, paper, paper craft, watercolor, video tutorial, shaker cards, envelope art

I filled the center with shaker guts (glitter and sequins) and sealed it up with an acrylic window.
Cardbomb, Tonic Studios, Tonic Studios USA, Tonic Studios Stamp Club, #tonicstudiosstampclub, stamps, stamping, cards, card making, ink, paper, paper craft, watercolor, video tutorial, shaker cards, envelope art

The floral piece in the front was watercolored before I glued it on to the front of the shaker.
Cardbomb, Tonic Studios, Tonic Studios USA, Tonic Studios Stamp Club, #tonicstudiosstampclub, stamps, stamping, cards, card making, ink, paper, paper craft, watercolor, video tutorial, shaker cards, envelope art

Next I added a sentiment and finished the cards off with some dream drops.
Cardbomb, Tonic Studios, Tonic Studios USA, Tonic Studios Stamp Club, #tonicstudiosstampclub, stamps, stamping, cards, card making, ink, paper, paper craft, watercolor, video tutorial, shaker cards, envelope art


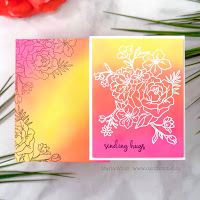
My next card and envelope set started out with some fun inkblending. I used pink, orange and yellow to create these vibrant card backgrounds. On these projects I used the largest floral image from the Heartfelt Corsage bundle.
Cardbomb, Tonic Studios, Tonic Studios USA, Tonic Studios Stamp Club, #tonicstudiosstampclub, stamps, stamping, cards, card making, ink, paper, paper craft, watercolor, video tutorial, shaker cards, envelope art

To see exactly how I did all of the stamping on this card and envelope set check out this video...


This card was heat embossed with white embossing powder. Then I added a sentiment in black.

Cardbomb, Tonic Studios, Tonic Studios USA, Tonic Studios Stamp Club, #tonicstudiosstampclub, stamps, stamping, cards, card making, ink, paper, paper craft, watercolor, video tutorial, shaker cards, envelope art

The stamping on the envelope was done in black...
Cardbomb, Tonic Studios, Tonic Studios USA, Tonic Studios Stamp Club, #tonicstudiosstampclub, stamps, stamping, cards, card making, ink, paper, paper craft, watercolor, video tutorial, shaker cards, envelope art


Did you notice that fun little sentiment on the flap of the envelope? That's from the Happy Mail Envelope stamp set and I love it. There's another stamp that says, "Licked. With my spit." If I'm being honest that second sentiment is more my style.
Cardbomb, Tonic Studios, Tonic Studios USA, Tonic Studios Stamp Club, #tonicstudiosstampclub, stamps, stamping, cards, card making, ink, paper, paper craft, watercolor, video tutorial, shaker cards, envelope art

Now, if you watched the last video you know that there is another card in that video. Let's take a look at that one...

Cardbomb, Tonic Studios, Tonic Studios USA, Tonic Studios Stamp Club, #tonicstudiosstampclub, stamps, stamping, cards, card making, ink, paper, paper craft, watercolor, video tutorial, shaker cards, envelope art

This card was very easy to make and it still manages to be very soft and beautiful. I stamped the large floral image from the Heartfelt Corsage stamp set in Clear Mark ink on light blue cardstock. This gave a tone-on-tone stamped look. I die cut the image out and adhered it to a background that was lightly ink blended with purple ink.
Cardbomb, Tonic Studios, Tonic Studios USA, Tonic Studios Stamp Club, #tonicstudiosstampclub, stamps, stamping, cards, card making, ink, paper, paper craft, watercolor, video tutorial, shaker cards, envelope art

The sentiment is a custom sentiment that I put together using stamps from the Happy Mail Envelope set. That stamp set is great for decorating your envelopes in a variety of ways. It's also great for the backs of your cards and creating custom sentiments. I finished the card off by adding dream drops.
Cardbomb, Tonic Studios, Tonic Studios USA, Tonic Studios Stamp Club, #tonicstudiosstampclub, stamps, stamping, cards, card making, ink, paper, paper craft, watercolor, video tutorial, shaker cards, envelope art

So far you've seen the Happy Mail Envelope set used as something of a sidekick to the Heartfelt Corsage set... but guess what?! The Happy Mail set can hold it's own! It's a great sidekick stamp of course but check out how amazing the set is for decorating your envelopes! I stamped the wooden sign in brown ink, masked it off and ink blended it. Then I took a colored pencil and dragged those detail lines towards the center a little bit. I added silver gel pen to the nails.
Cardbomb, Tonic Studios, Tonic Studios USA, Tonic Studios Stamp Club, #tonicstudiosstampclub, stamps, stamping, cards, card making, ink, paper, paper craft, watercolor, video tutorial, shaker cards, envelope art

The sentiment was custom built from the set. To finish the envelope off I added a tiny "to," and, "from" to the card before ink blending and splattering with Glitter Gloss.
Cardbomb, Tonic Studios, Tonic Studios USA, Tonic Studios Stamp Club, #tonicstudiosstampclub, stamps, stamping, cards, card making, ink, paper, paper craft, watercolor, video tutorial, shaker cards, envelope art

Now I just have to decide who to address it to and send it off with something fun inside. Honestly though, even if I got a bill in this I would still be so happy to find this in my mail box.

Ok, you all, that's it for me today. I really hope you've enjoyed the release and hope you'll continue on with our blog hop. Next up on the hop is the amazing Michelle Short! Head over to her blog and see what beauties she's made for you to feast your eyes upon!

Before you go let me tell you about that Giveaway I mentioned...

GIVEAWAY!!
Tonic Studios will be giving one lucky winner a $100 gift card ( £100 if you're in the UK!)! That is such a fantastic giveaway and someone is going to be so happy! To enter the giveaway you need to comment on every blog in this blog hop (the list of blog hoppers is down below). Get your comments in by 11:59 pm PST on September 30, 2020. The winner will be announced on the Tonic Studios Instagram and Facebook accounts on October 2, 2020 (so make sure you're following the Tonic social media accounts). Good luck to you all!


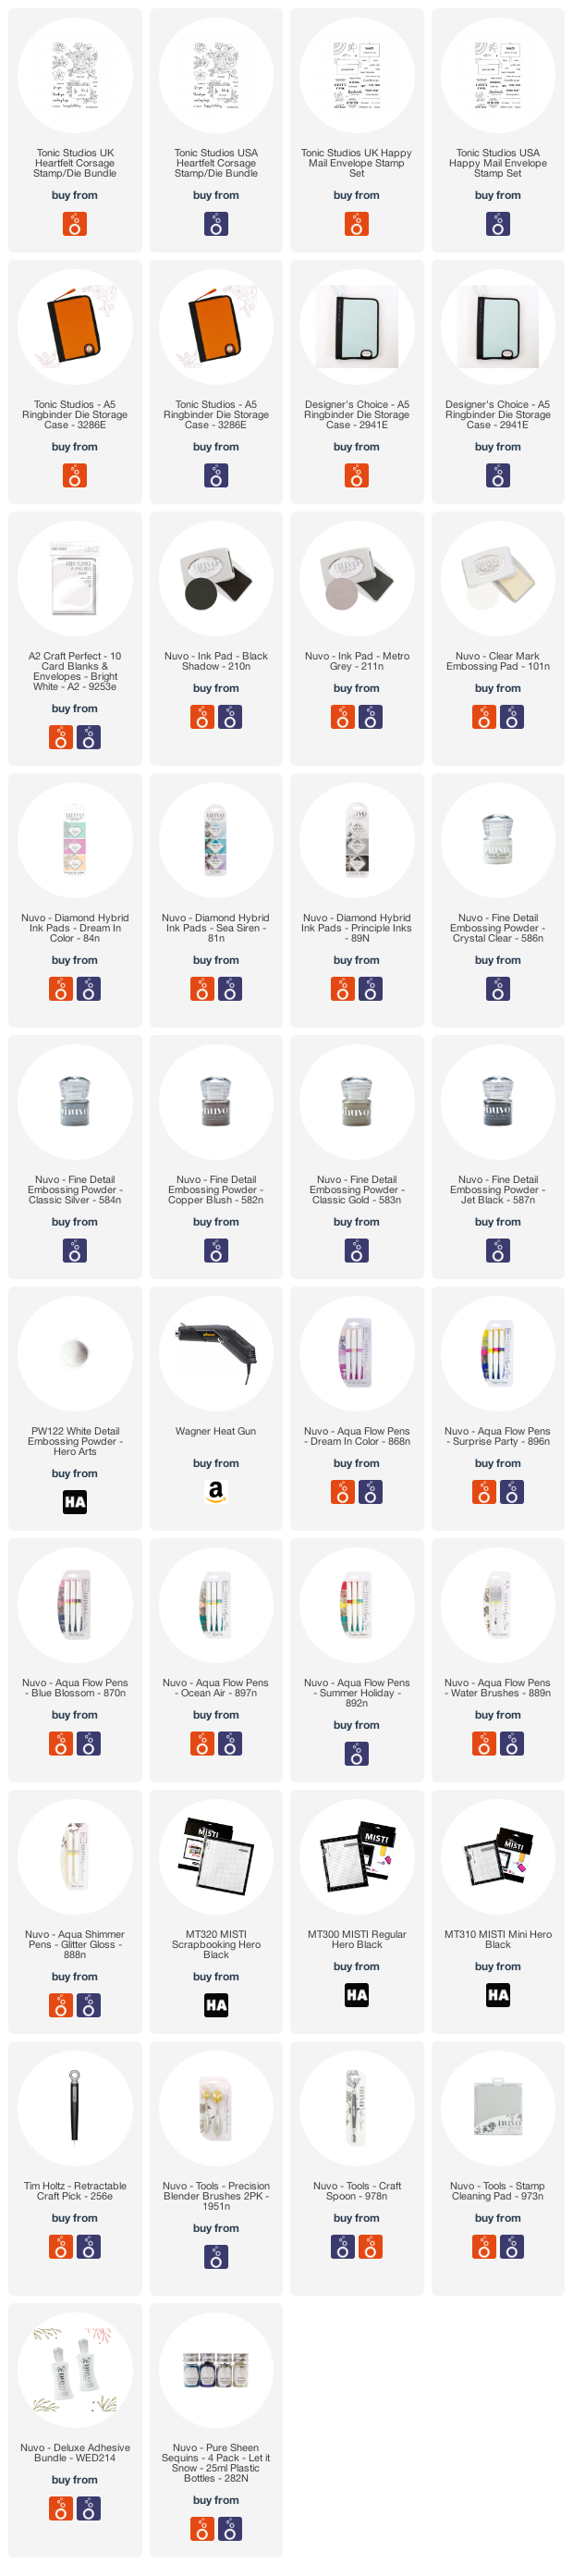
Ok, the blog hop list is below (or just head over to Michelle's blog right now). I've also linked most of the products that I've used today in case you'd like to check anything out. 

Have an awesome day (or evening if you're on the other side of the Earth from me)! Bye for now.

Maria.


BLOG HOP LIST:

Tonic Studios UK

Tonic Studios USA

Amber Rain Davis

Christine Smith

Daniel West

Jen Kray

Ilda Dias

Vicky Papaioannou

Maria Willis: YOU ARE HERE.

Michelle Short

Marie Heiderscheit

TaeEun Yoo

Mindy Eggen

Galina Filippenko

Sandi MacIver

Seeka


PRODUCT SUPPLY LIST:

Thursday, May 3, 2018

Creating Kindness: Techniques!

#cardbomb, #mariawillis, #stampinup, #stamparatus, #stamping,  #video, #videotutorial, #ink, #paper, #papercraft, #flowershop, #techniques, #masking, #watercolor, #stampinblends, #rainbow, #handmade, #diy, #color, #creative, #crafty, #cards,

Hi everybody! I hope you are having an amazing day! I'm here today with the monthly Creating Kindness Design Team blog and Video hop! Yep, we've got a video hop for you too. Our theme this month is "techniques" and I can' wait to see what the rest of the crew has dreamed up to share with us today.

#cardbomb, #mariawillis, #stampinup, #stamparatus,  #video, #videotutorial, #stamping, #ink, #paper, #papercraft, #flowershop, #techniques, #masking, #watercolor, #stampinblends, #rainbow, #handmade, #diy, #color, #creative, #crafty, #cards,


My card proved to be quite an adventure (ahem, NIGHTMARE!)... My game plan was to use my Stamparatus to stamp and mask off the flowers from the Flower Shop stamp set. Then I planned to watercolor them and finally to add some shading and extra color with my Stampin' Blends alcohol markers. My master plan was derailed very early on and I had to "go with the flow" in order to save my card. 
#cardbomb, #mariawillis, #stampinup,  #video, #videotutorial, #stamparatus, #stamping, #ink, #paper, #papercraft, #flowershop, #techniques, #masking, #watercolor, #stampinblends, #rainbow, #handmade, #diy, #color, #creative, #crafty, #cards,


I started out by using my Stamparatus to stamp the flowers multiple times on a piece of watercolor paper. I used some post-it tape and the coordinating Pansy Punch to easily mask off my flowers (you can see the masking process in the video below). This made it easy to stamp each flower multiple times to get a crisp, dark image. I used Memento ink as I wanted to make sure that in the final phase of my projects the alcohol markers wouldn't smear the ink and ruin my project. 
#cardbomb, #mariawillis, #stampinup,  #video, #videotutorial,  #stamparatus, #stamping, #ink, #paper, #papercraft, #flowershop, #techniques, #masking, #watercolor, #stampinblends, #rainbow, #handmade, #diy, #color, #creative, #crafty, #cards,

Well, it turns out the Memento ink was absolutely the wrong call! I always use Archival ink for watercoloring and was horrified when I added water to my project to begin watercoloring... and my project instantly turned into a black puddle of Memento ink. Total nightmare after I had taken all that time to stamp and mask. Anyhow, I decided to roll with it and was able to save my card, thank goodness!
#cardbomb, #mariawillis, #stampinup,  #video, #videotutorial, #stamparatus, #stamping, #ink, #paper, #papercraft, #flowershop, #techniques, #masking, #watercolor, #stampinblends, #rainbow, #handmade, #diy, #color, #creative, #crafty, #cards,


After watercoloring I used the light shade of Smoky Slate  Stampin' Blends to add some shading to the flowers. I also used a thin black sharpie to add back some of the detail I had lost when I ruined my stamped images with water. Then I used a white gel pen to add some fun accents. The last touch to make the flowers stand out was to add liquid adhesive from my Fine Tip Glue pen to give the flowers both gloss and dimensions. 
#cardbomb, #mariawillis, #stampinup,  #video, #videotutorial, #stamparatus, #stamping, #ink, #paper, #papercraft, #flowershop, #techniques, #masking, #watercolor, #stampinblends, #rainbow, #handmade, #diy, #color, #creative, #crafty, #cards,

I spattered the  background with a black Stampin' Write marker and added some embellishments. This sentiment was really the perfect final touch for this card because in the end it did make me smile but along the way it was a little bit of everything else... If you'd like to check out the process of making this card here's a video for you. Feel free to shake your head in horror or laugh at my distress, whatever strikes your fancy. Either way, enjoy!


Thank you so much for stopping by my blog today! It's always such a pleasure to have you join me. I hope you'll keep on hopping along with me as I visit all of my friends on the Creating Kindness Hop-Remember, there are blogs and videos galore so don't miss anything!

Now we're off to visit the lovely Paula Dobson in New Zealand! She is incredibly talented and I cannot wait to see what she has made. As always, if you have questions, comments or need some help please shoot me an email or leave comment below.

Bye for now!

Maria
Email: mariawillis@hotmail.com


Next up: Paula Dobson


BLOG ROLL:


PRODUCT SUPPLY LIST:


Want to shop with me? No problem, just click the button below. 
Let me know if you have any questions!
Email: mariawillis@hotmail.com


Monday, December 4, 2017

Give Thanks

Hey everybody! I've just got a quick share for today. This card is quick and easy and is actually a stepped down card from something I made a while back. Honestly, I made this a while back too and never got around to sharing it. Whoops!


A while back I did a tutorial for a technique called "Ink Smooshing." You can check out that tutorial here. It's a fun and easy technique but perhaps not something you want to try if you're in a hurry and need a card on the double. So, I decided to see if I could recreate my card technique card using DSP... Wouldn't ya know, it worked out pretty well. 

The card on the left has a background that was created with the Ink Smooshing Technique. The card on the right uses the Painted Autumn DSP as a background piece.

The sentiment that I used (heat embossed in gold) is from the Labels to Love stamp set. I also used the Starburst Punch with Gold Foil and added a strip of Gold Glimmer Paper for a little extra flair.

So, the next time you're looking for an easy Thank You card, look no further. 

Ok, I've got a gigantic task list for today so I am outta here.
Have an amazing day you all and I'll see you back here soon.

Maria.


Want to shop with me? No problem, just click the button below. 
Let me know if you have any questions!
Email: mariawillis@hotmail.com


Want a great discount on Stampin' Up! Products and to have a fun new stamping family? Join me on this fun adventure! I can't wait to be your super excited Stampin' Up! side kick and support lady! In case you didn't know, you can join Stampin' Up! just for the discount and never sell a single product. If you want to know the details just let me know. If you're looking for a discount on your favorite hobby (stamping and paper crafting with Stampin' Up! products) and want to earn money doing it... let me know! I'd love to talk with you whatever your interest might be! If you want to see a little more info go ahead and click the button below. Looking forward to hearing from you!


Tuesday, August 1, 2017

Bee

Hey everybody and happy Wednesday. Thanks for stopping by my blog today. Today I'm sharing a card that I made forever ago...February I think. Anyways, I made it for my On Stage Display board and still haven't gotten around to sharing it. Believe it or not there are still a few more after this one. The cool thing is that almost everything on this card is current. I was going for texture when I made this and ended up incorporating quite a few techniques in the process.


When I started this card I knew I wanted to use this bee. The rest of the card sort of unfolded from there. In this pic you can see how many different layers of interest there are. The card base has splatters, stamping, DSP, gold foil stickers and black pearls. 


The card face is glossy cardstock that has been treated with an embossed wax paper resist technique, sponged, dry embossed with the 3D Hexagon embossing folder, heat embossed with a stamped image from Gorgeous Grunge (retired but easily replaced by other stamp sets), smeared with versa mark and embossed for a faux metal look in silver, gold and copper. 

Then the card face was layered on a mat of Basic Black and wrapped with Venetian Crochet Trim and Linen Thread. 


The bee was placed to look as if it were ready to take flight from it's textured hive.

There's a lot going on here but I think (hope!) it all goes together for a fun look. 

Oh, I forgot to mention that I sponged the the sentiment banner as well. Do you see the yellow "honey comb" at the base of the card face? That's the embossed wax paper resist. To get that look you dry emboss a piece of wax paper in an embossing folder. I used the Hexagon folder. Then you iron the wax paper onto your glossy paper (make sure to put a piece of paper between the wax paper and your iron). After the wax pattern is transferred you sponge over it with ink to reveal the pattern. On this card I sponged over the wax with Daffodil Delight.


This card was really fun to make. It was a bit time consuming but for me it's worth it when you can see all of these different layers of technique and paper and ribbon and twine and texture come to together to make something interesting. 

I think I'll try to make another card like this soon. It's fun to just modge podge a bunch of ideas together to see how it will turn out.

If you like texture then please come back tomorrow. Tomorrow the Creating Kindness Blog and Video Hop goes live and I cannot wait to see what the rest of the team has created.

Thanks for stopping by. See you soon!
Maria.

PS: Please feel free to ask if you have any questions or need help with anything.


Need more stamps now? Never fear! I've got you covered!
Let me know if you have any questions!


Want a great discount on Stampin' Up! Products and to have a fun new stamping family? Join me on this fun adventure! I can't wait to be your super excited (possibly way too enthusiastic... No! That's not possible!) Stampin' Up! side kick and support lady! In case you didn't know, you can join Stampin' Up! just for the discount and never sell a single product. If you want to know the details just let me know. If you're looking for a discount on your favorite hobby (stamping and paper crafting with Stampin' Up! products) and want to earn money doing it... let me know! I'd love to talk with you whatever your interest might be! If you want to see a little more info go ahead and click the button below. Looking forward to hearing from you!


Thursday, April 20, 2017

Technique Zone: Faux Patina meets Ribbon of Courage

Hi Everybody! I'm here with a Technique Tutorial today for a stunning technique called, "Faux Patina." The idea is to achieve the look of metal patina (old, tarnished, awesome metal). I decided my patina needed a little rust in it today so I added a color that is typically not included in this technique (Pumpkin Pie). Here's the card I made using this technique and few items from the not-yet-released new Stampin' Up! Annual Catalog. Scroll on down for a "how-to."

First, use your Crumb Cake ink pad to ink the Sizzix side of your Hexagon Embossing Folder. Then, run your card face through the big shot to emboss it.


Next, use sponge daubers to ink your card face with Pumpkin Pie, Marina Mist, Wild Wasabi and Early Espresso inks.

Then, make sure your ink is dry. You can either use your heat tool, or, use your Embossing Buddy like I did. Now, drag your open Versamark ink pad all over the raised part of your card face. Cover in Gold Embossing a Powder and heat to set. 

HINT: After you finish heat embossing you can use your sponge daubers to add more color to your piece if necessary (I did).

Now, attach your finished Faux Patina card face to your card base using Fast Fuse. Sponge half of a doily with Marina Mist ink. Layer the ribbons on top of the DSP and sponged doily and secure to card with Fast Fuse. Stamp your image on the Stitched Circle in Marina Mist and sponge with both Marina Mist and Wild Wasabi. Then, use an Early Espresso Stamp’n Write marker to flick some light ink spatters onto it. Attach your sentiment on top of the ribbons using dimensionals.

Add some gold metallic accents to finish your card off.


There you have it! Faux Patina! Would you ever have guessed how simple it is? This card is incredibly difficult to photograph. I really wish you could see how much more beautiful it is in person. You'll just have to make your own to get the full effect I suppose!

Alright, y'all! That's it for me. It's really late at night and I'm still trying to kick a cold so I'm outta here. I hope you've enjoyed today's technique. I promise to be back soon with so many more cards from OnStage. I've started blogging some of them but haven't been able to catch enough free time to finish. Soon, I promise!

Have an amazing day!
Maria.


Need more stamps now? Never fear! I've got you covered!
 Let me know if you have any questions!


Want a great discount on Stampin' Up! Products and to have a fun new stamping family? Join me on this fun adventure! I can't wait to be your super excited (possibly way too enthusiastic... No! That's not possible!) Stampin' Up! side kick and support lady! In case you didn't know, you can join Stampin' Up! just for the discount and never sell a single product. If you want to know the details just let me know. If you're looking for a discount on your favorite hobby (stamping and paper crafting with Stampin' Up! products) and want to earn money doing it... let me know! I'd love to talk with you whatever your interest might be! If you want to see a little more info go ahead and click the button below. Looking forward to hearing from you!


01 09 10