Showing posts with label #papercrafting. Show all posts

Monday, January 28, 2019

WPlus9 Hibiscus Bouquet: Copic Coloring with Drop Shadows

Hey folks! It's so good to be back here and I'm really excited to be sharing this card today. I posted this to my Instagram account a while back and had a really positive response (thank you!). I'm happy to finally be sharing it here on my blog because so many people had questions about the which stamp I used, what colors of Copic Markers I used and how did I do the coloring. I'll start by saying that I am actually pretty new to Copic coloring and I don't have as much time to practice as I wish I did. This card took me multiple sit downs over many days because it's rare for me to have the time to sit and finish something like this all at once (yes, it took me hours to finish but it was fun). I used the WPlus9 Hibiscus Bouquet Stamp set and stamped it multiple times on my cardstock in a Copic friendly ink. 

#mariawillis, #cardbomb, #cards, #cardmaking, #handmade, #handmadecards, #wplus9, #flowers, #copicmarkers, #copics, #color, #art, #stamp, #ink, #paper, #papercrafting

I started out coloring the yellow flowers. I think I did that because they are the easiest part of the image and they are in the "front" of the image. I moved on to the green leaves, the pink flowers and finally finished with the long blue leaves. I'll share all of the Copic Marker colors that I used at the bottom of the post. I colored the whole background light gray. The cool gray markers seem to be the ones I reach for most and they are the markers that create the most drama on this card. If you look closely you can see that I've used gray markers for some additional shading where I didn't achieve the depth and dimension I had hoped for with my original color choices. This is a great trick if you're looking to add some shadows but are worried about picking the wrong color to do it with. I also used the grays to add some drop shadows. I used lighter grays to add depth and I used a slash of the darker gray (maybe a C7? I'm so sorry that I didn't take note of which grays I used) under the leaves to make them look like they are popping off of the page. 
#mariawillis, #cardbomb, #cards, #cardmaking, #handmade, #handmadecards, #wplus9, #flowers, #copicmarkers, #copics, #color, #art, #stamp, #ink, #paper, #papercrafting

I love this tiny sentiment from Simon Says Stamps. I was looking for a small sentiment because I didn't want to cover up much of my background. I also wanted something meaningful because I was mailing this off to a friend who I both treasure and miss. I heat embossed the sentiment in white on black and it was perfect for this card. I added some clear sequins in different sizes and that was it!
#mariawillis, #cardbomb, #cards, #cardmaking, #handmade, #handmadecards, #wplus9, #flowers, #copicmarkers, #copics, #color, #art, #stamp, #ink, #paper, #papercrafting

Wait! Actually that was not it! I used both a black sharpie and a white gel pen on this card. I used the sharpie to get even more depth in the really dark parts of the design. I used the gel pen on the stamen and to add some highlights to the pink flower petals. Don't forget that if you're trying this yourself. These little details can make a big difference!

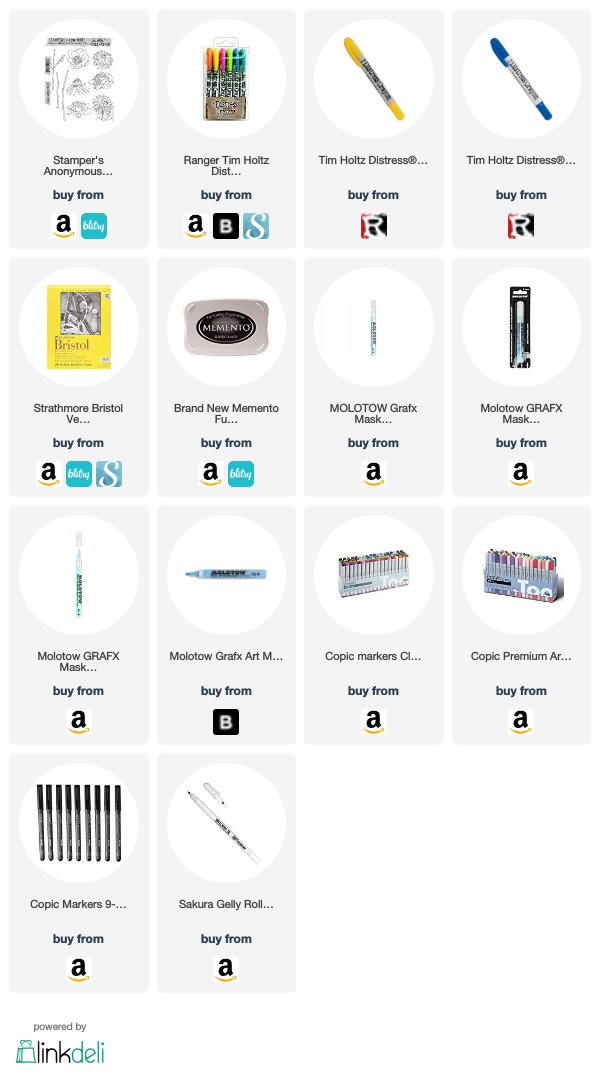
Ok, I know you're waiting for the list of Copic Colors that I used so here they are along with a link to Blick Art Materials where I like to buy my Copics:


R14
R22

Y02
Y08

YG01
YG03
YG05
YG09
YG17
YG67

BG11
BG15
BG18

RV000
RV02
RV06

C0 through C7

Alright! That's it for today folks. I hope you have some fun coloring something up on your own and I will see you back here soon!

Have an awesome day!
Maria


Sunday, September 30, 2018

Coloring with Copics and Tim Holtz Distress Crayons

Hi you guys! It's late on a Sunday evening here in California so I am going to be short and sweet with today's post. A while back I had a lot of fun making this card. I filmed my process but hadn't had time to finish the video editing until today... so, finally I get to share this with you. I used a Tim Holtz stamp set (see list below for info) and stamped it multiple times using masking fluid to cover the images that I wanted to keep in the front. 
#cardbomb, #mariawillis, #timholtz, #stamp, #ink, #paper, #papercraft, #papercrafting, #copics, #copicmarkers, #distresscrayons, #cards, #art, #handmade, #cardmaking, #video, #videotutorial,

Then I used Copic Markers to color it. I was trying to work on using dark colors to add shadows and depth to my coloring.
#cardbomb, #mariawillis, #timholtz, #stamp, #ink, #paper, #papercraft, #papercrafting, #copics, #copicmarkers, #distresscrayons, #cards, #art, #handmade, #cardmaking, #video, #videotutorial,

I also added details with a fine tip sharpie and a white gel pen. 
#cardbomb, #mariawillis, #timholtz, #stamp, #ink, #paper, #papercraft, #papercrafting, #copics, #copicmarkers, #distresscrayons, #cards, #art, #handmade, #cardmaking, #video, #videotutorial,

The real magic maker for this project was Tim Holtz Distress Crayons blended over the top of some of my Copic Coloring. 
#cardbomb, #mariawillis, #timholtz, #stamp, #ink, #paper, #papercraft, #papercrafting, #copics, #copicmarkers, #distresscrayons, #cards, #art, #handmade, #cardmaking, #video, #videotutorial,


I could never explain exactly how I made this card so here's a video detailing my process from start to finish. I hope you like it!


Over at the Simon Says Stamp Wednesday Challenge they've got an Anything Goes theme going on this week. That of course means that I'll be adding my card to their gallery. Check out their challenge by clicking HERE.

Have an amazing week you guys! If you're interested in checking out the products that I've used please check out the product list below. If you purchase through my links I do get a small commission at no extra charge to you (so if you purchase through my blog-many thanks!).

Bye for now!
Maria


PRODUCT LIST:

Monday, September 10, 2018

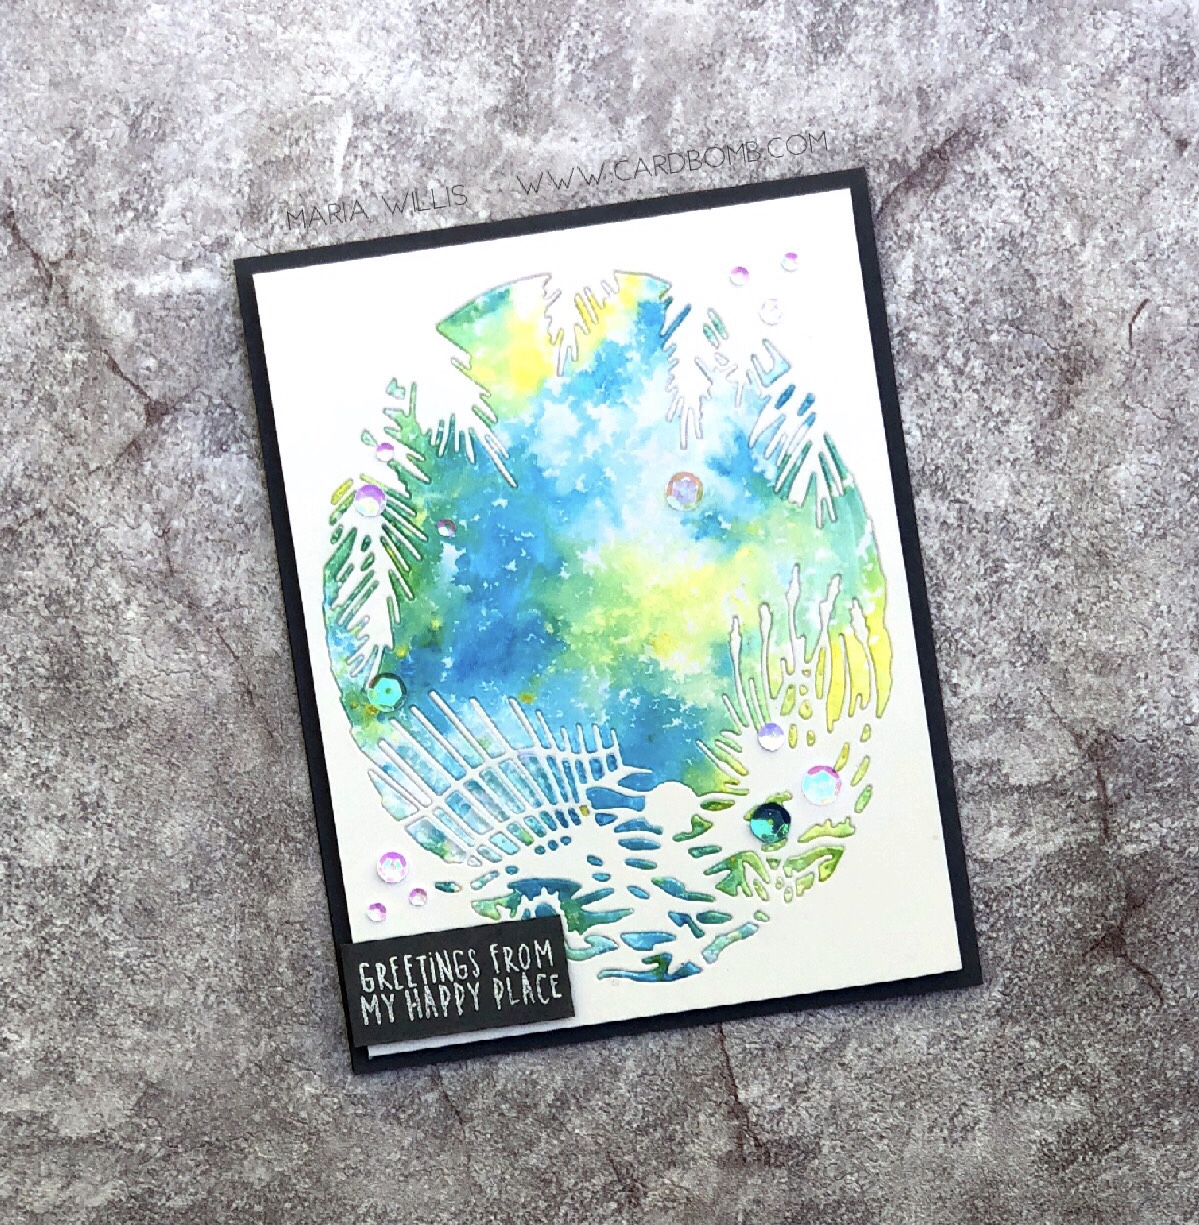
Nuvo Shimmer Powders on Glossy Cardstock

Hey! So, if you follow my blog you might have a YouTube video I posted the other day featuring Ten Different Ways to use Tonic Nuvo Shimmer Powders. If you didn't catch it, never fear, I've added it to the bottom of this post so that it's easy to find. Anyhow, let me start with explaining what the Nuvo Shimmer Powders are. They are pigment powders mixed with a good amount of mica. They come in bottles with fine tips so that you can tap out just a little bit of powder (because you really only need a little). Once your powder is on your cardstock you can activate with water or alcohol. The powder will turn into vibrant color that shimmers and is absolutely beautiful. On this card I used the Shimmer Powder on Glossy Cardstock. This is one of my favorite ways to use the powder because since the glossy surface of the paper doesn't absorb the product as easily as other types of paper do, all of the color and mica sit on the surface for a truly stunning look. 

On this card I used three different colors of shimmer powder (listed at bottom of post) on glossy cardstock and then I spritzed lightly with water to activate the powder. After it dried I used this fancy die that was an add-on from the Hero Arts My Monthly Hero Kit in June. I just couldn't throw away any of the cardstock so I decided to make two cards using both the positive and negative pieces of the die.
#cardbomb, #mariawillis, #card, #stamp, #ink, #paper, #papercraft, #papercrafting, #art, #color, #handmade, #diy, #heroarts, #mymonthyhero, #tonicstudios, #tonicstudiosusa, #rangerink, #distressoxideinks, #nuvoshimmerpowder, #nuvo, #video, #videotutorial,


On this first card I used the positive portion of the die and used my distress oxide inks and the birds from the Hero Arts My Monthly Hero Kit (June) to create an ocean scene for the background. I love the way the die cut piece frames the scene.
#cardbomb, #mariawillis, #card, #stamp, #ink, #paper, #papercraft, #papercrafting, #art, #color, #handmade, #diy, #heroarts, #mymonthyhero, #tonicstudios, #tonicstudiosusa, #rangerink, #distressoxideinks, #nuvoshimmerpowder, #nuvo, #video, #videotutorial,

It's really hard to see it in these pictures but this card is so sparkly and shiny! In addition to the front piece being glimmery, I also flicked Clear Wink of Stella all over the background.
#cardbomb, #mariawillis, #card, #stamp, #ink, #paper, #papercraft, #papercrafting, #art, #color, #handmade, #diy, #heroarts, #mymonthyhero, #tonicstudios, #tonicstudiosusa, #rangerink, #distressoxideinks, #nuvoshimmerpowder, #nuvo, #video, #videotutorial,


For the second card I made I used the negative pieces from the die cut glossy cardstock. I will tell you  that this was SO tedious! Check out all of those tiny little pieces that I had to first find and then glue into the appropriate spaces. It took me quite a while but in the end it was worth it.
#cardbomb, #mariawillis, #card, #stamp, #ink, #paper, #papercraft, #papercrafting, #art, #color, #handmade, #diy, #heroarts, #mymonthyhero, #tonicstudios, #tonicstudiosusa, #rangerink, #distressoxideinks, #nuvoshimmerpowder, #nuvo, #video, #videotutorial,

I heat embossed the sentiment in white on black and used foam tape to pop up both the background and the sentiment piece. 
#cardbomb, #mariawillis, #card, #stamp, #ink, #paper, #papercraft, #papercrafting, #art, #color, #handmade, #diy, #heroarts, #mymonthyhero, #tonicstudios, #tonicstudiosusa, #rangerink, #distressoxideinks, #nuvoshimmerpowder, #nuvo, #video, #videotutorial,

I finished the card off by adding sequins in a few different iridescent colors.
#cardbomb, #mariawillis, #card, #stamp, #ink, #paper, #papercraft, #papercrafting, #art, #color, #handmade, #diy, #heroarts, #mymonthyhero, #tonicstudios, #tonicstudiosusa, #rangerink, #distressoxideinks, #nuvoshimmerpowder, #nuvo, #video, #videotutorial,


If you'd like to check see ten ways to use these shimmer powders please check out this video. I  do demonstrate how to use them on glossy cardstock if you are curious about that. 

Thanks for stopping by today! As promised I will have a list of the Nuvo Shimmer Powders that I used on these two cards below. I will also provide a link to Tonic Studios who makes the Nuvo line of products as that is where I like to purchase my powders from. I'll also link you up to Ranger Ink and Hero Arts in case you're interested in the Distress Oxide inks or the die that I've used today.

Happy Crafting!

Maria
mariawillis@hotmail.com


Nuvo Shimmer Powders
-Blue Blitz
-Solar Flare
-Atlantis Burst


-Distress Oxide Inks


-D1524 Beach Frame Fancy Die
-June My Monthly Hero Kit (Sold Out)
-


Watercolor fun and a Fancy Envelope!

Hi guys! Today I've got a fun watercolored card to share with you. It's a long overdue hug/thank you card for a kindness that somebody paid me a couple of months ago. I've been meaning to send this out forever and I figure it's better ridiculously late than never. I started off by heat embossing this gorgeous floral image from Concord & 9th (stamp set is called Hello Lovely) in black onto watercolor paper. 
#cardbomb, #mariawillis, #card, #concord&9th, #flower, #watercolor, #distressinks, #distressoxides, #timholtz, #stamp, #ink, #paper, #papercraft, #papercrafting, #cardmaking, #handmade, #diy, #craft, #create, #art,

Then I used my Distress Inks (regular not Oxide) to watercolor the image. I love how vibrant these inks are even when you watercolor with them. Also, I don't know what you all think about blue leaves but I think they're pretty fun especially alongside the vibrant greens of the other foliage.
#cardbomb, #mariawillis, #card, #concord&9th, #flower, #watercolor, #distressinks, #distressoxides, #timholtz, #stamp, #ink, #paper, #papercraft, #papercrafting, #cardmaking, #handmade, #diy, #craft, #create, #art,

After watercoloring the main image I added some lighter watercoloring in blues and greens to the background. Then I splattered it with the same colors and added some sequins. 
#cardbomb, #mariawillis, #card, #concord&9th, #flower, #watercolor, #distressinks, #distressoxides, #timholtz, #stamp, #ink, #paper, #papercraft, #papercrafting, #cardmaking, #handmade, #diy, #craft, #create, #art,

I decided to make a crazy, fun envelope to go with the card. I used my Distress Oxide inks to lay down some color on my craft mat. Then I spritzed it with shimmer spray and pressed my envelope into it repeatedly making sure the whole thing was covered with color. 

That's all for today folks. Thanks so much for stopping by. Just in case you're interested in picking up either the original Distress Inks, or, the Distress Oxide Inks so that you can play around with them at home I am adding a link to Ranger Ink below. These inks are made by Ranger and I like purchasing directly from the source! Have fun!

Have an amazing day!
Maria


Thursday, May 24, 2018

Bow Chicka-huahua!

Hey you guys! I feel like I haven't posted in for-ev-er! It's been just over a week since I've posted and although I made this card quite some time ago I haven't gotten my act together to write this post. I am still loving this Chihuahua set from Hero Arts. The sentiments absolutely kill me! Bow Chicka-huahua! And, get a load of this guys eye wink-it cracks me up every time I look at it!
#cardbomb, #mariawillis, #simonsaysstamps, #ssswchallenge, #rangerink, #timholtz, #heroarts, #copics, #color, #distressoxideinks, #distressinks, #chihuahua, #cards, #stamps, #ink, #paper, #cards, #papercrafting, #creative, #handmade, #diy, #texture,

For this card I started out with a Hero Arts background stamp called Sunburst Bold Prints (CG732). I inked it up with some Distress Oxide ink. Before stamping it onto my paper I gave it a quick spritz of water to activate the ink. 
#cardbomb, #mariawillis, #simonsaysstamps, #ssswchallenge, #rangerink, #timholtz, #heroarts, #copics, #color, #distressoxideinks, #distressinks, #chihuahua, #cards, #stamps, #ink, #paper, #cards, #papercrafting, #creative, #handmade, #diy, #texture,

The charming little chihuahua is from Hero Art's It's Fiesta Time (CG252) stamp set. I stamped him with black Memento ink and colored him with Copic Markers. I cut him out with the coordinating dies (DI494) and used foam adhesive to pop him up over the sentiment piece. 
#cardbomb, #mariawillis, #simonsaysstamps, #ssswchallenge, #rangerink, #timholtz, #heroarts, #copics, #color, #distressoxideinks, #distressinks, #chihuahua, #cards, #stamps, #ink, #paper, #cards, #papercrafting, #creative, #handmade, #diy, #texture,

I finished the card off by adding a black mat and putting that on a card base of Island Indigo cardstock. The final touch was adding some black sequins in multiple sizes.
#cardbomb, #mariawillis, #simonsaysstamps, #ssswchallenge, #rangerink, #timholtz, #heroarts, #copics, #color, #distressoxideinks, #distressinks, #chihuahua, #cards, #stamps, #ink, #paper, #cards, #papercrafting, #creative, #handmade, #diy, #texture,

I'm entering this card into this week's Simon Says Stamp Wednesday challenge (Click HERE to check out the challenge blog). This week's challenge is to use more than one stamp set and I've used two on this card. 

I'll be back soon! I've been playing around with Nuvo Shimmer Powder and that stuff is so amazing! I can't wait to share what I've made with you. 

Have an awesome day and I'll see you back here soon!

Maria
mariawillis@hotmail.com


Wednesday, May 16, 2018

Ay, Chihuahua! SSS Stencil Challenge

Hey you guys! So this week Simon Says Stamp has a killer challenge going on over at their Monday Challenge: Stencil It! The crazy-cool thing is that they've got the exact same challenge going on over at their SSS Wednesday Challenge! So, I'll be entering both of their challenges with this card. 
#cardbomb, #mariawillis, #simonsaysstamps, #sssmchallenge, #ssswchallenge, #rangerink, #timholtz, #stencils, #heroarts, #copics, #color, #distressoxideinks, #distressinks, #distresscrayons, #chihuahua, #cards, #stamps, #ink, #paper, #cards, #papercrafting, #creative, #handmade, #diy, #texture,

I started out by watercoloring my background (watercolor paper) with Distress Ink and made sure I had some good layers on there. Then I grabbed my Tim Holtz stencils, my Distress Oxide Inks and blending tools and went to town. I also randomly stamped a musical background stamp (Stampin' Up!) in Black Archival ink all over the background. 
#cardbomb, #mariawillis, #simonsaysstamps, #sssmchallenge, #ssswchallenge, #rangerink, #timholtz, #stencils, #heroarts, #copics, #color, #distressoxideinks, #distressinks, #distresscrayons, #chihuahua, #cards, #stamps, #ink, #paper, #cards, #papercrafting, #creative, #handmade, #diy, #texture,

The bottom of the card has a bit of a cobblestoned look to it. First, I sponged some Distress Oxide ink (Faded Burlap) using a Tim Holtz stencil. Then, I used the same stencil with the Antiqued Brass Distress Crayon add a layer of metallic goodness to the left sides of the "cobblestones." I wish you could see how it looks in person because it's way cooler in real life than in this pic. If you look closely you can see that I've also used a white glaze pen to add detail to the background of the card (cobblestones and edges of sponged details).
#cardbomb, #mariawillis, #simonsaysstamps, #sssmchallenge, #ssswchallenge, #rangerink, #timholtz, #stencils, #heroarts, #copics, #color, #distressoxideinks, #distressinks, #distresscrayons, #chihuahua, #cards, #stamps, #ink, #paper, #cards, #papercrafting, #creative, #handmade, #diy, #texture,

This party animal dog from Hero Arts was so much to fun to color with my Copic markers. I also used part of the "It's fiesta time" sentiment to stamp "fiesta" repeatedly onto the background. I used a black glaze pen to darken up one of the "fiestas" as well as some of the music notes. I heat embossed my sentiment in white on black cardstock and popped that and the dog up on foam adhesive. 
#cardbomb, #mariawillis, #simonsaysstamps, #sssmchallenge, #ssswchallenge, #rangerink, #timholtz, #stencils, #heroarts, #copics, #color, #distressoxideinks, #distressinks, #distresscrayons, #chihuahua, #cards, #stamps, #ink, #paper, #cards, #papercrafting, #creative, #handmade, #diy, #texture,

This is really my first time getting crazy with stencils and it was so much fun! I've used them before for texture paste but that's about it. I was really glad to have a fun selection of Tim Holtz mini stencils to choose from to make this project. 

Ok, like I said at the beginning of this post I am excited to playing along with both of this week's Simon Says Stamp Challenges. Here are links to both of them. The SSS design teams are amazing so if you need a little inspiration go check them out!


Ok, guys, I'd better be heading off to bed now but thanks so much for stopping by! I'm linking to the products that I've used down below. If you're interested in picking anything up for your crafty stash I'd be so grateful to have you shop through my affiliate links below at no extra cost to you.

Have an awesome day and I'll be back here soon with another fun chihuahua card from this Hero Arts stamp set.

Bye for now!

Maria
mariawillis@hotmailc.com


PRODUCT SUPPLY LIST:


Thursday, October 26, 2017

A Paper Pumpkin Thing: October 2017 Kit

Hey Everybody! Welcome to this month's A Paper Pumpkin Thing Blog Hop where you'll find tons of fantastic alternative ides for the October 2017 Paper Pumpkin Kit!


The kit has pieces to make ten shaker cards and is so AWESOME! I usually like to use the pieces from the kits to make unique creations but this month's kit is so fantastic that I had a hard time cutting it up to make this card.  


I started with one of the background pieces that was originally intended to be placed inside the shaker and I fussy cut the trees out of the background. I layered the trees over the window of the shaker so that the trees would be the focal point. Check out the cool sequins. There are three kinds in the kit: Pool Party, Gold Stars, and iridescent white.

One of the fun things about this kit are the sentiment banners that layer perfectly over the gold banners. It's such an easy way to get a classy look (and all of the work is done for you). It also came with precut acetate and circles of foam adhesive to make the shaker cards really easy to put together.


Did you know that this kit coordinates with next month's kit? If it's anything like this month's kit you won't want to miss out on it. You can sign up for Paper Pumpkin HERE!

That's it for today. I hope you liked my project. If you're interested in seeing more fantastic alternative Paper Pumpkin ideas then click the Next button below and head on over to see what Monika had made to share.

Thanks for stopping by. I'm always glad to have you.
Have an amazing day!
Maria


BLOG ROLL:
Maria Willis: You are HERE.



Want to shop with me? No problem, just click the button below. 
Let me know if you have any questions!
Email: mariawillis@hotmail.com


Want a great discount on Stampin' Up! Products and to have a fun new stamping family? Join me on this fun adventure! I can't wait to be your super excited Stampin' Up! side kick and support lady! In case you didn't know, you can join Stampin' Up! just for the discount and never sell a single product. If you want to know the details just let me know. If you're looking for a discount on your favorite hobby (stamping and paper crafting with Stampin' Up! products) and want to earn money doing it... let me know! I'd love to talk with you whatever your interest might be! If you want to see a little more info go ahead and click the button below. Looking forward to hearing from you!


Monday, September 19, 2016

WWYS #82: Glamper Greetings

Hi everybody! It's Monday and I'm back to share another fun What Will You Stamp Challenge with you. This week we have been challenged to use this adorable set from the holiday catalog...  Glamour Greetings! I really had fun watercoloring the camper and in case you didn't know you can stamp the camper in different ways.  I chose to add the crosshatching to the bottom of the camper and stripes to the top but you can leave it plain if you like. I chose bright colors for my camper and used my favorite sentiment from the set.

Here's a side view so that you can see the distressed and sponged edges of my paper. I also embossed the background to give it a bit more texture. Those little trees are so adorable! The original image has a star on top of the tree but I cut it off so that it was more of a forest tree than a Christmas tree.


"Not all who wander are lost." This is so true and I really love this quote from J.R.R. Tolkien. I had fun mussing up the background behind the camper and I use Gorgeous Grunge for the first time in quite a while. 


If you haven't already seen this set check it out! There are so many fun little images that you can use to decorate the camper and create background scenes. 

Do you have this stamp set? If you do then please play along with us over at the What Will You Stamp challenge blog. Just add your own creation to our page and you could earn the chance to be one of our guest designers! Alright that's all for today. If you are interested in purchasing any of the products that I have shared here today please click the link below to head my store. If you have any questions I would love to help you out so please leave a comment or shoot me an email at mariawillis@hotmail.com  I'm looking forward to hearing from you!

Have an amazing day!
-Maria


Need more stamps now? Never fear! I've got you covered!


Want a great discount on Stampin' Up! Products and to have a fun new stamping family? Join me on this fun adventure! I can't wait to be your super excited (possibly way too enthusiastic... No! That's not possible!) Stampin' Up! side kick and support lady! In case you didn't know, you can join Stampin' Up! just for the discount and never sell a single product. If you want to know the details just let me know. If you're looking for a discount on your favorite hobby (stamping and paper crafting with Stampin' Up! products) and want to earn money doing it... let me know! I'd love to talk with you whatever your interest might be! If you want to see a little more info go ahead and click the button below. Looking forward to hearing from you!


Friday, September 9, 2016

Fiesta Like There's No Mañana!!

Ohh, my goodness... How many Birthday Fiesta cards can I make?! Don't ask, the answer could be infinite! If you follow my blog at all you already know that I love this quirky stamp set. It makes me smile every single time that I use it. In my books that's a win! So here you go... I hope it makes you smile too!


I watercolored this llampaca in Sahara Sand on Whisper White cardstock with my aquapapainter. I didn't even use watercolor paper so I was happy that it came out so well and with very little to no warping. One of my favorite things about this card is the blanket. I hand colored the stamp with Real Red and Tempting Turquoise Stampin' Write Markers to get the multicolored design. Fun stuff! Did you notice that peek of Real Red Twine? That's new from the Holiday Catalog and it is so vibrant!


When I made this card I used a stamp from this set that I had never used before. See those lines in the background? I used the long thin stamp (I think it's to string banners on) to create a fun criss-crossed background for my card. I also had some fun with the streamers and a Daffodil Delight flower. They were really easy to layer using glue dots.

That's it for today folks! Thanks for stopping by and have an amazing weekend!
-Maria


Tuesday, August 23, 2016

International Blog Hop Highlighting Stampin' Up! Products


Welcome to our International Blog Hop. We are a group of demonstrators from around the world that want to show you ideas and inspiration using the latest Stampin' Up!® products that are available to purchase right now. You may just be starting the blog hop here with me, Maria Willis, or you may have hopped over from the talented Katina Martinez. If you get off track at any time, the full lineup below (bottom of my post) will help you move along from blog to blog so you see all the amazing projects. If this is your first time visiting my blog... Welcome! I'm Maria Willis and I'm from Boulder Creak, California, USA. I've been a Stampin' Up! Demonstrator for just about 2.5 years now and I have loved every second of it. I'm so glad to have you visiting me today as I take part in this fantastic hop put together by the incredible Kylie Bertucci.

On to my cards! I've got two cards to share with you today and the first card has a bright watercolor background and showcases both the beautiful Butterflies Thinlits Dies (intricate butterfly in the front) and the Bold Butterfly Framelits Dies (solid butterfly).


I love these butterflies! They are so beautiful and are so easy to work with. Here I've layered two different butterflies. The top, more intricate butterfly was cut from vellum for a soft look and was then washed over with Clear Wink of Stella for a bit of shimmer. 

I heat embossed my birthday sentiment in white so that it would really pop on my watercolored background. Some of the fun details of this card might be hard to see but there is Clear Wink of Stella splattered on the black background. The black background is made up of five layers of circles to give it a raised look. There are loops of silver metallic thread tied into a bow just to the left of the butterfly. 

Here's one more look that shows off the fun antennae and the silver metallic dot I used on the butterfly's head. 


For my second card I've used the adorable little kitty from the Pretty Kitty stamp set and the Brick Wall Textured Impressions Embossing Folder.

I stamped the image in Basic Gray Archival on Shimmery White paper and watercolored it using my Aqua Painter. 

I trimmed the image using the new Layering Circles Framelits in Pink Pirouette and half of a doily. Some DSP from the A Little Foxy paper stack and some Stitched Ribbon in Smoky Slate finished the card off nicely. 

I hope you enjoyed my projects today! You are currently visiting me here in the USA and if you are from this area too I would love to assist you with purchasing Stampin' Up!® product or if you need any help with the products.

Thanks for taking part in our blog hop, there are so many amazing ideas and inspiration you don't want to miss so please keep on hopping! Remember that currently you are at my blog, Maria Willis, so check out the blog hop line up below to see who is next on the list.

Thanks for stopping by today and I hope to have you back again soon!

-Maria Willis


BUTTERFLY CARD PRODUCT LIST:


PRETTY KITTY CARD PRODUCT LIST:


Need more stamps now? Never fear! I've got you covered!


Want a great discount on Stampin' Up! Products and to have a fun new stamping family? Join me on this fun adventure! I can't wait to be your super excited (possibly way too enthusiastic... No! That's not possible!) Stampin' Up! side kick and support lady! In case you didn't know, you can join Stampin' Up! just for the discount and never sell a single product. If you want to know the details just let me know. If you're looking for a discount on your favorite hobby (stamping and paper crafting with Stampin' Up! products) and want to earn money doing it... let me know! I'd love to talk with you whatever your interest might be! If you want to see a little more info go ahead and click the button below. Looking forward to hearing from you!


01 09 10