Showing posts with label #emboss. Show all posts

Sunday, August 19, 2018

Sparkly, Shiny Mermaid!

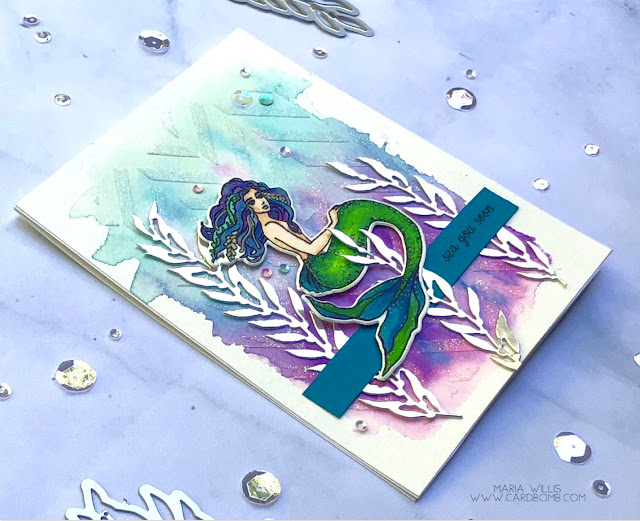
Well, holy moly. It's been a really long time since I've been here to share with you. Not surprising since I don't think I've actually finished a project in over a month (yikes!). I've just gotten back from an amazing trip to Belize where I visited a ton of family and snuck a few days of vacation on an island into the trip. While I was on vacation I did get a little coloring in and now that I'm back it's time to turn my colored bits into cards... I got inspired by this month's A Blog Named Hero challenge of Sparkle & Shine and decided to work with that.

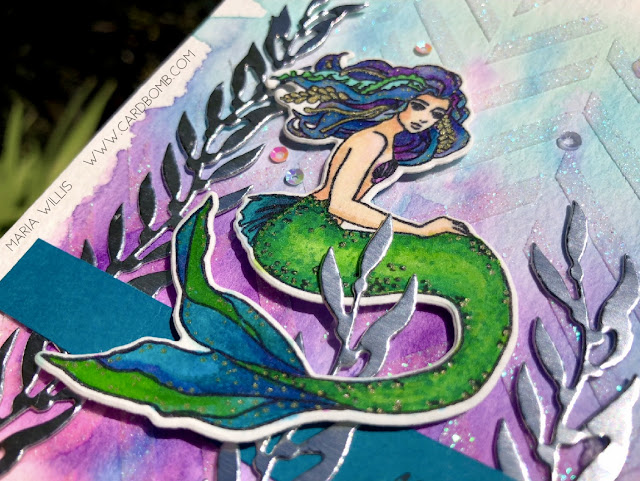
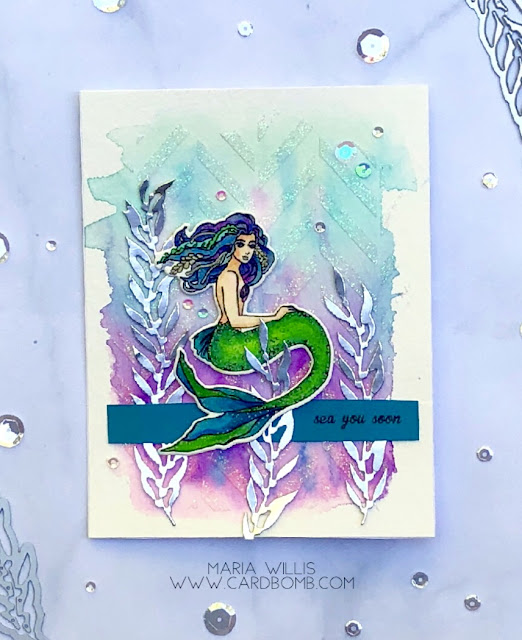
I actually watercolored this mermaid before I went on vacation but decided she was perfect for this challenge. I used the Hero Arts liquid watercolors then I added a little bit of copic coloring and some gold gel pen on her hair and tail. 

#cardbomb, #mariawillis, #heroarts, #ablognamedhero, #cards, #watercolor, #art, #create, #emboss, #mermaid, #copics, #paper, #stamp, #ink, #papercraft,

The background was watercolored in some fun colors and then I used a Hero Arts stencil and some sparkly embossing paste to create a subtle but glittery background. I love the texture that this creates on the card without totally stealing the attention from the mermaid.
#cardbomb, #mariawillis, #heroarts, #ablognamedhero, #cards, #watercolor, #art, #create, #emboss, #mermaid, #copics, #paper, #stamp, #ink, #papercraft,

I die cut some long fronds (are they fronds?) of seaweed in silver foil and attached those with glue dots. The sentiment and some sparkly sequins finished the card off.
#cardbomb, #mariawillis, #heroarts, #ablognamedhero, #cards, #watercolor, #art, #create, #emboss, #mermaid, #copics, #paper, #stamp, #ink, #papercraft,

Thanks for stopping by my blog today-I am sorry that I have been so MIA! If you have any questions about this card please feel free to leave me a comment below or shoot me an email. This challenge was really fun for me so if you are interested in playing along, or, just want to check out the gorgeous projects from the design team and other participants then head on over to the A Blog Named Hero challenge blog and enjoy!

Have an awesome day you guys! I'll be back soon!
Maria

mariawillis@hotmail.com


SUPPLY LIST:
-Hero Arts: DC226 Mermaid Stamp & Cut
-Hero Arts: DI455 Coral Fancy Dies (D)
-Hero Arts: Liquid Watercolors
-Hero Arts: SA002 Tweed Pattern

Monday, December 4, 2017

Give Thanks

Hey everybody! I've just got a quick share for today. This card is quick and easy and is actually a stepped down card from something I made a while back. Honestly, I made this a while back too and never got around to sharing it. Whoops!


A while back I did a tutorial for a technique called "Ink Smooshing." You can check out that tutorial here. It's a fun and easy technique but perhaps not something you want to try if you're in a hurry and need a card on the double. So, I decided to see if I could recreate my card technique card using DSP... Wouldn't ya know, it worked out pretty well. 

The card on the left has a background that was created with the Ink Smooshing Technique. The card on the right uses the Painted Autumn DSP as a background piece.

The sentiment that I used (heat embossed in gold) is from the Labels to Love stamp set. I also used the Starburst Punch with Gold Foil and added a strip of Gold Glimmer Paper for a little extra flair.

So, the next time you're looking for an easy Thank You card, look no further. 

Ok, I've got a gigantic task list for today so I am outta here.
Have an amazing day you all and I'll see you back here soon.

Maria.


Want to shop with me? No problem, just click the button below. 
Let me know if you have any questions!
Email: mariawillis@hotmail.com


Want a great discount on Stampin' Up! Products and to have a fun new stamping family? Join me on this fun adventure! I can't wait to be your super excited Stampin' Up! side kick and support lady! In case you didn't know, you can join Stampin' Up! just for the discount and never sell a single product. If you want to know the details just let me know. If you're looking for a discount on your favorite hobby (stamping and paper crafting with Stampin' Up! products) and want to earn money doing it... let me know! I'd love to talk with you whatever your interest might be! If you want to see a little more info go ahead and click the button below. Looking forward to hearing from you!


Tuesday, August 1, 2017

Bee

Hey everybody and happy Wednesday. Thanks for stopping by my blog today. Today I'm sharing a card that I made forever ago...February I think. Anyways, I made it for my On Stage Display board and still haven't gotten around to sharing it. Believe it or not there are still a few more after this one. The cool thing is that almost everything on this card is current. I was going for texture when I made this and ended up incorporating quite a few techniques in the process.


When I started this card I knew I wanted to use this bee. The rest of the card sort of unfolded from there. In this pic you can see how many different layers of interest there are. The card base has splatters, stamping, DSP, gold foil stickers and black pearls. 


The card face is glossy cardstock that has been treated with an embossed wax paper resist technique, sponged, dry embossed with the 3D Hexagon embossing folder, heat embossed with a stamped image from Gorgeous Grunge (retired but easily replaced by other stamp sets), smeared with versa mark and embossed for a faux metal look in silver, gold and copper. 

Then the card face was layered on a mat of Basic Black and wrapped with Venetian Crochet Trim and Linen Thread. 


The bee was placed to look as if it were ready to take flight from it's textured hive.

There's a lot going on here but I think (hope!) it all goes together for a fun look. 

Oh, I forgot to mention that I sponged the the sentiment banner as well. Do you see the yellow "honey comb" at the base of the card face? That's the embossed wax paper resist. To get that look you dry emboss a piece of wax paper in an embossing folder. I used the Hexagon folder. Then you iron the wax paper onto your glossy paper (make sure to put a piece of paper between the wax paper and your iron). After the wax pattern is transferred you sponge over it with ink to reveal the pattern. On this card I sponged over the wax with Daffodil Delight.


This card was really fun to make. It was a bit time consuming but for me it's worth it when you can see all of these different layers of technique and paper and ribbon and twine and texture come to together to make something interesting. 

I think I'll try to make another card like this soon. It's fun to just modge podge a bunch of ideas together to see how it will turn out.

If you like texture then please come back tomorrow. Tomorrow the Creating Kindness Blog and Video Hop goes live and I cannot wait to see what the rest of the team has created.

Thanks for stopping by. See you soon!
Maria.

PS: Please feel free to ask if you have any questions or need help with anything.


Need more stamps now? Never fear! I've got you covered!
Let me know if you have any questions!


Want a great discount on Stampin' Up! Products and to have a fun new stamping family? Join me on this fun adventure! I can't wait to be your super excited (possibly way too enthusiastic... No! That's not possible!) Stampin' Up! side kick and support lady! In case you didn't know, you can join Stampin' Up! just for the discount and never sell a single product. If you want to know the details just let me know. If you're looking for a discount on your favorite hobby (stamping and paper crafting with Stampin' Up! products) and want to earn money doing it... let me know! I'd love to talk with you whatever your interest might be! If you want to see a little more info go ahead and click the button below. Looking forward to hearing from you!


Thursday, April 20, 2017

Technique Zone: Faux Patina meets Ribbon of Courage

Hi Everybody! I'm here with a Technique Tutorial today for a stunning technique called, "Faux Patina." The idea is to achieve the look of metal patina (old, tarnished, awesome metal). I decided my patina needed a little rust in it today so I added a color that is typically not included in this technique (Pumpkin Pie). Here's the card I made using this technique and few items from the not-yet-released new Stampin' Up! Annual Catalog. Scroll on down for a "how-to."

First, use your Crumb Cake ink pad to ink the Sizzix side of your Hexagon Embossing Folder. Then, run your card face through the big shot to emboss it.


Next, use sponge daubers to ink your card face with Pumpkin Pie, Marina Mist, Wild Wasabi and Early Espresso inks.

Then, make sure your ink is dry. You can either use your heat tool, or, use your Embossing Buddy like I did. Now, drag your open Versamark ink pad all over the raised part of your card face. Cover in Gold Embossing a Powder and heat to set. 

HINT: After you finish heat embossing you can use your sponge daubers to add more color to your piece if necessary (I did).

Now, attach your finished Faux Patina card face to your card base using Fast Fuse. Sponge half of a doily with Marina Mist ink. Layer the ribbons on top of the DSP and sponged doily and secure to card with Fast Fuse. Stamp your image on the Stitched Circle in Marina Mist and sponge with both Marina Mist and Wild Wasabi. Then, use an Early Espresso Stamp’n Write marker to flick some light ink spatters onto it. Attach your sentiment on top of the ribbons using dimensionals.

Add some gold metallic accents to finish your card off.


There you have it! Faux Patina! Would you ever have guessed how simple it is? This card is incredibly difficult to photograph. I really wish you could see how much more beautiful it is in person. You'll just have to make your own to get the full effect I suppose!

Alright, y'all! That's it for me. It's really late at night and I'm still trying to kick a cold so I'm outta here. I hope you've enjoyed today's technique. I promise to be back soon with so many more cards from OnStage. I've started blogging some of them but haven't been able to catch enough free time to finish. Soon, I promise!

Have an amazing day!
Maria.


Need more stamps now? Never fear! I've got you covered!
 Let me know if you have any questions!


Want a great discount on Stampin' Up! Products and to have a fun new stamping family? Join me on this fun adventure! I can't wait to be your super excited (possibly way too enthusiastic... No! That's not possible!) Stampin' Up! side kick and support lady! In case you didn't know, you can join Stampin' Up! just for the discount and never sell a single product. If you want to know the details just let me know. If you're looking for a discount on your favorite hobby (stamping and paper crafting with Stampin' Up! products) and want to earn money doing it... let me know! I'd love to talk with you whatever your interest might be! If you want to see a little more info go ahead and click the button below. Looking forward to hearing from you!


Monday, September 19, 2016

WWYS #82: Glamper Greetings

Hi everybody! It's Monday and I'm back to share another fun What Will You Stamp Challenge with you. This week we have been challenged to use this adorable set from the holiday catalog...  Glamour Greetings! I really had fun watercoloring the camper and in case you didn't know you can stamp the camper in different ways.  I chose to add the crosshatching to the bottom of the camper and stripes to the top but you can leave it plain if you like. I chose bright colors for my camper and used my favorite sentiment from the set.

Here's a side view so that you can see the distressed and sponged edges of my paper. I also embossed the background to give it a bit more texture. Those little trees are so adorable! The original image has a star on top of the tree but I cut it off so that it was more of a forest tree than a Christmas tree.


"Not all who wander are lost." This is so true and I really love this quote from J.R.R. Tolkien. I had fun mussing up the background behind the camper and I use Gorgeous Grunge for the first time in quite a while. 


If you haven't already seen this set check it out! There are so many fun little images that you can use to decorate the camper and create background scenes. 

Do you have this stamp set? If you do then please play along with us over at the What Will You Stamp challenge blog. Just add your own creation to our page and you could earn the chance to be one of our guest designers! Alright that's all for today. If you are interested in purchasing any of the products that I have shared here today please click the link below to head my store. If you have any questions I would love to help you out so please leave a comment or shoot me an email at mariawillis@hotmail.com  I'm looking forward to hearing from you!

Have an amazing day!
-Maria


Need more stamps now? Never fear! I've got you covered!


Want a great discount on Stampin' Up! Products and to have a fun new stamping family? Join me on this fun adventure! I can't wait to be your super excited (possibly way too enthusiastic... No! That's not possible!) Stampin' Up! side kick and support lady! In case you didn't know, you can join Stampin' Up! just for the discount and never sell a single product. If you want to know the details just let me know. If you're looking for a discount on your favorite hobby (stamping and paper crafting with Stampin' Up! products) and want to earn money doing it... let me know! I'd love to talk with you whatever your interest might be! If you want to see a little more info go ahead and click the button below. Looking forward to hearing from you!


01 09 10